Posts

Showing posts from 2015

A Christmas Scene

Image
Morning everyone -today's card is a Christmas scene. The theme over on  52{C}CT  is....... I'm also entering into the Tic Tac Toe challenge over on  The Paper Players So...... sponging or brayering..........sponging or brayering........ hmmmm how about a bit of both? Plus the middle line from the Tic Tac Toe - Blue, Sparkle or Shine and Embossing, here is my card I brayered the sky with my Speedball brayer and sponged the rooves of the houses. Silver and whites embossed trees and a silver Santa Claus plus some dazzling diamonds glitter for extra sparkle. Thanks for looking xx

Red and Gold

Image
It's been a horrible day here today. Really dark and wet and miserable. What better way to while away the hours than crafting? Today I have a card for two challenges:  52{C}CT  which has the theme Friends and Family, and  The Paper Players  who have a sketch Here is my card Eeeek- my one tree looks a bit wonky doesn't it!!!!! I love this sentiment which comes with the house in the Holiday Home set, I've heat embossed the house, trees and sentiment with gold embossing powder and the house and trees are attached with 3D foam pads. Thanks for stopping by today - hope the weather is a bit better where you are! xx

Green and Purple Christmas Card

Image
I'm back with another Christmas card - this time it's for the challenge over on the  52 {Christmas} Card Throwdown . This week they have a gorgeous colour combo - take a look The colours I chose for my card are Gumball Green and Elegant Eggplant The tree and deer were stamped with Versamark and heat embossed with a clear embossing powder. I then masked off the ground and sponged the green ink over the images. Purple snowflakes were added with sparkly gem centres and some dazzling diamond glitter was added to give a more Christmassy look. The card base was one that had gone wrong on a previous project but the decorated panel fitted perfectly on the card covering the hideous mistake but still showing a bit of the tree underneath - I like it when things work out like that don't you?! Thank you to the lovely 52{C}CT dt ladies for picking last week's card for an Honorable Mention. See you soon xx

Mini Christmas Cards

Image
I'm here with my promised tutorial - enjoy! You will need: pre-scored card blanks, three colours of ink plus a Versamark pad, snowflake stamps and a large focal image stamp, gold embossing powder, heat tool, and baby wipes. Take one of your card blanks and randomly stamp with the snowflakes using your three colours of ink. Do this with all of your card blanks. Then take your focal image stamp and stamp in the middle of the card using the Versamark pad. Cover with the gold embossing powder. Shake of the excess and return to the pot. Heat the powder with a heat tool. I used small 3.5" x 3.5" cards - if you use small cards too take care not to burn your fingers. When heated the powder becomes very shiny and smooth to the touch. Continue with the rest of the cards. Your cards are complete however you may like to add a simple sentiment or some self adhesive gems. These cards are very quick and simple to make - perfect if you have loads to make!

Christmas Throwdown Sketch

Image
I know I said that my next post would be a tutorial - I lied, I have a challenge card first and will post the tutorial soon - I promise! I have followed the sketch for the challenge over on  52{C}CT  - it's a good one - take a look I could have made 10 cards with this sketch it's so versatile but this is the one I went with - what do you think? My stamps were free on a magazine and I do love this noble stag's head -  quite manly too I think! Thanks for looking - pop back again soon won't you xx
Image
This is a card I made last year and I'm only just getting around to posting it - take a look It's very clean and simple and I've only used half the stamp from the Joyful Christmas set. I coloured the images with markers and added a hand drawn frame. I am entering this card into the challenge at  A SNOWFLAKES PROMISE  where the theme is Anything Goes with a Winter or Christmas theme. Thanks for stopping by today, my next post will be a tutorial  - hope you can make it xx

Fire

Image
Hello - it's been a while I know but I'm still here and I have a card to share with you today! I made this card ages ago for a challenge but missed the deadline and then forgot all about it. I was then mooching around blogland and happened upon one of my favourite challenge sites -  LESS IS MORE  and discovered that their challenge this week is perfect for my card. The theme is FIRE and to use the colours you would see in a fire - what do you think? I created my Autumn scene by first masking off the middle section and sponging it with some Pumpkin Pie ink. I punched a circle out of a post it note and sponged inside the stencil to get my sun - I used Tangelo Twist for that and for the deer silhouettes. Before removing the masking I then stamped my trees with Versamark and added some white embossing powder. After heating it I removed the mask and added my sentiment. Thanks for looking - see you soon xx

Another CAS Christmas Card

Image
Back today with another CAS card for the challenge over on  CAS Colours & Sketches . This week there is a sketch - take a look This is such a gorgeous sketch don't you think? Anyway here is my card I used some free stamps from the new copy of Creative Stamping Magazine and an old piece of bakers twine I found in my stash. Actually I'm lucky to be able to find anything in my craft garage at the moment. I recently moved everything into storage again in order to paint the walls. It's been done for a couple of weeks now but I'm still waiting on my new shelves and work top - it's all measured and ordered but not here yet! It's so frustrating trying to locate everything just to make a little card! You may remember last weeks card  HERE  - I won a weekly winner award - thank you ladies of the CAS Colours & Sketches DT. Thanks for stopping by today and leaving your lovely comments - see you son xx

Endless Wishes

Image
So if you read my blog yesterday you would have seen a lone Christmas card created with the Endless Wishes snowflake set. I did make quite a few more but the weather was lousy and it was impossible to take any decent piccies. Well today is no better really but I took more photos for you - come and take a look The last pic shows two spare panels - I usually go wrong and make a mess of things so I had a back up plan. I actually didn't need them this time so I will have two extra cards! These cards are available to buy along with many more that you will be seeing here. If there are any that you like the look of email me and I will send details. I also make personal cards and cards for special occasions, again just drop me an email and I will send details.  jacquelinenm68@gmail.com Today's cards will be sold as a pack of 8 and will cost £5. Thanks for looking - see you soon xx

CAS Christmas Style

Image
A quick post today - I have a Christmas card created cleanly and simply for this week's challenge at  CAS Colours & Sketches Here are the colours I am working with And here is my card I randomly stamped a panel of Whisper White card stock with the snowflakes from Endless Wishes - some were embossed with gold embossing powder along with part of the sentiment. The card stock panel was then attached to a white card base. I did make a few more of these but the weather is so dull today I will try photographing them again tomorrow. Today's were so bad I think I'll quit while I'm ahead! Thank s for looking - bye for now xx

Anniversary Swans

Image
I bought a craft magazine recently and it had some free stamps with it - who doesn't like free stamps eh? They were all bird themed and in amongst them were these lovely swans. I fell in love with them instantly and had to use them straight away on an Anniversary card for my cousin and her husband - here's my card The base card is some textured Coastal Cabana card stock and my scene is sponged on to a piece of die cut card. The dies are from the Apothecary Accents set along with the two one I used to place each side of the scene. The swans were stamped and cut out before attaching to the card with 3D foam pads. Hope you like today's effort - more Christmas cards to come in the next couple of days - hope you can join me xx

Another Christmas Card

Image
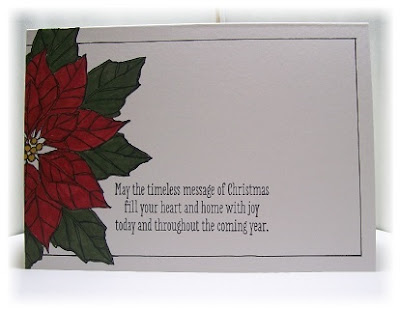
Yes I'm starting to think seriously about Christmas now so you will be seeing a lot more Christmassy stuff from now on! Here is a clean and simple card made with a gorgeous poinsettia stamp This is one of my favourite Christmas stamps - Joyful Christmas, and I've just stamped half of it on to the card base and coloured it with markers. I hand drew the border and added the sentiment in black. Quite easy to mass produce too I would think or make several very similar to create a set. Thanks for stopping by to take a look today - see you soon xx

Making a Scene.

Image
Today I have a card to share with you that I made for a rather special friend. This friend was extremely kind and helpful at the the time my dad died so he deserved a very special card. He loves birds and nature so I combined the two and created a wildlife scene - take a look One of my favourite techniques is sponging over torn copy paper, post it notes and masks and this card uses all those. Here is a close up Stamps used - Stampin' Up Wetlands and the background trees are one I made myself - I stamped the trees many times before re-inking to create a bit of perspective. Thanks for stopping by - please leave a comment - I love to read them xx

More 'Man' Cards

Image
Today I have some cards to show you made for the men in our lives. Really quick and simple card made with one stamp set and a background stamp - take a look My background stamp is the gorgeous World Map from Stampin' Up and it has been stamped directly onto the card bases. Using some earthy colours and a bit of blue I sponged the maps and inked the edges of the cards. Another fantastic set is Traveler and I stamped each individual image onto a square of card stock which was again sponged around the edges. Now these could have just been attached to the cards but I decided to die cut some labels, add holes at each end and add some frayed twine. These were stuck behind the images and then attached with 3D foam pads Thanks for stopping by today - have a great weekend xx 

A Christmas Card

Image
I've made a Christmas card at last! I am seriously behind with my Christmas crafting - I need to get going and get organised! Any way here it is It's for the challenge over on  52{C}CT Blog  where the theme this week is  Hope it fits!! This is very simply made, glitter paper on Kraft card stock and the old faithful pine from Stampin' Up's Lovely as a Tree. White craft ink and a few gems. I hope it's suitable for a man 'cos I'm probably giving it to my Brother!!! Thanks for looking xx

Cascade Card

Image
Today I'm going to share with you my Facebook swap card for September. The brief was a cascade card, no flowers or butterflies and no pink, blue, orange or white colours! Here's what I came up with Two slanted pieces of card stock are intertwined to form this complicated looking card. I added a panel to the back of the card to make a little pocket to hold a tag for writing on. Stamp sets used are Papaya Collage and An Open Heart with the background being created with the Hardwood stamp. I used a scallop border punch down the sides and added a label to the front with the sentiment on. Thanks for looking today - see you soon xx

New Home Card

Image
So things are really busy these days not least the fact that my daughter has recently moved to a new appartment with her boyfriend Leigh. Me and Mum have found her loads of bits and pieces to furnish the place and last week we paid them a visit to have a good nosey around! Before we went though I made her her a New Home card to take along - take a look This is a mish mash of Kind and Cozy and Holiday Home but I think it works very well! We had a lovely day and my daughter looked after us really well - she was the perfect hostess in her new home! See you soon xx

Post - it - Note Holders

Image
Today I have some post-it-note holders to show you. These make great craft fair stock or cute little thank you gifts. Again these are great for using up scraps of card and paper - these are simply strips of card wrapped around the pad of post it notes and decorated with co-ordinating paper. The closure is a small round self adhesive Velcro dot. These are larger pads but made the same way. I've used a border punch to decorate the one edge. These last two have been made using a tag punch so that they can be closed with ribbon. There are a couple more examples of post it note holders in my labels section in the side bar - click on post it note holders and you will be able to see them. Have a great weekend folks - see you soon xx

Decorated Notebooks

Image
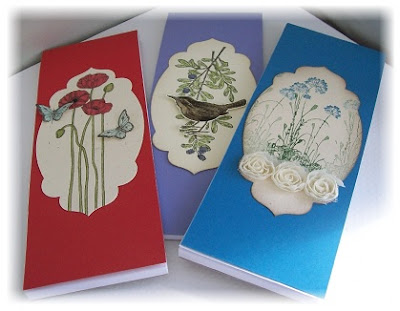
Good morning all - I'm back from a lovely holiday in Wales although I did bring a cold back with me which settled on my chest and made me feel quite unwell for a few days! I'm feeling much brighter now and ready to start sharing my crafting endeavours with you again. Today I have some decorated notebooks to show you - made quite simply from cheap notebooks bought from a pound shop and then decorated with scraps of card and paper. These sell really well at craft fairs and are really quick and simple to do. The next ones are some I made from scratch. I used an old notebook, cut the pages to size and rebound them using my Zutter Bind it All. I love making these and again are perfect for craft fairs. Thanks for looking - I'll be back soon with some more craft fair makes - post it note holders xx

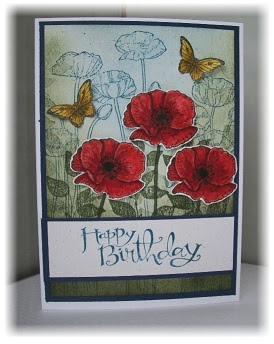
Birthday Poppies

Image
Here is a birthday card I made recently It was a fun card to make and it's inspired by one I found on Pinterest  HERE . I changed a few of the images and added the butterflies but the layout is the same. Mossy Meadow was used to sponge the background and stamp the leaves while Night of Navy was used to stamp the background poppies. The main poppies were coloured with markers as were the butterflies - they were cut out using a punch. I cut the flowers out by hand. A Sassy Salutations sentiment was added to finish it off. Hope you like it - see you soon xx