Posts

Showing posts with the label You Tube

Workshop News

Image
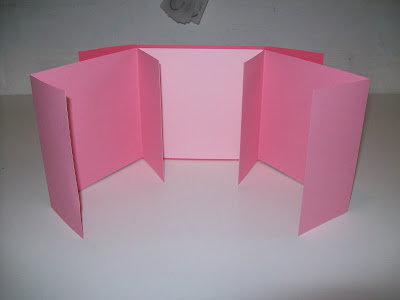
Next Thursday night is my next workshop and I thought that it would be nice for my ladies to make a 'Telescoping Card'. There are a few videos on Youtube which I have adapted to make my card - take a look As always there will be a tutorial on my  Craft Club Blog  after the workshop and if you fancy having a go at making it there will be a materials list appearing very soon so you can get everything you need. Thanks for looking - see you soon - Jacqueline xx
Having a Hoot with Pop-up Owls.

Image
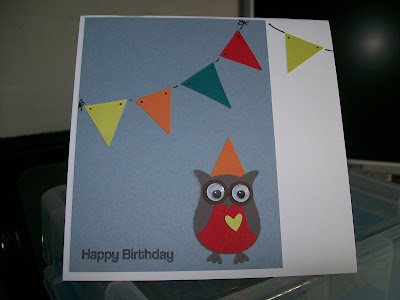
One of the themes of my August workshops is going to be 'Pop-up Cards', and as I trawled around You Tube for some inspiration I found a cute pop-up owl card. Now it just so happens that I have recently purchased the 2 Step Owl Punch from Stampin' Up and I just couldn't resist making my own version. Here is the front of the card - I've added some googly eyes to get some extra movement. When you open the card it looks like this I had the idea for the bunting when I was cutting the party hats for the owls. If I turn it to the side for you - you can get a sneaky peek of how this was made Can't wait to do this next week with my lovely ladies - hope they will enjoy making it as much as I did. Bye for now - Jacqueline xx.

Fancy Fold French Foliage.

Image
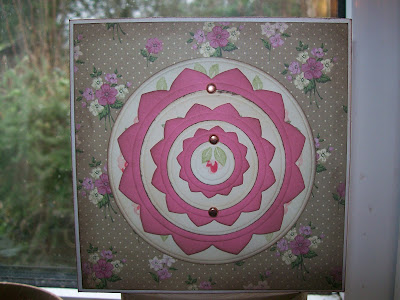
Today's card started out as a Tri-shutter card, I was making up a sample to show the ladies who will be coming to the June Tuesday morning workshop. Well I was mooching around You Tube to check on all the measurements and I came across one demonstrated by Dawn HERE  and I thought "ooh that's different - let's do that" I started it about midday and I finished it about 4.30pm - no good for a 2 hour workshop! Although I may have got it done a little quicker had Beverley not been here - I think we have done more gossiping and giggling than crafting!!!! Anyway - here is my card This is the front - I have used French Foliage (brilliant for 'man' cards) and I am really enjoying the little splodge stamp - great for covering up smudges! The base card is Papermania Kraft Basics again along with some Really Rust card stock. Inks were Really Rust, Chocolate Chip, Pumpkin Pie, Creamy Caramel and Close to Cocoa. Here is a picture of the inside So the moral of this ...

3D Flowers.

Image
I didn't know whether I was going to have time to do a post today - but I have decided to take five and show off some flowers that I have made. These are what I will be demonstrating (amongst other things) tomorrow night at my workshop . All these flowers are adapted from tutorials I have found on You Tube - adapted 'cos I haven't had the correct tools and I have had to substitute my own. I love the Fuchsia though and I can't wait 'till I have enough time to play around with it and make a complete project. So - that is what's kept me busy all day - prepping my samples and making sure everything is ready for tomorrow - I'm still not finished yet so I had better get back to it!! - See you soon - Jacqueline xx.

Card in a Box for Project Tuesday.

Image
Today I thought I would share with you a card that I started Tuesday night at a club I go to. The theme of the evening was  Metal Foiling and when we had done playing with the foils (we embossed it and then coloured it with alcohol inks) we were shown a fancy folded card on which to mount our efforts. Well my foiling efforts were not very good so I changed tactics and made a different card all together. This (I think) is called a Diamond Fold Card and there are instructions on You Tube. I used some Bazzill Basics paper for the base and Stampin' Up - Old Olive. The stamps are also S'U - Vintage Vogue using Ruby Red and Chocolate Chip inks. So then I am hopping from blog to blog and I see that the challenge this week on Project Tuesday  is a Clear Sleeve Gift Box. There is a link on there to get instructions and what luck - it fits my card! The card measurers 4" x 4" and just fits into the 4" x 4" box. A piece of acetate was then wrapped around. I decorated...

In Vogue.

Image
I needed to make a small gift for someone, and I had some bits and pieces left over form the previous card so I made this - a post-it note holder. I adjusted the measurements of one demo'ed on You Tube. (Just go to You Tube and key 'post-it note holder' into the search bar and there are loads to choose from). I also used my new Stampin' Up favourite stamp set - Vintage Vogue. I love this set so much that I couldn't resist playing a little longer and I came up with this I think it was seeing a card similar to this on Vicky's  blog that made me fall in love with the set. I have used Chocolate Chip cardstock and ink, Creamy Caramel and Old Olive ink and some self adhesive, flat backed pearls. I'm off now for my Sunday Lunch - seeyou soon - Jacqueline xx .

Project Tuesday.

Image
Hello again folks. I know in my last post I said I was going to do my housework - but I had a sudden thought. I had made my project for the Project Tuesday  challenge but I hadn't inserted the gum - it's a Gum Holder you see This is made from all Stampin' Up stuff - Very Vanilla and Certain Celery card stock, Certain Celery and Always Artichoke inks and the Greenhouse Garden stamp set. I followed Dawn's video tutorial on You Tube and found her instructions really easy to follow. I really hope I haven't missed the deadline on this - so sorry to be posting it so late. Until tomorrow - Jacqueline xx.

A Great day.

Image
Now I don't always say it, but today has been pretty good (not so good at the mo - thunder storm approaching so may lose power any second). Started the day off at  Rosie's where me and four others made these gorgeous cards using the fab Stampin' Up set - Nature's Nest. Sorry about the chipped paint and socket - I take the distressed look into my decor too you know! So after my lunch I then did a bit of tidying and decided to do something with all the sponge wedges seen yesterday (scroll down to the last post and you will see). I punched out (with my tab punch) tabs in all the S'U coloured card stock that I have and attached them to said sponges - like so I also did  colour charts of all the matching inks too - how's that for being organised eh? Can't remember where I saw the idea for the sponges - it was something I found mooching round You Tube one day. I even found time to race off to my local craft shop to buy a huge amount of card stock for something I ...

Purple Haze.

Image
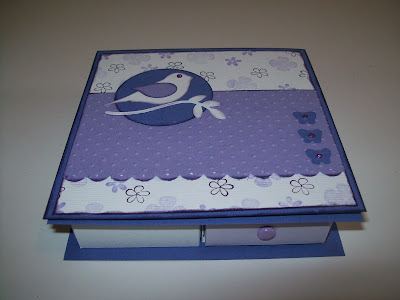
Hello folks - here as promised is a project not using blue! This is an easel card with a difference - it has little drawers underneath it - take a look This is for this week's challenge over on Project Tuesday  and I have used Bazzill card stock and my favourite 2 step bird punch from Stampin' Up. I got the inspiration for this project from  Jennifer Meyer  who is on the PT design team and she provided the link for the tutorial - here . Here it is with drawers open The idea for the image on my card is sort - of CASEd from a blog I love - here . She did a You Tube video for her card so I'm hoping she won't mind that I tried it out. Doing this I found that I had a few bits and pieces of card stock left over - so I made this aswell - This was last week's Project Tuesday challenge that I never got around to. It was just too good an idea not to do! Will have to hide this though - I can see it ending up in my daughter's hand bag!!! See you soon - Jacqueline ...

Workshop Projects.

Image
Just a quick short post as promised to show you the Flip Album I demonstrated at last week's workshop. This one is a made up album without all the embellishments This is the bare bones of the album and as far as we got on Thursday night. Hopefully my Ladies went staight home and decorated their albums - just as I did The pink album was the sample album - this is the one I made on the night. Blue seems to be my colour of the moment. Inspirarion for the little tag pockets was taken from a video I saw on You Tube and the papers are Blue Awning by K&Company. Here is the cover Can you see a little Stampin' Up sneaking in there........ yep you guessed it Greenhouse Garden! If you pop back later I will have yesterday's project to show too - bye for now - Jacqueline xx.

Flight of the Butterfly.

Image
Good evening everyone. Just a quick post before I go to bed - it's nearly 10 and I'm feeling pretty tired. I have had a busy day preparing for my workshop tomorrow. We are using the Stampin' Up stamp set Flight of the Butterfly and I made a couple of cards to inspire my ladies - take a look This is called a recessed window card and I got the idea from a Splitcoast Stampers tutorial on You Tube. Apart from the stamp set I used the Butterfly Punch and some Elegant Eggplant card stock and ink. I used my trusty Cuttlebug for the corners and embossing and the sentiment stamp from Bird on a Branch. Not being content to just make one card - oh no - I revisited You Tube and found this idea for a stair step card For this card I used Sage Shadow and Always Atichoke and various paper punches. We are going to be making a 'Card in a Bag' tomorrow morning so please pop back to see the results. I will also have my completed 'Flip Album' from last week's workshop to sho...