Posts

Showing posts with the label Penny Slider Cards

Tutorial Tuesday - To a Wild Rose Penny Slider Card

Image
Today's post is a tutorial on making a Penny Slider card - very easy to do and very effective. Let's go! Gather a few items - card base, coloured and white card stock, inks and a stamp set with large floral images. I used To a Wild Rose. Take your card base and mat and layer coloured and white card stock. Next take a piece of card stock and create a piece to cover at least half of the card front - the wavy line is optional - you can leave it straight if you wish. Now we are going to make a small slot - use a die, punch or do it just by eye but the width must be narrower than your penny. I did mine with a circle punch: punch the holes at the ends of the slot and connect them using a craft knife. Now it's time to do some stamping. Add a background to your card and then make some elements to add to the front of your card and most importantly the things that you want to be able to slide. I want my sentiment to slide and I will also add the bu...
Back Of The Net!

Image
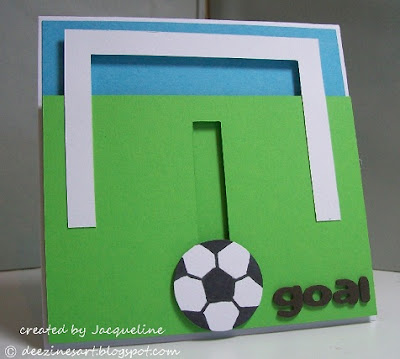
I have gone over to the Dark Side this week for the challenge over on  Make My Monday  and created a Football card. I loath and detest football but the theme we have for you this week is MALE SPORTS OR HOBBIES - so needs must, this was the only thing I could come up with This is a 'Penny Slider' card and when you tip the card the ball shoots into the net - like so This was very quick and easy to do and used up a load of small pieces of card stock so very economical too! I made a similar card last year with a tutorial to go with it  here  if you would like to have a go. Don't forget to visit the blog to see all the other more wonderful creations from my fellow team mates and also check out the fabulous prize we have up for grabs this month. Bye for now - Jacqueline xx

Slider Card Workshop.

Image
This is the card I demo'd this morning at my Tuesday workshop. Four lovely ladies attended and we made something like this The stamps are a combination of Greenhouse Garden and the tiny leaf from Vintage Vogue. The colours I used were Brocade Blue (retired), Baja Breeze and Always Artichoke. This is the last of the Penny Sliders for a while - tomorrow you can have a sneaky peek at the project for my Thursday evening workshop that is next week. We will be making a card with one of the 3D roses on. Now yesterday I mentioned that I had had an encounter with another spider and in my comments Vicky bless her wondered if I was being stalked by said creatures. Well what a thing to say - I now have visions of spiders hiding behind doors ready to leap out at me Kato style (Kato is the little man in the Pink Panther films who lies in wait for Peter Sellers). Do spiders know kung fu - they have an awful lot of legs for the karate chop don't they!!!! See you soon - Jacqueline xx.

April Workshop

Image
Yah - I've just discovered a massive spider taking over my craft room. Luckily my husband was around to eliminate him (well set him free in the garden actually 'cos much as I hate them I can't kill them!). So - panic levels have now dropped so I can tell you all about my workshop planned for tomorrow morning. The theme this month is 3D flowers and tomorrow we are making a 'Penny Slider Card' The Vintage Vogue stamp set and also the Greenhouse Garden set will be available for use and here is a pic of the card we are making The colours I have used are : Very Vanilla, Cajun Craze, More Mustard and Old Olive. Here is another pic of the flower 'sliding' across the card A tutorial of how I made a similar card to this can be found here . If you live in the Malvern area and would like to come to one of my workshops please e-mail me at deezinesart@gmail.com I will also be showing my ladies my copy of the new Stampin' Up Mini Catalogue - can't wait to se...

Driving By........with a tutorial!

Image
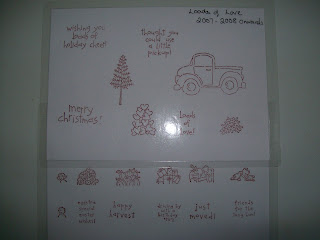
As promised here are some instructions on how to make the slider card. This card has again been made using Stampin' Up - Loads of Love and Accessories . 1) choose your image, colour it and then carefully cut it out. I used Promarkers to colour this image . 2) Cut a piece of plain card stock and create a background for your image. I used a brayer, post it notes and the trees from Lovely as a Tree. 3) Cut a small slot in your background carefully removing the piece of card whole. Now cut a piece of card stock a little larger than your background. Line up the background on the larger card (but do not stick) Replace the card back into the slot and stick this to the larger card. This means that the background remains the same when the truck moves.  4) Now take the truck, turn it upside down on your mat. Take the background and turn this upside down also - place over the truck and add some 3D foam pads . 5) Remove the backing paper and stick on two pennies . 6) Now cover thi...

Driving By.

Image
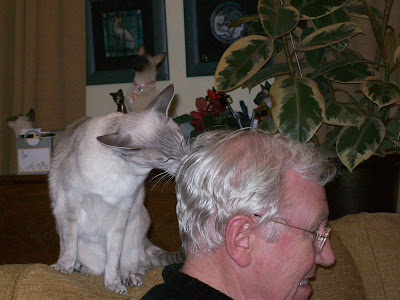
Hello everyone - happy March to you all. Well it's been a week since I last posted - as you know I've been away visiting my Dad as he was having some top-up chemo treatment. Whilst I was there I managed to take this picture of Mum and Dad's cat eating Dad's head! Hee hee - I thought this was very funny. So - I came home and went straight round to my friend Bev's house for some emergency crafting. I did do a bit while I was away but not much. We decided that this week we would use the Loads of Love stamp set and also the accessories set that go with it. Bev made a fab little pull card with a tab and I made a 'Penny Slider' card. Here it is The truck starts and the right, and drives along I will try and put some instructions up together for this - it's not that hard a card to make and - it's for a Man! I have to go now as I also came home to meetings and paper work which is all very boring but needs to be done :(  See you soon - Jacqueline xx.