Posts

Showing posts with the label Distress Inks

MMM - Vintage Travel

Image
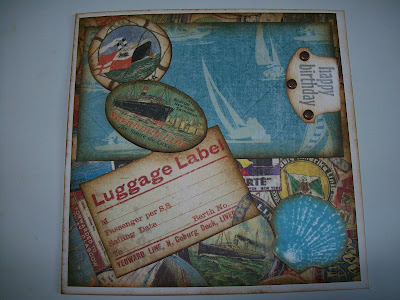
This is the last week of our Vintage themed challenges at Make My Monday  and we are finishing with VINTAGE TRAVEL Here is my card My card is made using some K&Co paper (I forget which collection) and I have gone for a bit of nautical travel. I started with a 5" x 5" square card with a mat of pale blue card stock. Over that I have layered some of the papers, I cut out various pieces of interest and added them with 3D foams pads along with my words of travel. All my edges were sponged with Distress Ink before sticking down. Please pop over and say hi to the other ladies of the dt and take a look at their amazing creations too - bye for now - Jacqueline xx

Vintage Childhood

Image
It's  Make My Monday  time and we are continuing our monthly vintage theme with a Vintage Childhood challenge - here is my card I have used a Shabby Chic image from a Debbi Moore CDRom and coloured it with Promarkers. Other elements added are a doily, some seam binding ribbon, paper punched flowers and Liquid Pearls. I also inked all my edges with Brushed Corduroy Distress Ink. Please make some time to pop over to the blog to take a look at all the fabulous work produced by the dt and I will see you soon - Jacqueline xx

A Vintage Male Card

Image
Yikes - I am so late with this post. I went to my parents' over Easter and stayed a little longer than I intended hence the lateness of my post! It's Men and Boys over on  Make My Monday  and this week we want you to make it Vintage. There is a great prize on offer too - all the details are on the  blog . So here is my card Now being quite a girly crafter I was having a bit of a problem with this theme - that is until my team mate Fliss helped me out by sending me some stamped images. I covered my card with some brown vintage patterned paper. The houses (from crafty Individuals) had been stamped twice so I cut out one set - inked them with Brushed corduroy DI and then cut out a few individual houses from the second set to attach with 3D foam pads. The man, hat and balloon were inked in the same way  and stuck down onto the background paper - they are from Oxford Impressions. The french words - from Artistic Outpost were attached again with 3D foam pads. That...

MMM - Flourishes and Diamonds

Image
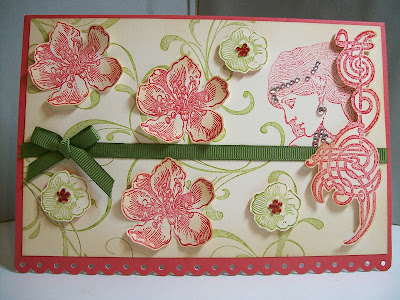
That's the challenge this week over on the  Make My Monday  challenge blog, here is my card I have used a huge mish mash of items to make this card starting with an unknown card base (I found it yesterday whilst clearing out my craft room) It is a lovely red colour and has a fabulous scalloped edge to it. I teamed it up with some Very Vanilla card stock on to which I stamped my Lady - again this is unknown as I have had her for forever! The other stamps are from Stampin' Up - Everything Eleanor along with the Old Olive ribbon. My inks are Old Olive and Ruby Red along with Brushed Corduroy DI around the edges. I have added both clear and red flat backed gems to finish it off. Details of the prize and gorgeous samples from the dt can be found over on the  blog  hope I see you over there - Jacqueline xx

MMM - Love Letters

Image
Morning all - it's a new month of challenges at  Make My Monday  and the new theme (picked by fellow team member  Suzanne ) is ROMANCE Also this month we have a fab sponsor who will be donating a gorgeous prize Marianne Design Look at this amazing prize So, the challenge this week is to make a project with LOVE LETTERS - Verse or Text. Here is my card The stamps are from Papermania and are stamped on to pink and cream card stock using SU Rose Red ink and then Brushed Corduroy Distress Ink is used for sponging around the edges. I also had these huge pink pearls lying unused in my stash so I added some of those too. Rock Candy Distress Stickles have been daubed randomly but unfortunately it's not been picked up by the camera but they do give a really lovely subtle sparkle. Can't wait to see what you all come up with - have fun - Jacqueline xx

Mid-week Motivation Time

Image
Today over on the  Make My Monday  challenge blog it's time for the Mid-week Motivation. This week for my dt card I made a Recessed Window card and I have been asked to do a tutorial for it - so pop on over to the blog and take a look at all the details on how to make this card I have used some K&Company Blue Awning paper, some Creative Expressions alphabet stamps, a butterfly stamp (can't remember where from!) and a Tim Holtz Pointer. I also used some Brushed Corduroy Distress Ink. Here are a couple of close ups I am also entering this card into the  Flutter By Wednesday's  challenge - the challenge is open, just make sure you include a butterfly, fairy or angel. See you soon - Jacqueline xx

Something a little bit different

Image
Here are a couple of cards that I made today whilst out playing at Jane's. She makes fabulous vintage cards all the time which you can see  here  and today was one of her classes where I had a go myself. She had loads of papers, images, ribbons and embellishments to choose from and this is what I made I started off by using some cream decorative paper that I distressed and inked with Tim Holtz Distress Inks. The red holly is an Anna Griffin Stamp as is the border at the bottom. A rosette was added with a die cut snowflake. Jane had die cut some lacy borders which went really well with my chosen image. This one started off as navy card which was layered with some red paper. Again this was distressed and inked. The vintage image was distressed also and stamped with a cute little holly stamp and some Brilliance ink. The doily was treated in the same way before layering behind the image and some ribbon added. The snowflakes were inked with more Brilliance ink and the fi...

MMM - Challenge 17 - Steampunk Anything But a Card

Image
This week for the challenge at  Make My Monday  I have let my hair down. The challenge is ANYTHING BUT A CARD and I had SUCH FUN  making this! I hope you like it - take a look I started off with a tiny canvas that I bought at The Works. I painted it with white acrylic paint and then added some Bushed Corduroy Distress Ink. My understanding of Steampunk is industry with a fantasy twist, so hence the title of my work - Hive of Industry. The bee hive is achieved by stamping through some sequin waste (a favourite technique of mine) and the bees are stamped using Stampin' Up - Nature Walk. Some cogs have been added and some Maya Road chipboard wings - distressed with Brushed Corduroy ink and some gold acrylic paint. A metal corner was added and a tiny cork stoppered  bottle labeled Bee Wing! The cogs were taken from from a very old broken clock and I just had to use the pendulum - just because I liked it! Please hop over and have a go - I  certainly don't...

Steampunk

Image
Good morning everyone - I honestly didn't think I was going to make it this morning as my son decided to re-organise his room last night and that included moving his computer. We lost our internet connection all last night and only managed to get it back at 9am this morning. That mean't I was late getting the challenge up on the  Make My Monday  blog - but it's there now and you can hop over and take a look at our brand new theme and challenge. This month my lovely dt colleague Cath has chosen STEAMPUNK for our theme and she kicks off by challenging us to make a Steampunk inspired ATC. Here's mine I have used a 2.5" x 3.5" piece of card stock and stamped it with a Tim Holtz  Components stamp from his Stampers Anonymous range - this one being Time. I then inked it with Brushed Corduroy DI. I then added some pieces of Tim Holtz Idea-Ology  - a metal pointer and some ball chain. The pocket watch is a past free stamp from the cover of Craft Stamper mag and it h...

Wet Weather

Image
Yuk - I hate days like this. I had to go shopping this morning and on the way out of the garden a rose bush that we have by the gate got overloaded with rain and soaked me all down my back! I also stepped in a puddle at the supermarket and soaked my feet. I hate being cold, but more than that I hate being cold and wet - I am really considering lighting a fire this evening!!! Anyway - I got crafting this afternoon (with new stamps) and made this card This is some 12" x 12" paper that I have had since time began and until today was shoved to the bottom of my card drawer (made a HUGE mess trying to get it earlier!) and the letter stamps were some I got for my birthday. Admittedly I didn't think they were that exciting but I have since changed my mind. So I stamped and embossed them on to the paper and also stamped and embossed some Lovely as a Tree and then I added a Tim Holtz Idea-ology Pointer. The embossing looked a little lost on the paper so I sponged it with some Bru...

Workshop Coffee Filter Mini Album - Part 1.

Image
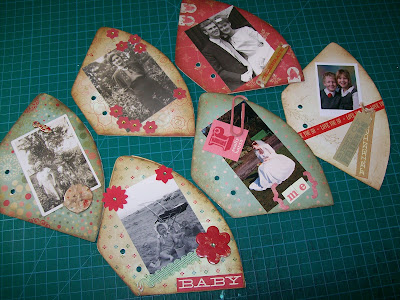
As promised - here are some pics of what we did today at my workshop . We made today a 'Coffee Filter Mini Album'. That is - we took some coffee filter bags and covered them top and bottom. This made a pocket into which we inserted some tabbed file pages ready to be journaled. These are the first six finished pages of my album - I will show you the reverse side tomorrow. I used some Cosmo Cricket scrap book pages and inked the edges with some Distress Inks. The embellishments are all Cosmo Cricket as are the words and ribbon. So the pictures are (from top left) - my Great Gran Rose, my Grandma Hilda - both of these ladies are no-longer with us, and my Mum and Dad on their wedding day. Bottom left - me as a baby (eek!) me on my wedding day and my two children This is such a fun project to do and next week at my Thursday night workshop we will be making Paper Bag Albums - can't wait. See you soon - Jacqueline xx.

Time for something a bit different.

Image
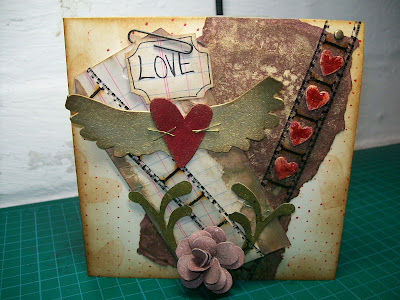
It's a long time since I got all grungy and inky but today seemed the right time to do it again. My Tim Holtz Grungepaper has been lying forgotten on my shelves for too long now. I also had some Idea-ology Film Strip Ribbon for Christmas and I have been dying to use it. Here is my Creation This card started life as a tag to which I added a flower and swirl made with grungepaper, coloured with Distress Inks. The heart and wings are also grungepaper and they were attached using staples. I then added a small sentiment attached with a paper-clip and some of my new Film Strip Ribbon. The card base itself was just a 5" x 5" cream card square on to which I stamped a heart (Stampin' Up - Simply Said) with Tattered Rose Distress Ink. This was then inked with Brushed Corduroy. I added the polka dots by inking up one of my embossing folders with Fired Brick and stamping that directly onto the card. The brown card was torn, crumpled and spritzed with gold Perfect Pearls and then...

All Aboard.

Image
What a lovely sunny 1st of September we are having - yikes September, time just seems to be racing by! Today I thought I would share with you a challenge card. It isn't a blog challenge as usual but one set for me by one of the ladies of my craft group. I normally challenge them but this month the tables have been turned and each of my ladies have set me a challenge. This is 'A birthday card suitable for a man'. Colour was my choice but I had to include 2 decorative papers, 1 stamp, a sentiment and 3 brads. How did I do? My 2 decorative papers came from the Sea Glass range from K & Company and I also cut out some of the images of one piece to decoupage. My 1 stamp is the seashell which was a freebie on the cover of Craft Stamper magazine and I put my 'Happy Birthday' sentiment on a tab secured with the 3 brads. The edges of all the paper and card stock were inked with Brushed Corduroy distress ink. Now I can't tell you who set this challenge as the game i...

A Birthday Card.

Image
Just a quick post to share with you a card I made for a friend who's birthday it is today. It has been made using the Stampin' Up set Greenhouse Garden and Distress Inks. The flowers were stamped separately, cut out, shaped with a bone folder and then stuck on the card using 3D foam pads. Little touches of bling were also added. Happy birthday Rachel - hope you have a great day! - Jacqueline xx.

All Things Tim.

Image
That being Tim Holtz of course - but you knew that didn't you? And of course you all know of the fab new challenge blog now into it's third challenge over on Simon Says Stamp and Show . So this week it was All Things Tim Holtz Inspired and I am very late in submitting my entry on account of all inspiration leaving my head and going on holiday! Any how this is what I have managed to come up with. It's a tag inked with Brushed Corduroy DI's and then spritzed with gold mica powder. A piece of torn ledger paper has also been added. On top of that is a pair of golden wings and a heart cut out of grungepaper and a grungepaper rose coloured with Tattered Rose DI. There is some Rock Candy Distress Stickles on the rose too and a couple of florishes also coloured with DI - Peeled Paint. (Would have added a Memo Pin and a sentiment but haven't got round to ordering them yet!) Thanks for taking the time to look - have a good Bank Holiday Weekend - Jacqueline xx.

Just For a Change....

Image
...I decided to make something for ME. I make loads of cards and papercraft items and more often than not they end up being sold or used for family and friends. So as I said this is for me My diary/organiser has disintergrated in my handbag and all my pages have got ripped and dogeared. So I have made a new one. I painstakingly printed off various pages - ('cos I have customised it for my own personal needs), and made dividers. The covers are made of grungepaper coloured with Tim Holtz distress inks - Tattered Rose and Brushed Corduroy. I then sort of used a technique I saw recently on Wendy Vecchi's  blog where she colours her grungepaper flowers white before colouring them with ink - I used white acrylic paint instead of a white ink pad. So after colouring the flowers white I used some Stampin' Up ink pads to colour them, I then stamped over them with various stamps from my stash. As you can see I attached the flowers with jumbo brads - I thought that if I just glue...

An Homage To.....

Image
...........THE Wendy Vecchi. For those of you not familiar with THE Wendy Vecchi - please click here  - this link will transport you quite effortlessly over to the blog of the lady herself. Take a look - it's quite breathtaking. So on to my poor imitation This is for this week's challenge over on the Simon Says Stamp & Show  blog. The challenge is to create a piece of art in the style of (THE) Wendy Vecchi. Now unfortunatly I don't yet own any of her stamps so I had to improvise. I used chipboard for the base, an old wooden cotton reel (I know spooly things are what's proper - but they were out of stock) grungepaper flowers and a few bits of bling. The foliage was cut on my Cuttlebug. Oh and the butterflies were punched out of grungepaper with a Stampin' Up punch. I also used a S'U stamp (Flight of the Butterfly) to put the polka dots on the flowers and butterflies. All were coloured with Tim Holtz Distress Inks and spritzed with mica powders. Thanks for...

Things with Wings.

Image
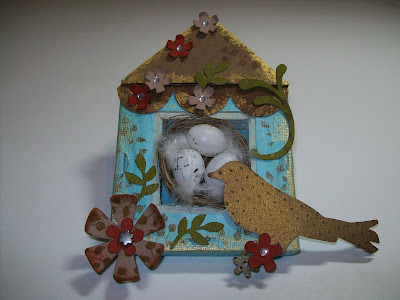
This is a project which has been a long time in the making. It has been in the back of my mind for absolutely ages and should have been finished for at least two challenges, but somehow it just didn't happen. I reckon I was subconsciously (yikes - big word!) waiting for this NEW challenge blog to begin. The new blog is Simon Says Stamp and Show.  It encourages art work in the style of Tim Holtz, Wendy Vecchi and other vintage greats. This week's theme is 'Things with Wings' So - my wingy thingy was made with a mini canvas (4" x 4") and I painted it with a turquoise acrylic paint. The frame was then rubbed with Brushed Corduroy distress ink and gold acrylic. I then used some Stampin' Up stamps to give some foliage detail. The roof is made from chipboard and Grungepaper coloured with DI's again and Grungepaper flowers and leaves. My bird is also Grungepaper cut with a die in my Cuttlebug and I also put it through an embossing folder before I coloured...

Loads of Love.

Image
Now if you have been to my other blog you may recognise the title of this post - this I suppose is part two. Same stamp set (Stampin' Up - Loads of  Love) but a different design. This card is for the Die Cut Dreams  challenge blog where the theme is 'Gingham' . The main image is stamped onto S'U Very Vanilla card stock in Rose Red ink and then coloured with a water brush and distress inks (Brushed Corduroy and Fired Brick) The backing papers are all from a set I had off QVC soooooo many years ago I forget what it is called!!! and the flowers are 7 Gypsies. I cut the little florishes on my Cuttlebug. Have been playing all day so I must really go and do some housework now! - so long - Jacqueline xx.

There's No Place Like Home.

Image
Hi folks, this is just a short post sneaked inbetween housework and gardening and all those other little things I should be doing instead of playing! This is a piece of work I started last week for the Alter it Monthly  blog. I've lurked around it before and always said to myself " I really must take part" and this month I have. The theme is "Home Sweet Home". I 'altered' a 4"x4" canvas using Distress Inks (Brushed Corduroy, Peeled Paint and Fired Brick) and some scrap pieces of chipboard. The letters are Cosmo Cricket - I was able to reverse them and colour them. I cut the house freehand and (although you can't see it) there is a piece of an old laundry ticket behind the windows and doors which I also filled with glossy accents. The rose is made from Grungepaper and I followed Linda's tutorial here  (left hand column). Hope you like it - Jacqueline xx.