Posts

Showing posts with the label Blooms and Wishes

Pop Out Swing Card

Image
Today's card is another fancy fold - a Pop Out Swing Card. Here's how it started To get to this stage I followed Amanda's tutorial HERE Here are some more views To decorate it I cut a frame from Whisper White card stock and also a mat for the swing out middle I then decorated them using Blooms and Wishes stamp set and attached them to my card I also used my leaf punch to add to the middle design which was attached using Dimensionals. Hope you like my card today - see you soon - J xx

A Little Bit of Sparkle

Image
So - it's been a lousy week. I have a viral infection which has messed with my fibro, this has left me feeling pretty fed up as I haven't felt able to do anything. Yesterday however I was feeling a bit better so I had a little play. It's not a very detailed card as just lifting my Big Shot on to my desk did me in! Here it is The branch from Seasonal Layers Thinlits was die cut from some glitter paper and a die cut orchid was attached with Dimensionals. The sentiment is from Blooms and Wishes and is stamped in Early Espresso ink on Sahara Sand card stock. A glitter centre to the flower adds the perfect finishing touch. I am entering this card into the challenge over at CAS(E) this Sketch Thanks for stopping by today - don't know when I shall be back, on top of this fibro/flu of mine Mum was taken into hospital this morning - it never rains but it pours as they say - 'cept it's snowing here which is why I didn't go with her. Hopefuly I...

Blooms in Orange

Image
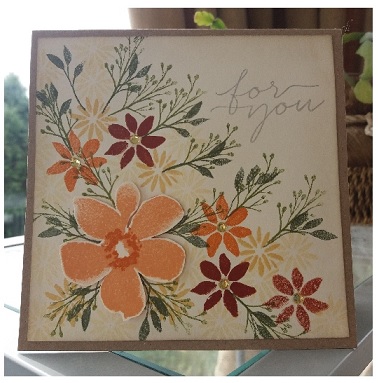
I have a floral card for you today - in fall colours - take a look The main large flower has been been cut out separately and attached with Dimensionals. Stamp set used - Blooms and Wishes. Colours used - Peek a boo Peach, Pumpkin Pie, Cajun Craze, So Saffron, Old Olive and Always Artichoke. I will be entering this card into the challenge over at Hiding in my Craftroom HIMCR #316 - Fall Colors! To order any of the above Stampin' Up products or request either of the current catalogues email me or go to my online shop HERE Thanks for looking - see you soon - J xx

Card Pouch Tutorial

Image
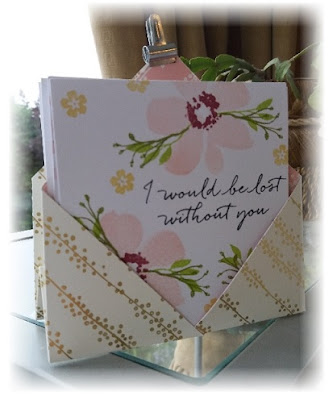
Good evening - and as promised I have the instructions for the little pouch I made for my note cards. It's very easy - take a look Take a piece of decorative paper 9" x 9" square. Fold in half along the diagonal and crease firmly with a bone folder. While the paper is in half score 2" along the diagonal. Score each corner 4" in. Your paper should look like the diagram above and the picture to the left. Fold in the two corners - they will overlap. Remember to crease each fold with the bone folder. Then fold in half. (Ignore the clip at this stage - it was for photographing purposes!!!) Fold the sides down so that an envelope shape forms. Do this for both sides and secure with a clip - like in the picture below. Because of the way it is folded it can be stood up but also can be folded flat to post - it makes a lovely gift. I used Blooms and Wishes to decorate my note cards I hope you like this little...

A Quick Hello

Image
It is really a very quick hello indeed. I've been at the doctor's and hospital today and I'm very tired and achy - need to go to sleep! So here it is for today - a pretty little pouch full of note cards This is just a teaser - tomorrow I will tell you what I used and how to make it - see you soon - J xx

Make a Card - Send a Card

Image
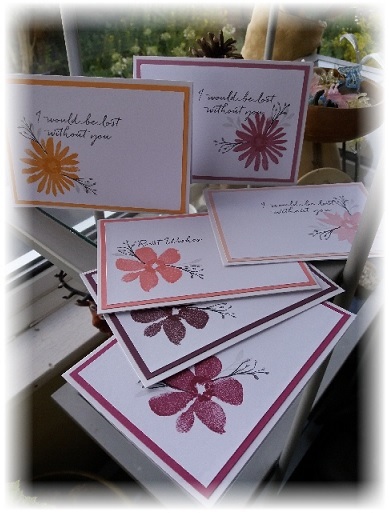
This is one of the swap groups I belong to on Facebook. Everybody makes a few cards and then sends them other swappers on the list. It's very random but huge fun! This month I have decided to use the style of card I made for my recent make and take but using different colours - take a look Let's see if I can remember all the names!! We have Peekaboo Peach, Powder Pink, Flirty Flamingo, Fresh Fig and Berry Burst. The stamp set used is Blooms and Wishes. Here's a couple of close ups Thanks for stopping by to take a look today. If you like what you see please drop me a comment and click the followers button in the side bar - thanks, see you soon xx

Catching Up

Image
Good morning - did everyone have a good weekend? I spent mine at work, it's the first full weekend in ages so I can't complain and I have today off to catch up so it's not all bad! I organised a fundraising event for last Friday (14th) to raise money for the Make a Wish charity. It was like a make and take with a raffle and I staged it at a local cafe here in Bridgnorth. Bec's Cafe is the place and the coffee and cake (coffee and walnut) are divine! The card we made was a nice simple one CASEd from the Stampin' Up catalogue. It's at the bottom of of page 139 and uses the gorgeous Blooms and Wishes set And here is my version My colours were Powder Pink, Smoky Slate and Basic Black. The catalogue is a great resource for tips and ideas on card making and scrapbooking. There's link in the side bar for you to take a look at one or if you would like your own to stroke and hug drop me an email at jacquelinenm68@gmail.com. This card ...

Blooms and Wishes

Image
I've been having a pay with my new stamp sets which is good but sometimes it takes me a while to get used to them. I have to use them a few times to break them in or get a feel of their potential. Sometimes my first efforts are not very good because of this. This is my first go with the Blooms and Wishes set and I have used the colours from this week's  Color Throwdown My colours are Real Red, Dapper Denim and Daffodil Delight. Here is my card The background fiddly bits are stamped from the Graceful Garden set and I have added a few rhinestone gems as a finishing touch. These fabulous stamps and more are available in my shop - details in the top tabs. Thanks for stopping by today - see you soon xx