Posts

Showing posts with the label Notebooks

Decorated Notebooks

Image
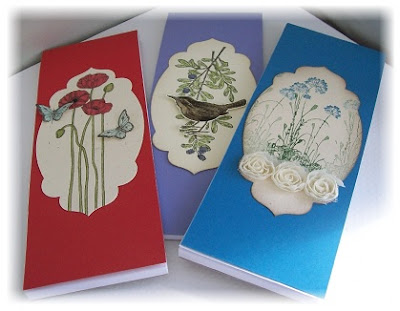
Good morning all - I'm back from a lovely holiday in Wales although I did bring a cold back with me which settled on my chest and made me feel quite unwell for a few days! I'm feeling much brighter now and ready to start sharing my crafting endeavours with you again. Today I have some decorated notebooks to show you - made quite simply from cheap notebooks bought from a pound shop and then decorated with scraps of card and paper. These sell really well at craft fairs and are really quick and simple to do. The next ones are some I made from scratch. I used an old notebook, cut the pages to size and rebound them using my Zutter Bind it All. I love making these and again are perfect for craft fairs. Thanks for looking - I'll be back soon with some more craft fair makes - post it note holders xx

Flower Patch and Kraft Note Book

Image
So I've really gone to town this week with my Flower Patch stamps - hope you are not getting bored with it! Today I have a cute little note book which I have decorated - come and take a look If you look closely you will see that I have combined my stamps with some matching die cuts. These dies are fab if you you don't like cutting - just run them through the Big Shot! Plain Kraft note books are very popular in the shops at the moment and can be picked up quite cheaply. The one above is from Stampin' Up however, take a look at this post  HERE  and you will see what I did with a couple of books I bought from a Supermaret. Tomorrow will be my last post of the week and also the last of my Flower Patch projects - I hope you can join me.

A little of what I've been up to.

Image
September is a very busy time of year - especially for the students amongst us and next week I lose my daughter again as she returns to university. To make life a bit easier for her I have made her a Student Planner with custom made pages for a diary, contacts, notes and useful web addresses. These are not the best photos in the world (I do seem to be having a problem with my photography lately!) but hopefully - you get the idea. It has turned out to be quite lucrative as a few of her friends have ordered them from me too - here are a few pics showing the different covers I have made These useful books can be made to order - with pages made to suit your needs. The diary can also start and finish whenever you wish. If you would like to order one from me there is a tab at the top of the page saying 'Items for Sale' There you will find the price, my e-mail address and payment details. Thanks - Jacqueline xx

Spreading a little love

Image
If you pop over to visit my lovely blog buddy  Mynnette  - you will see this   Sadly this is not something that I have acheived every week however I did spread a little around last night at my monthly workshop. I have been running my craft club now for 5 years and this month was the fifth anniversary so to say 'Thank You' for their support I made my ladies a little gift Along with the printed schedules each one received a little notebook and matching bookmark. Here's a close up The notebooks are 3" x 3" and the covers are chipboard covered with My Mind's Eye paper. They have been bound using a Bind -it- all machine. The ladies of my Tuesday morning group will get theirs when they come to class in April. Pop back tomorrow and I will show you what we made last night - bye for now - Jacqueline xx

Altered Notebook.

Image
I have a friend's birthday coming up soon and I always like to make her a little something. This year I have made a notebook. I salvaged some pages from an old A4 pad, cut them down to size and bound them together with my Bind it All machine. I decorated the cover with some Stampin' Up DSP - take a look The paper is from the Springtime Vintage collection and I have teamed it up with some Very Vanilla card stock. The little dotty frame is stamped from the Baby Blossoms set and my flower is made using some die cuts. The edges of the petals have been sponged with Baja Breeze ink. I am entering this notebook into the challenge over at  "Just Us Girls"  which has the theme of Altered Notebooks and then I shall wrap it up ready for my friend. I am away for a few days tomorrow - I am hoping to schedule some posts, whether this will work I don't know - but there's only one way to find out ........see you soon - Jacqueline xx

Anything but a Card......

Image
.....is the theme for this week's challenge at the Simply Stampin'  challenge blog. As they are a challenge blog for everyone who loves Stampin' Up products they want to see something ie a stamp image or sentiment that is Stampin' Up on all of the projects we make. Needless to say - this is one of my most favourite of challenges! This week I have made a notebook. I always recycle the backs of note pads as they are a great source of chipboard and this time I covered it in white paper. I recycled an old sketch pad, cut the paper to size and bound it together with the covers with my Zutter Bind it All machine So to prevent this note book remaining naked I added some Sahara Sand card stock and some Vintage Springtime DSP. Here is the back of the book I then drew some inspiration from one of the Simply Stampin' design team - Angela. This is the piece that caught my eye - here (scroll down a little). And here is my interpretation I used my Baby Blossoms stamp set, ...

Sparkly Trees.

Image
I have done a lot of tree cards lately - mainly in autumnal colours - but when my friend Jane came to play yesterday she showed me these stamps and I just had to have a go with them. They are from Kanban and are just gorgeous - especially in my favourite colours Old Olive and Not Quite Navy (Stampin' Up). This is just very simply stamped onto vanilla card stock, mounted onto the coloured card and then finished off with a few green sparkles. I also covered two notebooks with the same cardstock and used the smaller tree stamp to decorate them. Thanks for stopping by to take a look - see you soon - Jacqueline xx.

Journey.

Image
How many of you like me have drawers,shelves, boxes where stuff gets shoved  placed carefully 'cos you are going to do something with it later - but then never get round to it and those drawers, shelves and boxes just keep getting fuller and fuller? Well I decided I was going to do something about it 'cos I have all three - drawers, shelves and boxes........... Now just lately I have have been inspired by a couple of blogs whose work is just fabulous and it has really got crafting mojo working. One such crafty Goddess is Hels Sheridan  and she has a kind of challenge that she sets on a Sunday called 'Sunday Stampers' This week is 'Believe &/or Journey' and this week I think that I have actually produced something worthwhile. This is what it looked like before It started life as a pretty boring looking book, one that I think I had given to me ages ago and I didn't know what to do with and so threw   oops no placed carefully in recepticles mentioned ...

Little Note Books.

Image
Hello every one, how are you doing? Good I hope. The other day I was browsing round one of the shops in my hometown of Malvern and I came across a multi-pack of note books for not much money. Hmmmm thinks I - I can do something with these. So I did - I decorated the cover of each little note book and tried to make them all  different . I know there are four bird houses (I just LOVE that Stampin' Up punch)but they are each a bit different. Here are some closer views These are now ready to be packed up and priced all ready for the big fair at the weekend - more on that story later! Hope you like these - it would be really good to have a comment, I'm feeling a little lonely at the moment. See you soon - Jacqueline xx.

Spiral Bound Book Tutorial.

Image
I love making books, be it memory books or just plain notebooks - I love to make them and customise them. This is one I made today: She was inspired by I sketch I saw on Tuesday Morning Sketches  and I didn't just want to make a card this time. So I used some cereal boxes - 4 pieces 15 1/2 cm by 22cm and I glued them together. I glued the picture sides together so it wouldn't show through my paper when I came to cover it. I then covered over them with brown wrapping paper - I bought it from my local Post Office - and then I decorated them. I used some Anna Griffin blue polka dot paper and inked it with my Tim Holtz distress ink - Brushed Cordouroy and stamped some swirls using Stampin' Up inks Bordering Blue and Night of Navy. The vintage lady is from the Craft Stamper Magazine  web site - I just ripped the edges and inked them. The flowers are punched from vintage papers using the Stampin' Up 5 petal flower punch and again are distressed and inked. I stuck them on with...