Posts

Showing posts with the label Tim Holtz

Mid-week Motivation Time

Image
Today over on the  Make My Monday  challenge blog it's time for the Mid-week Motivation. This week for my dt card I made a Recessed Window card and I have been asked to do a tutorial for it - so pop on over to the blog and take a look at all the details on how to make this card I have used some K&Company Blue Awning paper, some Creative Expressions alphabet stamps, a butterfly stamp (can't remember where from!) and a Tim Holtz Pointer. I also used some Brushed Corduroy Distress Ink. Here are a couple of close ups I am also entering this card into the  Flutter By Wednesday's  challenge - the challenge is open, just make sure you include a butterfly, fairy or angel. See you soon - Jacqueline xx

Something a little bit different

Image
Here are a couple of cards that I made today whilst out playing at Jane's. She makes fabulous vintage cards all the time which you can see  here  and today was one of her classes where I had a go myself. She had loads of papers, images, ribbons and embellishments to choose from and this is what I made I started off by using some cream decorative paper that I distressed and inked with Tim Holtz Distress Inks. The red holly is an Anna Griffin Stamp as is the border at the bottom. A rosette was added with a die cut snowflake. Jane had die cut some lacy borders which went really well with my chosen image. This one started off as navy card which was layered with some red paper. Again this was distressed and inked. The vintage image was distressed also and stamped with a cute little holly stamp and some Brilliance ink. The doily was treated in the same way before layering behind the image and some ribbon added. The snowflakes were inked with more Brilliance ink and the fi...

Metal Steampunk.

Image
It's week 16 at the  Make My Monday  challenge blog and this week the challenge is to incorporate some metal into your card or project. This was a fun one to do - I still don't know if I have yet fully grasped the whole Steampunk style but here goes The image (if I remember correctly) comes from the Graphics Fairy, it's printed on to cream card and the edges have been sponged with Really Rust and Pumpkin Pie inks. The flowers have been stamped using one of the free Craft Stamper Mag stamps and I have added a couple of cogs to the top two and a Tim Holtz pointer to the bottom one. There is a piece of ball chain threaded through the lace and added to this are the ends of two zips. Hope you are able to join in this week or at least pop over to see what my lovely design team have come up with this week. See you soon - Jacqueline xx

Steampunk

Image
Good morning everyone - I honestly didn't think I was going to make it this morning as my son decided to re-organise his room last night and that included moving his computer. We lost our internet connection all last night and only managed to get it back at 9am this morning. That mean't I was late getting the challenge up on the  Make My Monday  blog - but it's there now and you can hop over and take a look at our brand new theme and challenge. This month my lovely dt colleague Cath has chosen STEAMPUNK for our theme and she kicks off by challenging us to make a Steampunk inspired ATC. Here's mine I have used a 2.5" x 3.5" piece of card stock and stamped it with a Tim Holtz  Components stamp from his Stampers Anonymous range - this one being Time. I then inked it with Brushed Corduroy DI. I then added some pieces of Tim Holtz Idea-Ology  - a metal pointer and some ball chain. The pocket watch is a past free stamp from the cover of Craft Stamper mag and it h...

Wet Weather

Image
Yuk - I hate days like this. I had to go shopping this morning and on the way out of the garden a rose bush that we have by the gate got overloaded with rain and soaked me all down my back! I also stepped in a puddle at the supermarket and soaked my feet. I hate being cold, but more than that I hate being cold and wet - I am really considering lighting a fire this evening!!! Anyway - I got crafting this afternoon (with new stamps) and made this card This is some 12" x 12" paper that I have had since time began and until today was shoved to the bottom of my card drawer (made a HUGE mess trying to get it earlier!) and the letter stamps were some I got for my birthday. Admittedly I didn't think they were that exciting but I have since changed my mind. So I stamped and embossed them on to the paper and also stamped and embossed some Lovely as a Tree and then I added a Tim Holtz Idea-ology Pointer. The embossing looked a little lost on the paper so I sponged it with some Bru...

Time for something a bit different.

Image
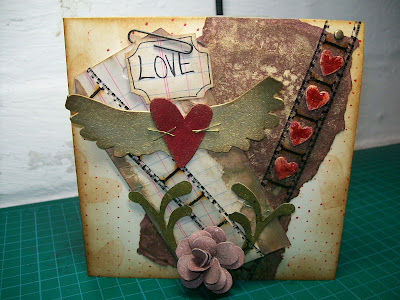
It's a long time since I got all grungy and inky but today seemed the right time to do it again. My Tim Holtz Grungepaper has been lying forgotten on my shelves for too long now. I also had some Idea-ology Film Strip Ribbon for Christmas and I have been dying to use it. Here is my Creation This card started life as a tag to which I added a flower and swirl made with grungepaper, coloured with Distress Inks. The heart and wings are also grungepaper and they were attached using staples. I then added a small sentiment attached with a paper-clip and some of my new Film Strip Ribbon. The card base itself was just a 5" x 5" cream card square on to which I stamped a heart (Stampin' Up - Simply Said) with Tattered Rose Distress Ink. This was then inked with Brushed Corduroy. I added the polka dots by inking up one of my embossing folders with Fired Brick and stamping that directly onto the card. The brown card was torn, crumpled and spritzed with gold Perfect Pearls and then...

All Things Tim.

Image
That being Tim Holtz of course - but you knew that didn't you? And of course you all know of the fab new challenge blog now into it's third challenge over on Simon Says Stamp and Show . So this week it was All Things Tim Holtz Inspired and I am very late in submitting my entry on account of all inspiration leaving my head and going on holiday! Any how this is what I have managed to come up with. It's a tag inked with Brushed Corduroy DI's and then spritzed with gold mica powder. A piece of torn ledger paper has also been added. On top of that is a pair of golden wings and a heart cut out of grungepaper and a grungepaper rose coloured with Tattered Rose DI. There is some Rock Candy Distress Stickles on the rose too and a couple of florishes also coloured with DI - Peeled Paint. (Would have added a Memo Pin and a sentiment but haven't got round to ordering them yet!) Thanks for taking the time to look - have a good Bank Holiday Weekend - Jacqueline xx.

Just For a Change....

Image
...I decided to make something for ME. I make loads of cards and papercraft items and more often than not they end up being sold or used for family and friends. So as I said this is for me My diary/organiser has disintergrated in my handbag and all my pages have got ripped and dogeared. So I have made a new one. I painstakingly printed off various pages - ('cos I have customised it for my own personal needs), and made dividers. The covers are made of grungepaper coloured with Tim Holtz distress inks - Tattered Rose and Brushed Corduroy. I then sort of used a technique I saw recently on Wendy Vecchi's  blog where she colours her grungepaper flowers white before colouring them with ink - I used white acrylic paint instead of a white ink pad. So after colouring the flowers white I used some Stampin' Up ink pads to colour them, I then stamped over them with various stamps from my stash. As you can see I attached the flowers with jumbo brads - I thought that if I just glue...

An Homage To.....

Image
...........THE Wendy Vecchi. For those of you not familiar with THE Wendy Vecchi - please click here  - this link will transport you quite effortlessly over to the blog of the lady herself. Take a look - it's quite breathtaking. So on to my poor imitation This is for this week's challenge over on the Simon Says Stamp & Show  blog. The challenge is to create a piece of art in the style of (THE) Wendy Vecchi. Now unfortunatly I don't yet own any of her stamps so I had to improvise. I used chipboard for the base, an old wooden cotton reel (I know spooly things are what's proper - but they were out of stock) grungepaper flowers and a few bits of bling. The foliage was cut on my Cuttlebug. Oh and the butterflies were punched out of grungepaper with a Stampin' Up punch. I also used a S'U stamp (Flight of the Butterfly) to put the polka dots on the flowers and butterflies. All were coloured with Tim Holtz Distress Inks and spritzed with mica powders. Thanks for...

Things with Wings.

Image
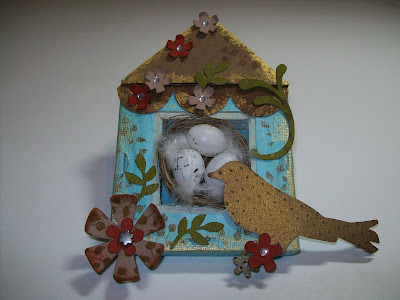
This is a project which has been a long time in the making. It has been in the back of my mind for absolutely ages and should have been finished for at least two challenges, but somehow it just didn't happen. I reckon I was subconsciously (yikes - big word!) waiting for this NEW challenge blog to begin. The new blog is Simon Says Stamp and Show.  It encourages art work in the style of Tim Holtz, Wendy Vecchi and other vintage greats. This week's theme is 'Things with Wings' So - my wingy thingy was made with a mini canvas (4" x 4") and I painted it with a turquoise acrylic paint. The frame was then rubbed with Brushed Corduroy distress ink and gold acrylic. I then used some Stampin' Up stamps to give some foliage detail. The roof is made from chipboard and Grungepaper coloured with DI's again and Grungepaper flowers and leaves. My bird is also Grungepaper cut with a die in my Cuttlebug and I also put it through an embossing folder before I coloured...

Keyring

Image
Hi folks - hope you had a good weekend and didn't get too much rain. I managed to dodge in and out of the showers and I got quite a bit of weeding done. Managed to get some crafting in too - making something special for my big family lunch tomorrow. And also squeezed in a bit of time to make this - I needed a new keyring for my keys and thought that my Grungepaper would fit the bill perfectly. So I drew around some chipboard flower shapes onto the Grungepaper, cut them out and coloured them with my distress ink pads. I then punched holes in the middle of the flowers and put them all together on a jumbo eyelet (Stampin' Up). Before closing the eyelet I used a piece of Grungepaper to make a loop through which I inserted a ring binder clippy thingy (will change that though as soon as I get my Tim Holtz Idea-ology D-Rings through the post). Thing is - now I have made it, I don't want to put it in my handbag with all the rubbish that accumulates in there. Think I will have to ca...

Journey.

Image
How many of you like me have drawers,shelves, boxes where stuff gets shoved  placed carefully 'cos you are going to do something with it later - but then never get round to it and those drawers, shelves and boxes just keep getting fuller and fuller? Well I decided I was going to do something about it 'cos I have all three - drawers, shelves and boxes........... Now just lately I have have been inspired by a couple of blogs whose work is just fabulous and it has really got crafting mojo working. One such crafty Goddess is Hels Sheridan  and she has a kind of challenge that she sets on a Sunday called 'Sunday Stampers' This week is 'Believe &/or Journey' and this week I think that I have actually produced something worthwhile. This is what it looked like before It started life as a pretty boring looking book, one that I think I had given to me ages ago and I didn't know what to do with and so threw   oops no placed carefully in recepticles mentioned ...

WOYWW.

Image
It's that time of the week again - if you don't know what I'm on about, go see Julia  and all of the other WOYWWers at The Stamping Ground. I'm a bit late posting this morning - had to finish the above card and get it posted ASAP - my baby brother reaches the ripe old age of 40 this week so I have been very good and made him a 'grown up' card for a change! So my desk is a teeny bit messy today. Also I would like to show you a piece of art I have just made. I have been blown away lately by many peoples projects using all the various ditressing techniques. So I dug out my Distress Inks, bought some Grungepaper and had a go. As you can see I have been inspired by the lovely Linda E - I followed her rose tutorial from her blog. I now have Fired Brick coloured fingers! Have to go now - half way through decorating the bedroom but I will be back later to take a look a your desks - bye for now - Jacqueline xx.

There's No Place Like Home.

Image
Hi folks, this is just a short post sneaked inbetween housework and gardening and all those other little things I should be doing instead of playing! This is a piece of work I started last week for the Alter it Monthly  blog. I've lurked around it before and always said to myself " I really must take part" and this month I have. The theme is "Home Sweet Home". I 'altered' a 4"x4" canvas using Distress Inks (Brushed Corduroy, Peeled Paint and Fired Brick) and some scrap pieces of chipboard. The letters are Cosmo Cricket - I was able to reverse them and colour them. I cut the house freehand and (although you can't see it) there is a piece of an old laundry ticket behind the windows and doors which I also filled with glossy accents. The rose is made from Grungepaper and I followed Linda's tutorial here  (left hand column). Hope you like it - Jacqueline xx.

Mojo Monday.

Image
O.K so I didn't get done yesterday what I should have (will have to work harder today!) but I still found time to sneak in a teeny challenge! Check out the sketch and samples here  and check out my card here: Materials used: White 5"x5" card base Papers: K&Company - Blue Awning Inks: Tim Holtz - Tea Dye & Memento - Paris Dusk Stamps: Stampin' Up - Greenhouse Garden & Bird on a Branch (sentiment). Ribbon: Stampin' Up - Very Vanilla. Pearls from stash. O.K got to dash - busy, busy, busy!!! - Jacqueline xx.

Paper Bag Album.

Image
Hello folks. Just finished in my garden, sat down with a cup of tea and it started to rain on me!! So came inside to have a play instead. Just a little post to show off a paper bag album that one of my craft club members commissioned. She didn't want pretty and girly but neutral colours and images. I used some papers from a huge kit I bought from QVC light years ago, it was a Cosmo Cricket set with albums, papers, chipboard embellishments and loads of other stuff. It was stuff that I used to get out and stroke occasionally but I thought that the time had finally come to use a bit of it. I made some pockets in the album and I made a few tags to go in them. There were some larger pockets where the paper bags opened so I made some file cards to go in those - they can very easily be used for journaling. I distressed the edges of the paper bags and the papers with Tim Holtz Distress Ink - Brushed Corduroy (my favourite). The tags were made useing the tab punch from Stampin' Up. The ...

Paper Bag Album.

Image
Hello folks. Just finished in my garden, sat down with a cup of tea and it started to rain on me!! So came inside to have a play instead. Just a little post to show off a paper bag album that one of my craft club members commissioned. She didn't want pretty and girly but neutral colours and images. I used some papers from a huge kit I bought from QVC light years ago, it was a Cosmo Cricket set with albums, papers, chipboard embellishments and loads of other stuff. It was stuff that I used to get out and stroke occasionally but I thought that the time had finally come to use a bit of it. I made some pockets in the album and I made a few tags to go in them. There were some larger pockets where the paper bags opened so I made some file cards to go in those - they can very easily be used for journaling. I distressed the edges of the paper bags and the papers with Tim Holtz Distress Ink - Brushed Corduroy (my favourite). The tags were made useing the tab punch from Stampin' Up. The ...

BoyZone.

Image
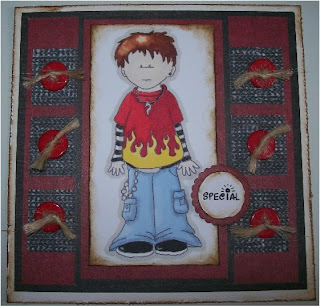
No I haven't gone mad - I am not going to be talking about an irish boy band. It's the theme for a challenge I found on a blog called Daring Cardmakers.  Now doing male themed cards is a bit out of my comfort zone but I found a lovely  free digi on Sj's - Little Musings  - take a look : His name is Grey but it just reminds me so much of what my son Will used to look like. He even had a top like that! The challenge is being sponsored by Charmed cards and Craft  and I have just had a look . and there are some lovely things to see and buy So this is for the challenge - hope you like it - Jacqueline xx. Recipe White card blank Background papers: Hot off the Press Ink: Tim Holtz Distress Ink Pad - Brushed Corduroy Image: Sj's - Little Musings Promarkers All other materials from stash.

Feeling Distressed.

Image
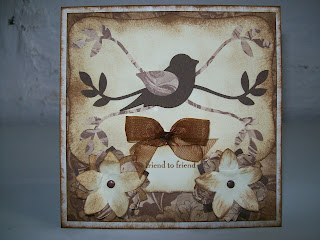
Good morning to you all. I was going to post this last night but the light had gone for the photograph - and I was tired and wanted to watch telly. Not too distressing, however, here is something that is : This is a new paper punch that I have recently purchassed from Stampin' Up and he is called '2 step Bird Punch' - I think I am going to have fun using him. Anyway the theme this week at Paperplay Challenges  is 'Brown and.....?' I have gone for brown and cream - the backing paper is 'Hot off the Press' and I have distresssed the edges using Tim Holtz 'Brushed Corduroy'. The flowers are made from another Stampin' Up punch and I have just layered these up. Here is a closer view :                                   Thank you for stopping by and taking a look - see you soon - Jacqueline xx.     ...

Spiral Bound Book Tutorial.

Image
I love making books, be it memory books or just plain notebooks - I love to make them and customise them. This is one I made today: She was inspired by I sketch I saw on Tuesday Morning Sketches  and I didn't just want to make a card this time. So I used some cereal boxes - 4 pieces 15 1/2 cm by 22cm and I glued them together. I glued the picture sides together so it wouldn't show through my paper when I came to cover it. I then covered over them with brown wrapping paper - I bought it from my local Post Office - and then I decorated them. I used some Anna Griffin blue polka dot paper and inked it with my Tim Holtz distress ink - Brushed Cordouroy and stamped some swirls using Stampin' Up inks Bordering Blue and Night of Navy. The vintage lady is from the Craft Stamper Magazine  web site - I just ripped the edges and inked them. The flowers are punched from vintage papers using the Stampin' Up 5 petal flower punch and again are distressed and inked. I stuck them on with...