Posts

Showing posts with the label 3D Projects

Tutorial Tuesday - To a Wild Rose Penny Slider Card

Image
Today's post is a tutorial on making a Penny Slider card - very easy to do and very effective. Let's go! Gather a few items - card base, coloured and white card stock, inks and a stamp set with large floral images. I used To a Wild Rose. Take your card base and mat and layer coloured and white card stock. Next take a piece of card stock and create a piece to cover at least half of the card front - the wavy line is optional - you can leave it straight if you wish. Now we are going to make a small slot - use a die, punch or do it just by eye but the width must be narrower than your penny. I did mine with a circle punch: punch the holes at the ends of the slot and connect them using a craft knife. Now it's time to do some stamping. Add a background to your card and then make some elements to add to the front of your card and most importantly the things that you want to be able to slide. I want my sentiment to slide and I will also add the bu...

Perennial Essence Follow Up

Image
Following on from my Spotlight post yesterday I have a card to show you using the Perennial Essence DSP - take a look Calypso Coral is a perfect match for this paper and my Floral Essence flowers were stamped with it and then fussy cut to create a cluster. The Paper formed the background along with the Calypso Coral card stock. Also used was the Leaf Punch and Mossy Meadow ink and although this looks fairly OK for the front of the card - just take a look inside More flowers and leaves were made and mounted on to pop-out panels to create this wow card. It folds flat when the card is closed so it's really good for posting. Check out the whole Perennial Essence Suite in the catalogue in my side bar - there's 10% off some of the bundles. Hope you enjoyed today's card - see you soon - J xx

First Christmas Card of the Year!

Image
I love making Christmas cards and the great thing is you can make them all year round and be nice an organised when December comes! Today's card is a very sparkly shaker card - take a look The shaker is made from nesting star dies cut on the Big Shot and filled with glitter and micro beads. Glitter paper has been used for the round panel and then my sentiment has been heat embossed onto a strip of navy card stock. I shall be entering this card into two challenges: Christmas Card Throwdown Freshly Made Sketches It's a Bank Holiday weekend here in the UK but unfortunately I am working - all weekend and Monday - insert sad face here! I am hoping though to get in a little crafting tomorrow afternoon so I hope you will join me then and I do hope that you all have a great weekend - see you soon x

By the Tide Box Frame Picture

Image
No card today but a box frame picture. I picked up a few of these box frames a while ago quite cheaply but haven't got around to filling them up till now. This one has some cut up pieces of mount board that have been stamped and then had clear embossing powder over them - take a look It uses a whole load of blue inks - past and present and some white craft ink too. When the tiles were inked and dry I dabbed all over them with a Vesamark ink pad and then covered them with clear embossing powder. When the heat is applied it gives a glazed ceramic tile effect. I had to put a few layers on but I think the end result is perfect and I'm definitely going to have another go at this. Craft time has been a bit scarce recently as dad's condition is deteriorating rapidly. I've got the Dr, care nurse and district nurses coming today as we need to install a hospital bed for him - not looking forward to that - it all feels very scary!. Thanks for visiting - see yo...

Tent Card

Image
As I mentioned yesterday, today was workshop day. We made Tent Cards - a bit like this I have raided my stash drawer for some 6" x 6" Papermania papers for this one - I love polka dots and this is a particularly pretty one don't you think. I also thought that it matched perfectly with the butterfly paper behind it. I used my Precious Butterflies Hostess set and stamped the flourish in Lucky Limeade. I then cut it out to fit into the corners. The butterflies were inked with Blushing Bride and again cut out before mounting with 3D foam pads. A few teeny tiny flowers were added and a load of bling and pearls! Also as promised there is a free step by step tutorial to accompany this card. Just pop on over to The Craft Club Blog  HERE  to take a look. I am going into scrapbook mode now as I am holding a special Easter Scrapbook Workshop next Wednesday. If you live in the Malvern area and you would like to join in click  HERE  for all the details - spaces are going...

ooooops

Image
OK - who's the numpty that prepared her post last night and forgot to schedule it and left it in draft? Hmm yes well.........any way very late here are my cards for this week's challenge at  52 {Christmas} Card Throwdown . We have an Anything Goes theme this week as it's the 5th week of the month. This being so I have (for one week only) decided to go 'off piste' somewhat and create a couple of 3D objects instead of cards. Please take a look This is a little treat cup hanger that I made at a workshop just before Christmas. It's die cut on the Big Shot and then decorated using the Stampin' Up set Pines and Poinsettias. I've made quite a few of these little birdhouses - they make great holders for choccies!! This one has been decorated with robins made with the S'U 2 Step Bird punch. Some of the leaves have had Liquid Pearls added to look like mistletoe berries. I've also added some frosting to the roof. Mynnette  - my partner in crime...

Rosettes and Cupcakes

Image
I made this card a little while ago but thought I would dig it out today to show you. It's not really 'me' but anyhow - here it is Those rosettes were mighty fiddly things to do I can tell you! I think the card stock may have been a bit thick as they would not lie flat to be glued! Here is a close up The cupcake case was also pleated and my sentiment is from Flight of the Butterfly. Colours used were Baja Breeze, So Saffron, and Regal Rose. The patterned paper is some retired SU Springtime Vintage DSP. I'm feeling a bit peeved at the moment - my daughter has just come home from uni, she's only been home 10 minutes and she's dumped her washing, let the cat in my craft room and now gone out to the pub! I wouldn't feel so bad but my husband escaped with her leaving me to clear up the devastation caused by a rampaging cat! I think I may sulk and not cook any tea! Bye for now - Jacqueline xx

Christmas Cards with Decorative Papers

Image
It's  52 {Christmas} Card Throwdown  time once more and this week Mynnette has chosen the challenge. She wants us to add Decorative Papers as an Embellishment. For my first card I have made some little Christmas trees. They were die-cut on my Cuttlebug using a nesting Bunting Die (Papermania). I attached them together so that although they stand out from the card they can also fold flat for posting - take a look I have used more of my Christmas Wishes DSP as it seems to be going on forever!!! and I have added a sentiment with a Hero Arts stamp. My second card is somewhat different - I had an idea in my head but it didn't come out as I expected. It's very clean and simple in appearance - what do you think? Again using my DSP I made some rosette flowers but only half  and I made them to decrease in size - hopefully to look like a Christmas tree shape. Actually although it looks very CAS it took AGES to make !! - that'll teach me to have crazy ideas!! ...

Spring Pansies

Image
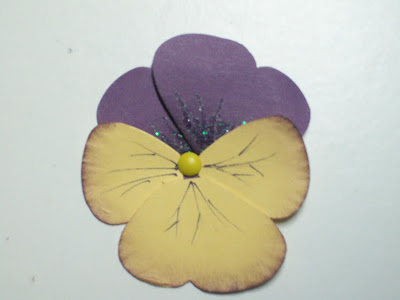
Hello everyone - today is Mid-week Motivation day at  Make My Monday  and if you head on over there you will find a step by step tutorial on how I made my flowers for today's card. Firstly here is a close up of my flower - it's a pansy It's made using the Stampin' Up Butterfly punch. I also used Perfect Plum and So Saffron card stock along with Perfect Plum and Elegant Eggplant ink. The veins were added with a Concord Crush Stampin' Write marker. I made three of these fabulous flowers and added them to a card - take a look The tags are made with Crumb Cake card stock and the Large Tag punch and just elongated a little. The base is Whisper White and the sentiment is from My Friend. I found a few scraps of ribbon to tie in my tags. I hope you like this folks as it's going in to this week's  Simply Stampin'  challenge which is 'Totally Tags'. Also  St. Luke's Charity Cards Challenge  - Spring into Spring and  The Kraft Journal  - An...

Christmas card challenge time

Image
It's time for  52 {Christmas} Card Throwdown  again and this week we have a *THEME* - take a look   My first card features a Polar Bear - star gazing It's an easel card attached to a drawer - great for combining cards and gifts in one and this one would hold a lot of Christmas choccies I think!! Here's a close up It's a Pollycraft digi image and the backing papers are from Pollycraft too - some I purchased a couple of years ago. My image has been coloured using Promarkers. My second card is equally as cute Three reindeer, one with a red nose - I wonder who he could be?! These were made using my 2 Step Owl Punch - a couple of alterations here and there and some googly eyes. Don't for get to visit  Mynnette  - she's done some lovely cards too and then pop over to see the challenge - you might even want to take part! Bye for now - Jacqueline xx

Pinwheel Card Tutorial

Image
My tutorial for the pin wheel card from this month's Tuesday workshop can now be found  here  or by clicking the pic in the side bar.

Perfect Pinwheels

Image
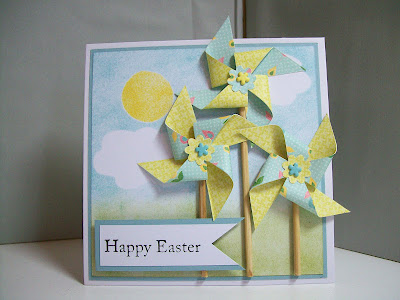
Do you remember years ago when you visited the seaside, you would build fabulous sandcastles and decorate them with windmills? For me those are memories from long ago - even with my own children but today I have made a card with some on to celebrate Easter - take a look It would be very easy to create a beach scene behind these windmills but these have been created with my next workshop in mind. It will take place next Tuesday morning and as always a tutorial will follow. To find out what you will need to make this card should you so wish please visit my Craft club Blog  here . We sometimes finish our cards with a little time to spare - if this is the case next Tuesday I will be prepared and I will demonstrate how to make these interesting little concertina rosette flowers This is a very simple one made quickly for practise - hopefully by Tuesday I will have made so more elaborate ones to show off!! thanks for stopping by to take a look today - hope you pop back again ...

Vintage Aqua

Image
The lovely ladies at  Less is More  have this week given us the challenge of using the colour AQUA . I had a look through my sets and decided on one that I haven't used for a while - Vintage Vogue. I also had a bit of a play and made a 3D rose - I love making these. Here is my card My colour is Stampin' Up Stampin' Write marker - Pool Party. The middle panel is raised and the rose is placed just off this panel with some stamping on the card it's self. Here's a close up Thanks for looking - Jacqueline xx

MMM - Red Ribbon

Image
Good morning all, it's Monday so that means it's challenge time over on the  Make My Monday  challenge blog. This week it's still SEASONAL projects with the added extra of RED RIBBON.  Here is my contribution to the dt line -up It's a Centre Step card - I got the instructions from the Splitcoast Stampers site (via Just Us Girls). I used Kraft card stock as my base and then used SU Lucky Limeade and Very Vanilla. The poinsettias were made using the French Foliage stamp set (see Vicky's blog  here  to see where I got my inspiration for these). They were coloured using Poppy Parade and Lucky Limeade. My RED RIBBON is wrapped around the base with my sentiment mounted onto it. Hope you have the time to pop over to the blog and take a look and maybe even have a go your self. I am also entering this card in to the  Just Us Girls  challenge as they are looking for Centre Step Cards. Bye for now - Jacqueline xx

MMM - Seasonal Glitter

Image
It's week 27 at the  Make My Monday  challenge blog. All the details are over there on the blog and this week we want to see some - SEASONAL GLITTER. mmmmmmmmm glitter - take a look This is an old favourite, one of the first stamps I ever bought - my poinsettia medallion. Instead of going traditional and red with this I went for white. It was stamped and embossed in gold several times and layered up. The  leaves were then glittered in green. It was then layered onto some green card stock and I used a holly punch in the corners. Here is another view I decided to make it into an easel card. And then I decided to make it into a drawer gift box. Hope you have time to join in - or at least pop over to see our two new dt girlies and our Guest Designer. Bye for now - Jacqueline xx

Finished Christmas Box

Image
I was very naughty on Monday and failed to complete my project for the  Make My Monday  challenge. Here's a quick reminder of how it looked  I have completed it now and can reveal that it was in fact an Exploding Box - here is a picture This is just one picture - if you would like to see more please hop over to the  MMM  blog 'cos over there you will see what is hiding in that box behind the Christmas trees - see you soon - Jacqueline xx

MMM - Week 26

Image
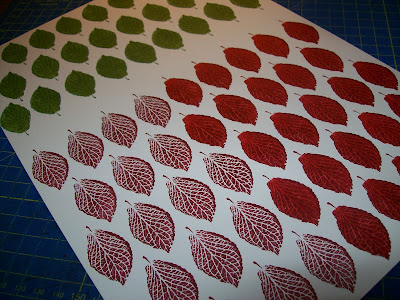
Morning all - it's week 26 over on the  Make My Monday  challenge blog and this week we are making a DECORATED CHRISTMAS BOX Now I have known about this challenge for weeks but I only started planning it last Tuesday. I made the box, the bits inside and the lid. I decided that I would start the decoration yesterday - nothing like flying by the seat of your pants then! This is how it started I stamped out all these leaves (from the French Foliage set) and coloured them with Stampin' Write Markers (Poppy Parade and Lucky Limeade). I then cut them out. Had to take time out to do lunch and tea and then of course there was Strictly and X Factor so at 9.00 last night my box was still not completed!!! Managed to do the outside - take a look It's like this on all four sides - and the lid As for the inside of the box - you will have to wait. I'm sorry I was going to finish it this morning but as I was waiting for Il Divo to appear on Lorraine, I realised tha...