Embedded Embossing, a Tutorial & a Giveaway!
This is such a cool technique - it's called Embedded Embossing and it is so easy. So easy in fact that it only took a matter of moments to do a little tutorial for you.
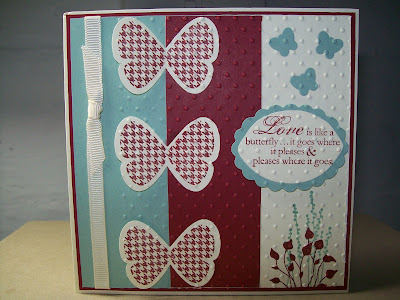
But first my card. I came across the technique when I looked to see what the challenge was today on Splitcoast Stampers. You get together the components of your card - using punched out shapes or die cuts, stick them onto your card and then run them through an embossing folder on your Cuttlebug (other die cutting machines are available!).
I used a base of Sage Shadow with two strips of Very Vanilla and Cherry Cobbler stuck on with a glue stick. I stamped a small motif with Pocket Silhouettes on the Very Vanilla and then stamped the butterfly from Butterfly Prints three times onto some scrap. These were punched out using the butterfly punch. They were then stuck down half on the Sage Shadow and half on the Cherry Cobbler. Three tiny butterflies were then stuck on in the top right hand corner. This was then run through the 'Bug in a Swiss Dots embossing folder. The sentiment was done in the same way and placed on with 3D foam pads. A piece of Very Vanilla ribbon was added and then the whole thing was mounted on to a mat of Cherry Cobbler and then adhered to a 5" x 5" card blank. Here are some pics to show you better what I mean:
Gather all your bits and pieces
Stick them all down
Run through an embossing folder
And this is the result.
This is an ATC - artist trading card and is up for grabs if you want it. You must be willing to swap in return and you must leave me a comment - I will choose a winner in a week's time.
My stomach is telling me it's lunch time so I'll see you again soon - Jacqueline xx.


This is a fun technique isn't it - and works rather well. It's the Easter holidays and I am completely time-challenged so I'm not going to be able to play - but I wanted to comment anyway!
ReplyDeleteI would love to receive such a fine example of a lovely technique, i keep meaning to try it myself but i always find all sorts of other stuff to try it is on my to do list well done x
ReplyDelete