Posts

Showing posts from November, 2010

It's so frustrating.......

Image
.......... I hope I'm not being a killjoy but - I hate the snow. I was supposed to be going to see my Dad - he is in hospital this week but with the present conditions and the forecast - I don't think that's going to happen. Also this Saturday is the Christmas Fair - I have worked quite hard to make loads of stuff for this so I'll be very disappointed if it doesn't come off. Plus - and this is the worst - the snow has knocked out our Freeveiw box and I can't watch Neighbours. Somebody please tell me if Donna gets to Ringo's funeral on time!! OK - sad, ranting lady has now finished and I will now calmly show some mini calendars I have made. Really quick and simple to make - These have been made using Stampin' Up 'Elegant Soiree' DSP and the Boho Blossoms punch and they are just offcuts of chipboard, covered and decorated with a bit of Very Vanilla ribbon for hanging. Will leave you now with a pic of the view from our house across the valley Se

Post it Note Holders.

Image
A very long time ago I came across a blog with these delightful little post it note holders, click here  to go and see them. I downloaded the instructions - and must have forgotten them because when taking a tour around some files I found them again! I didn't make mine exactly the same - I didn't add the holder for the paperclips. I thought that they would make cute little stocking fillers. As you can see I have used the very versatile 2 Step Bird Punch and also the Scallop Edge Punch and they are so easy to make, Jo has made her instructions very easy to understand. So - only 27 more days left to the big day - is anyone excited yet? I bought some tree lights today only to get them home and find that they don't work... doh! Bye for now - Jacqueline xx.

Raffle Prize.

Image
Hello again folks. Today's effort is not a card and I hope I am giving some inspiration to the Ladies of my craft group by posting this. At the last workshop I set the last challenge of the year which was to make something but not a card. This is a calendar with a notebook and it even has a place to keep your pen. This is made from an off cut of chipboard covered with some of the new Stampin' Up DSP - Elegant Soiree. The note book is one I had bought intending to cover but it all went a bit wrong and the cover came off completely (nearly threw it through the window actually!!) anyway it looks much better now. I stuck a little more of the paper over it so that the pages didn't fall off and I stamped the first page with a stamp from Just Believe. The pen holder is again a piece of the DSP wrapped around the pen and glued securely under the note book. I printed off the calender page, cut it up and fixed that on with brads and then used some jumbo eyelets to attach the ribbon

Looking for some inspiration.

Image
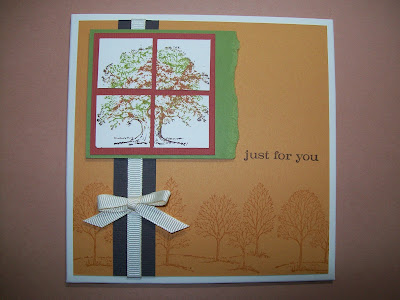
And I found some! I had a trawl last night through some past Stampin' Up catalogues - well they do call them idea books too - and saw a lovely card using Lovely as a Tree. It's a very close copy but I added a couple of extras - more stamping, ribbon and a different sentiment (from Just Believe). The colours that I used are More Mustard, Old Olive, Really Rust and Chocolate Chip. So that's this morning taken care of. I need to go and get a coffee now - it's so cold in my craft room this morning and my fingers are going numb! See you soon - Jacqueline xx.  

Christmas Tree Challenge.

Image
It really is getting close to Christmas now and as I have a stand at the Village Christmas Fair I am working hard to fill my table with lots of Christmas goodies. So with that in mind today I have made a card to add to the pile. I followed a sketch for this card but rotated it counter clockwise . Recipe 5" x 5" cream card blank Card stock - Stampin' Up - Handsome Hunter, Crumb Cake, Chocolate Chip & Very Vanilla. Ink - Stampin' Up - Handsome Hunter. Stamps - Hero Arts - Happy Holidays Trees & Stampin' Up - Lovely as a Tree. Stampin' Up - Scallop Edge Punch Glitter & adhesive stones. This card will be entered into the following challenges: Sketch Saturday  - Sketch (see above). Die Cut Dreams Christmas Club  - Christmas Anything Goes. Craft Your Days Away  - Christmas Trees. Thanks for looking - Jacqueline xx.

Simply Sayin'

Image
Brrrrrrrrrrr - it's cold out there. Just been to do the weekly shop and can't see a thing it's so foggy. I live next to a cider orchard and the boys have been picking the apples with their huge tractors. Those massive wheels have really churned up the field and everywhere is a sea of mud - not a good start to the day. However here is a card to hopefully cheer you up This is using one of my favourite Stampin' Up colours - sadly now retired - Brocade Blue. I used the Simply Said stamp set along with the tiny flower from Flight of the Butterfly. It is all the same ink although I stamped the image two or three times before re-inking to get differing tones. The main card is Very Vanilla and I have also used a small piece of Crumb Cake (mmmmmm cake). For a finishing touch I added some tiny blue sparklies to the centres of the flowers. I am off now to scrape 3" of mud from my shoes and the kitchen floor! See you soon - Jacqueline xx.

Another Pop-Up Card.

Image
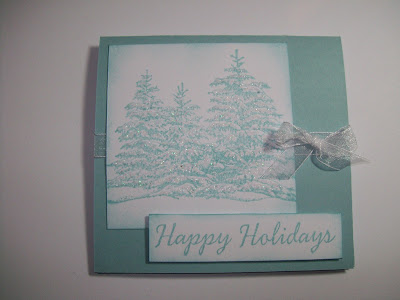
Well, we all had a good night last night making our Pop-Up Christmas cards. Most made tree scenes as I had done except one lady who made a lovely card with pop-up snowflakes - very effective. The Christmas Card and matching Gift Tag competition prize went to Louise - she made a lovely card and tag in traditional red and green and had added robins made with the 2 Step Bird Punch. The card I made was using another Hero Arts stamp - Happy Holiday Trees. I used Baja Breeze card stock and ink (Stampin' Up), and some sparkly glitter. Here's what it looks like inside - The sentiment is from the Wondrous Gift stamp set and the little twiggy thingy is from Lovely as a Tree. Now, some say ................... it's only FIVE weeks to Christmas!! Yikes how did that happen? I've only got two weeks left to prepare for the big Christmas Fair in the village. I think I'm going to very busy in the next few days! - See you soon - Jacqueline xx.

Christmas Tutorial.

Image
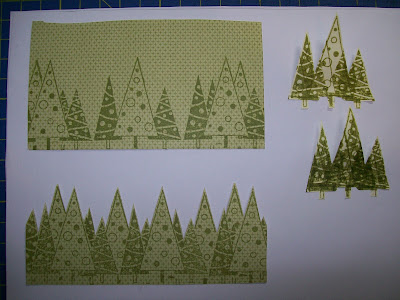
Hi there - it's been a while again. Been working hard with village hall committees, art workshops and the local Mother and Toddler group. However I have a craft workshop tomorrow night so I 've been doing some preparation. We are doing 'Pop-Up' Christmas cards and as I was working out what we would do I decided to make it into a tutorial so everyone could have a go. Here is what to do: Firstly - find a stamp that you like and that can be made to 'pop-up' inside a card. I used the Sparkle Clear Merry Christmas stamps from Hero Arts. Then stamp the image in a long line. I also used some post-it notes to make a 'mask' so I could also stamp in between the image. Cut the image out. Then take a rectangular piece of card and fold it in half. Take a smaller piece of thin card or paper and make a mat for one half. The edges of this can be sponged and don't forget to leave a small margin. Then take your strip of trees and stick them over the mat.         

Challenge Time.

Image
Do you know it's ages since I did a challenge card - how shameful! So in order to rectify this I found a challenge over on The Shabby Tea Room . The theme is 'Lavendar and Lace' and here is my card I used a square card blank as my base and added some 'Lavendar Lace' card stock. This was stamped with the florish stamp from the Vintage Vogue set (Stampin' Up) in Lavendar Lace ink. I then used Pocket Silhouettes for the main image - I was hoping that it looked like lavendar flowers, these were stamped in Lavendar Lace and Elegant Eggplant. The flowers down the side are also stamped in Elegant Eggplant and are also from the Vintage Vogue set. The gorgeous lace is some I was sent by a lovely lady who lives in Cypress (thank you Cath!) and I added a few flat backed pearls. Thanks for looking - Jacqueline xx.

Ornate Flower.

Image
I just love this new stamp set Ornate Flower and this is another card I have made using it I used some Basic Black and Ruby Red cardstock along with some white. The flowers down the right hand side have been stamped in Ruby Red ink and the main flower is stamped in black. Looking at it now I rather think that next time I shall use black embossing powder for a bit more depth of colour. The script in the background is an old dictionary page which has been torn and the edges inked. I'm very pleased though with this colour combination and I think I shall be using it some more. Hope you all enjoyed your weekends - any one started their Christmas shopping yet? - Jacqueline xx.

More Christmas Ornaments.

Image
This is a card I have seen a lot of recently - I could'nt tell you who did it first but it's rather a nice design. Mostly I have seen it done with the Stampin' Up ornament stamp and punch, I however had a stamp I bought last year and tried to make it work with that. As you can see I used the fir tree from Lovely as a Tree and made it into branches. This was stamped in Handsome Hunter ink and then I stamped the baubles in Ruby Red. I then cut them out and stuck them on using 3D foam tape and I added a couple of gold bows. I managed to stamp the sentiment a bit wonky so I restamped it and punched it out with a scallop oval. This one is more or less the same - I just stamped the baubles in versamark ink onto red card stock and then heat embossed using gold embossing powder. Well I didn't get to see any fireworks last night - after a day running around town with my daughter (which by the way was very nice) I was too shattered to do anything else but veg out in front of th

Christmas Cheer.

Image
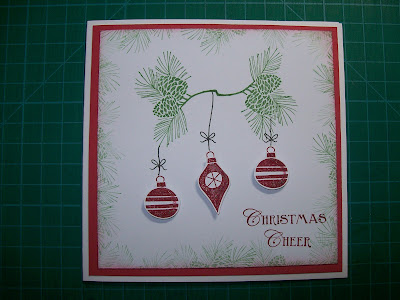
Christmas is drawing ever closer - only 7 weeks. So I thought I'd show you a card I made using a little ornament set I have I stamped the branches in Garden Green and used that also to go around the edge of the card. I used a home made stamp positioner to join the branches together. (The branch is from the Autumn Days set). I then stamped and cut out the tree ornaments from Hung Up on the Holidays - I used the new Cherry Cobbler ink for this. The sentiment is one I have had for years - also stamped in Cherry Cobbler and I drew the hangers by hand. Hope you are all having fun firework watching - I'm off to a do tonight - weather permitting! Bye for now - Jacqueline xx.

A Little Sympathy.

Image
Sadly a friend of ours passed away last week - one of our neighbours'. This is the card I made It uses the new set from Stampin' Up - Ornate Flowers. I've also used some of the new colour - Baja Breeze. I teamed it up with some Bazzill Basics card stock and some Versamark ink. The ribbon is quite a good match with the brown card, I actually cut it out of a jumper I bought recently - you know the bits that get all tangled up on the hangers - looks much better on my card I think! See you soon - Jacqueline xx.

More New Stamps.

Image
Golly - it has been over a week since my last post - did you miss me? I have been away for a few days visiting family but now I'm back and getting back into the swing of things again. Lucky me - only been home a little while when my new stash arrived (thanks Sue) and look what I have made This uses the new Butterfly Prints stamp set and I love it. It fits nicely into the butterfly punch too. I used some of the card from the Neutrals range - Crumb Cake and Basic Black along with Ruby Red and I also used one of my old favourites - Pocket Silhouettes. Please pop back soon as I also have Ornate Flowers to try out next - bye for now - Jacqueline xx.