Posts

Showing posts from August, 2010

Beach Huts in the Craft Garden.

Image
Hi folks - I found this challenge blog this morning and there are but hours left in which to take part. The blog is  The Craft Garden  and the theme is 'Beach Huts' and they are one of my favourite things about the seaside. Here is my card    The digi stamp is one I found on the Little Musings  blog and I teamed it up with some K & Company paper from the Sea Glass range. The shells are real and it wasn't until I had stuck them on that I realised - they probably won't go through the post - doh. Will have to give it to someone by hand! Bye for now - Jacqueline xx.

A Birthday Card.

Image
Just a quick post to share with you a card I made for a friend who's birthday it is today. It has been made using the Stampin' Up set Greenhouse Garden and Distress Inks. The flowers were stamped separately, cut out, shaped with a bone folder and then stuck on the card using 3D foam pads. Little touches of bling were also added. Happy birthday Rachel - hope you have a great day! - Jacqueline xx.

Anniversary Card.

Image
Hello to all you lovely crafters out there. Today I thought I would share with you an anniversary card I made for my Daughter to give to her boyfriend's parents. I think she said they had been married for 23 years. I chose Bird on a Branch for it's simplicity and Taken with Teal 'cos turquoise is Lyn's favourite colour. This is one of my favourite Stampin' Up sets - very versatile and I don't think that it needs much more than that. I put a sentiment inside with a little more of the card stock and wrapped some taffata ribbon twice around the front. Hope everyone is enjoying the Bank Holiday Weekend - see you soon - Jacqueline xx.

All Things Tim.

Image
That being Tim Holtz of course - but you knew that didn't you? And of course you all know of the fab new challenge blog now into it's third challenge over on Simon Says Stamp and Show . So this week it was All Things Tim Holtz Inspired and I am very late in submitting my entry on account of all inspiration leaving my head and going on holiday! Any how this is what I have managed to come up with. It's a tag inked with Brushed Corduroy DI's and then spritzed with gold mica powder. A piece of torn ledger paper has also been added. On top of that is a pair of golden wings and a heart cut out of grungepaper and a grungepaper rose coloured with Tattered Rose DI. There is some Rock Candy Distress Stickles on the rose too and a couple of florishes also coloured with DI - Peeled Paint. (Would have added a Memo Pin and a sentiment but haven't got round to ordering them yet!) Thanks for taking the time to look - have a good Bank Holiday Weekend - Jacqueline xx.

Making a Splash.

Image
I actally managed to make my three atc's for Addicted to ATC's  today. Whether or not they will be in time for Tuesday - I don't know! I went to my local P.O and last post went at 4.45pm - I always thought it went at 5.45 DOH! Anyhow - they are in the post now and must take their chances. The theme this month was 'Make a Splash' It could be anything to do with water so I decided upon a seahorse. (Mainly 'cos that is the only watery type stamp I had!). These were made using very dark card stock (Stampin' Up Night of Navy & Handsome Hunter). The card stock was then covered in Versa Mark ink. I then got my Cosmic Shimmers out and threw on some blue, green and gold powders and blended them with a soft paintbrush. I inked up my seahorse stamp again with the Versa Mark and stamped it onto the cards. This 'lifted' the powder off the card to reveal the image. (If you try this remember to clean your stamp well afterwards as it ruins your ink pads). I t

Winter Wonderland.

Image
Did you see my brayer tutorial yesterday? Well after telling you all how I made my card I forgot to link it to the challenge I was making it for! The challenge is over on Winter Wonderland  and the theme is 'Walking in a Winter Wonderland'. Here is the card He is made using Stampin' Up stamps,inks and card stock and if you would like to see how I made him please click here . Thank you for taking the time to look - Jacqueline xx.

Brayered Christmas Card Tutorial.

Image
I have been told recently that many crafters find brayering difficult. With that in mind I have made a simple brayered card and broken it down into 7 easy steps. You will need: 5" x 5" card blank Dark card stock 4.75" x 4.75" White card stock 4.5" x 4.5" Speedball Brayer Large ink pad (suitable for inking up your brayer) & various other ink pads Post-it-notes Large circle punch Tree, foliage, sentiment stamps & image to be focal point ie - bird Scrap paper Glitter & adhesives . Step 1 Ink up image to be focal point and stamp onto white card stock. From a post-it-note punch a large circle ensuring that there is enough sticky to hold the circle in place on the card (see above). Also stamp main image onto a post-it-note and cut out. Step 2 Place mask onto main image and then from some scrap paper tear a piece roughly as above and place on card about halfway down. Secure with masking tape. You may find it useful to have a wad of paper u

Just For a Change....

Image
...I decided to make something for ME. I make loads of cards and papercraft items and more often than not they end up being sold or used for family and friends. So as I said this is for me My diary/organiser has disintergrated in my handbag and all my pages have got ripped and dogeared. So I have made a new one. I painstakingly printed off various pages - ('cos I have customised it for my own personal needs), and made dividers. The covers are made of grungepaper coloured with Tim Holtz distress inks - Tattered Rose and Brushed Corduroy. I then sort of used a technique I saw recently on Wendy Vecchi's  blog where she colours her grungepaper flowers white before colouring them with ink - I used white acrylic paint instead of a white ink pad. So after colouring the flowers white I used some Stampin' Up ink pads to colour them, I then stamped over them with various stamps from my stash. As you can see I attached the flowers with jumbo brads - I thought that if I just glued

3 Little Birds.

Image
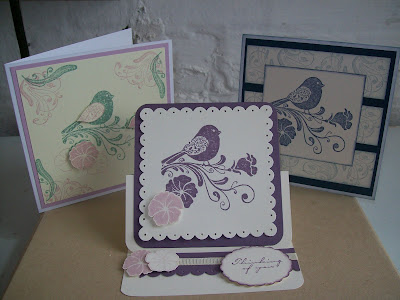
A little while ago my friend Bev lent me some of her Stampin' Up sets to play with. You have already seen the Loads of Love and now it is the turn of Whimsical Wings. It is a lovely set but only available as a Level 2 Hostess Gift. Here's what I made I managed to make 3 cards before she snaffled it back! I used S'U card stock and inks - left is Pale Plum and Mellow Moss, right is Night of Navy and Bordering Blue and the center is an easel card using Perfect Plum and a touch of Pale Plum. They all had Very Vanilla as a base. (Except the one on the left - I don't know where that came from!) Hope every one has enjoyed their weekend, see you soon - Jacqueline xx

Just Thought You Might Like To See..................

Image
...............the cards we made at my last workshop. Everyone was instructed to bring 3 sheets of A4 card and it was my intention that we made 3 cards. Firstly we made the pull-up card Next came the side - step card and as you can see - I love my Stampin' Up Flight of the Butterfly set. (I will be getting something new and different soon - promise!) Now if you have been very careful cutting there should be enough card left to make the final card That's all for today folks - my next workshop is more brayering techniques - Jacqueline xx

Poinsettia Christmas Card.

Image
So a little bird told me today - 'it's only 18 weeks 'till Christmas' - yikes that's not long is it? Still I have been planning ahead and I have a fair few cards made for the festive season. Including the one I made today for the Die Cut Dreams  Christmas challenge blog. The theme this week is 'Poinsettia' and I dug out a stamp that I haven't used for absolutely ages. It's from Creative Expressions and is a gorgeous Poinsettia medallion. The image has been stamped onto decorative Christmas paper and embossed with gold embossing powder. I stamped about 5 images and then cut them out getting a bit smaller with every one. I then layered them up with 3D foam pads. The stars in the corners have been glittered. All the paper was from the Stampin' Up Simply Scrappin'  'I Wish' collection. It's an easel card and this is what it looks like open Thanks for popping over to take a look - Jacqueline xx.

An Homage To.....

Image
...........THE Wendy Vecchi. For those of you not familiar with THE Wendy Vecchi - please click here  - this link will transport you quite effortlessly over to the blog of the lady herself. Take a look - it's quite breathtaking. So on to my poor imitation This is for this week's challenge over on the Simon Says Stamp & Show  blog. The challenge is to create a piece of art in the style of (THE) Wendy Vecchi. Now unfortunatly I don't yet own any of her stamps so I had to improvise. I used chipboard for the base, an old wooden cotton reel (I know spooly things are what's proper - but they were out of stock) grungepaper flowers and a few bits of bling. The foliage was cut on my Cuttlebug. Oh and the butterflies were punched out of grungepaper with a Stampin' Up punch. I also used a S'U stamp (Flight of the Butterfly) to put the polka dots on the flowers and butterflies. All were coloured with Tim Holtz Distress Inks and spritzed with mica powders. Thanks for

WOYWW -63

Image
O.K - who has had their finger on the fast forward button this week? It really can't be that time already. But I suppose it must be because if you click here  you will be magically transported through the ether to the fabulous world that is WOYWW! This is my desk this morning - It is a bit of a mess I know but I am having the best time making my project for the next Simon Says challenge so all my distress inks are out along with pieces of grungepaper, chipboard and mica powders etc. Thank you to every one who gave me ideas for my clock cogs - I think I know what I am going to do with it now. Also last week you may remember I was making a garden journal to enter in the local garden club 'Show'. Well here is said journal The journal was entered and so was my daughter's Victoria Sandwich. My daughter was pipped at the post this year and she came second - I however came third beaten by a hat and one of those doilly things - you know the things - my nanna had them over

Guest DT

Image
Gosh this is early for me - I'm posting at 7.00am. Have a very busy day today - got my friend and her little girl Amelia comming over soon, I have a Garden Show to organise for this evening and a workshop tomorrow morning. But better than all that - I have a guest spot on the Die Cut Dreams Challenge Blog. The theme this week is ' A Tag - but no Stamping'. Here is my card Yikes - no stamping, that was quite a challenge! However with my trusty Stampin' Up punches I created this flower pot card with a lift out tag for writing greetings and messages. Don't forget to hop over to Die Cut Dreams  to see all the other DT samples - and why not have a go yourself! Thank you Susie for this oppotunity to be Guest DT - it's been fun! Recipe Card Stock - Stampin' Up - Apricot Appeal, Taken with Teal, Lavender Lace, Rose Red & Old Olive. Bazzill - brown. Cuttlebug & Embossing folder - Swiss Dots & Floral Fantasy Punches - Stampin' Up - 5 Petal Flower,

More Samples........

Image
....these are for my workshop on Tuesday morning. The main 'make' is this Pull-Up Card It's made with my set of the moment Stampin' Up Flight of the Butterfly and some Elegant Eggplant and Lavender Lace card stock. This is a very clever card as it also slides shut for posting. Hopefully there will be time (and card left!) to make two more (hense the title 'Pull-Up Card and More') both the the same colour combination. Details of my workshop are in the side bar if you are interested - see you soon - Jacqueline xx.

WOYWW

Image
Good morning everyone welcome to another Wednesday - I'm sure you know that by now Wednesday means you hop over to Julia's blog  at the Stamping Ground and spy on all the lovely desks there. On my desk this morning there is the makings of a Garden Journal. It is the local village Garden Club Show next week and there is a craft section, so I thought I would enter that this year as last year my Victoria Sponge was unclassified! (My daughter's sponge came first and she still gloats about it to this very day!!!) So as you can see there are various pieces of chipboard, Grungepaper, tags and my precious K & Company papers. Also my favourite gadget - my Bind-it-All - love making things with that. Also I have this: I found an old and battered clock and was going to take it apart to use all the cogs and thingies but I don't know if I have the heart to do that. It looks kind of nice as it is don't you think....? Any body got any ideas please? O.K - so I'm off sh

Things with Wings.

Image
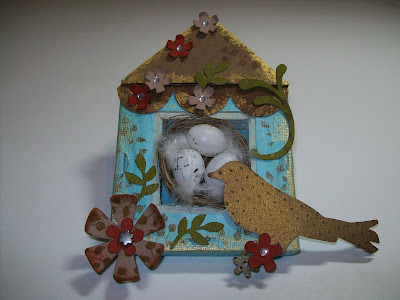
This is a project which has been a long time in the making. It has been in the back of my mind for absolutely ages and should have been finished for at least two challenges, but somehow it just didn't happen. I reckon I was subconsciously (yikes - big word!) waiting for this NEW challenge blog to begin. The new blog is Simon Says Stamp and Show.  It encourages art work in the style of Tim Holtz, Wendy Vecchi and other vintage greats. This week's theme is 'Things with Wings' So - my wingy thingy was made with a mini canvas (4" x 4") and I painted it with a turquoise acrylic paint. The frame was then rubbed with Brushed Corduroy distress ink and gold acrylic. I then used some Stampin' Up stamps to give some foliage detail. The roof is made from chipboard and Grungepaper coloured with DI's again and Grungepaper flowers and leaves. My bird is also Grungepaper cut with a die in my Cuttlebug and I also put it through an embossing folder before I coloured

More Christmas Cards.

Image
Hello - just thought I'd show you some more of the cards I have made for my 'Christmas' workshop on Thursday evening. My favourite is the one in the middle - it uses Stampin' Up Pocket Silhouettes and Autumn Days and is really quick to make. Also used my 2 Step Bird Punch to make the robbin and the gold embossed tree is from the Wondrous Gift stamp set. The object of this workshop is how to produce easy cards that are quick to make - and get a head start on making them in time for Christmas. Hopefully by the end of the evening everyone will have at least three cards made. Details of the workshop are in the side bar if anyone is interested - bye for now - Jacqueline xx P.S - Cath if you see this - thank you for re-following me over here, I really appreciate it xx.

WOYWW - 61

Image
Gosh is it that time already? Bit late again this morning - my son is off to the 'Big Chill' music festival tomorrow. There is now a huge mountain of food in my kitchen - it still won't be enough. Good job it's not too far away - I have visions of him phoning us for more supplies!!!! Anyway - back to the matter in hand....... my desk This week I have been mostly working on making samples for my Christmas workshop next week (some of which can be seen in past posts). Above you can see the magnetic board I'd found last week - not finished yet, some little items of card candy I'm making for the lady who has won the challenge set at my last workshop and my Grungepaper and Distress Inks. I am going to alter a mini canvas and you can just see a teeny nest and eggs that my friend Rosie gave to me - I have the perfect project in mind for it. O.K. I'm off to Julia's  now to spy on everyone else's desks - Jacqueline xx.

Project Tuesday.

Image
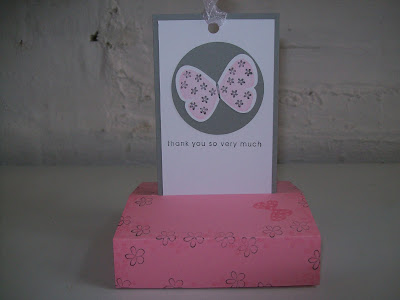
Hello again folks. I know in my last post I said I was going to do my housework - but I had a sudden thought. I had made my project for the Project Tuesday  challenge but I hadn't inserted the gum - it's a Gum Holder you see This is made from all Stampin' Up stuff - Very Vanilla and Certain Celery card stock, Certain Celery and Always Artichoke inks and the Greenhouse Garden stamp set. I followed Dawn's video tutorial on You Tube and found her instructions really easy to follow. I really hope I haven't missed the deadline on this - so sorry to be posting it so late. Until tomorrow - Jacqueline xx.

Loads of Love.

Image
Now if you have been to my other blog you may recognise the title of this post - this I suppose is part two. Same stamp set (Stampin' Up - Loads of  Love) but a different design. This card is for the Die Cut Dreams  challenge blog where the theme is 'Gingham' . The main image is stamped onto S'U Very Vanilla card stock in Rose Red ink and then coloured with a water brush and distress inks (Brushed Corduroy and Fired Brick) The backing papers are all from a set I had off QVC soooooo many years ago I forget what it is called!!! and the flowers are 7 Gypsies. I cut the little florishes on my Cuttlebug. Have been playing all day so I must really go and do some housework now! - so long - Jacqueline xx.
Loads of Love.

Image
This is a cheeky little card I made for my Christmas workshop next week. It uses the Stampin' Up set 'Loads of Love' and DSP from the Simply Scrappin' 'I Wish' set. My friend Bev very kindly lent me the set to play with a little while ago along with the accessories set so I may make a couple more. Unfortunately you can't see the glitter on the trees to give it a bit of sparkle and I also inked the edges with Always Artichoke. This is another card I made for my workshop. The theme is 'Quick & Easy Christmas Cards' and it will take place at my home on Thursday August 12th at 7.30pm. Hope to see you there - Jacqueline xx.
Mistletoe Kisses.

Image
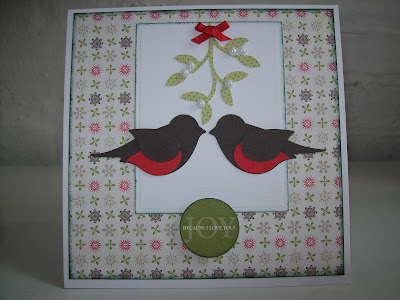
Hello again - second post today and another challenge. This time it's for the Die Cut Dreams Christmas Club  and the theme is 'Mistletoe Kisses' . This is my Stampin' Up 2 Step bird Punch and some DSP from the 'I Wish' Simply Scrappin' kit. The red breasts on the robbins were just wings punched from red card, and the mistletoe was made from the branch pieces. The mistletoe berries are flat backed pearls. Got to dash - my tubs and hanging baskets are crying out for me to water them, then I think I may water myself with a glass of wine (or two!!!!) - see you soon - Jacqueline xx.

Wild Wedding at Just Us Girls.

Image
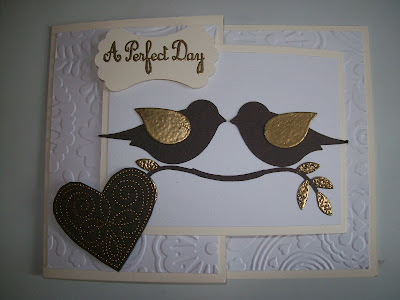
Here is the card I made for the 'Wild Wedding' challenge at Just Us Girls I made a Joy Fold card andI used Stampin' Up Very Vanilla card stock, 2 Step Bird Punch and Polka Dot Punches heart stamp, some Bazzill card stock (brown and white), gold embossing powder and my Floral Fantasy embossing folder in my Cuttlebug. This is the inside - again using the S'U Polka Dot Punches heart stamp. Hope you like it - see you soon - Jacqueline xx.