Posts

Showing posts from July, 2010

Christmas Challenge Card.

Image
Hello - been a bit absent from this blog for a while but pop over to my other blog and you will see that I haven't been idle - been makin' loads of stuff over there! Any ways - back to the here and now - I have made a Christmas Card for the Winter Wonderland  challenge blog. The theme is - No Designer Paper Challenge. Here is my card I used a 5" x 5" card blank, some Stampin' Up card stock in Night of Navy and plain white card. I punched the moon from a post it note, tore some copier paper to mask the hills and brayered over the card using S'U ink Brocade Blue. The trees in the background (S'U - Lovely as a Tree) were stamped before removing the hill masks. My Papermania Reindeer stamp was inked in Night of Navy and was stamped twice to make him stand out more. I then added a little silver glitter as a finishing touch. Hope you like him - Jacqueline.

Brayered Reflections

Image
Hi folks - just a quick post to show you some work I've been doing with my brayer . The images were made by making a mask for the moon with a post it note and placing two on the paper so one acts as a reflection. Blue ink was then brayered over the top. The reflected trees wee added next by inking up the stamp (Stampin' Up - Lovely as a Tree) and rolling the brayer over the top, it is then transfered to the paper via the brayer and the stamp can then be re - inked and stamped on to the paper to produce the main image.  The Bird on a Branch (S'U) was made in the same way. The mountains in the background were made by ripping copier paper into 'mountain' shapes, sponging and then reversing to make the reflection in the water. Hope you like them - Jacqueline xx.

Family Fun.

Image
Hi there folks - thought you might like to see some things I made for a family lunch I organised the other day. The invitations only went out to the ladies of the family - eight of us. I made us all a little goody bag as a memento of the occasion - take a look Inside were lip balm holders and post it note holders with mini pens ( made using my Stampin' Up set - Pocket Silhouettes).   Here they all are waiting to be placed around the table We had the best time and we ranged in age from 18 to nearly 80. It has been a difficult time lately as we have all experienced hard times. My father-in-law died very suddenly, my dad's cancer came back, my husband's uncle has had major heart surgery and my nephew has been diagnosed with a brain tumour - and although some of us are hopefully through the bad stuff now I thought we all deservered a treat. We talked and laughed and nobody mentioned any of the hard times and I think everybody left with a smile - well worth all the effort. See

WOYWW

Image
Yikes - I'm a bit late posting today, but when I got into my studio this morning I had forgotten that it looked like this I had a big family lunch yesterday and 'cos our house is so small, I have to keep stuff moving from room to room in order for there to be enough space. So I got to work straight away and now my desk looks like this There is a hidiously green magnetic board complete with snail magnets that I won in a raffle - just right for altering, some wooden drawer knobs onto which I will attach some foam to use with my disress inks and my chipboard albums from last week that I didn't get round to doing. Also found when clearing from one room to another was my old jewelery display board which will soon be converted to a card display board and an old set of corner shelves. All they needed was a quick flick of a J-Cloth and a spray of Flash (oops advertising - other cleaning products are avaliable) and they now stand proudly in my craft room displaying my most recent cr

Keyring

Image
Hi folks - hope you had a good weekend and didn't get too much rain. I managed to dodge in and out of the showers and I got quite a bit of weeding done. Managed to get some crafting in too - making something special for my big family lunch tomorrow. And also squeezed in a bit of time to make this - I needed a new keyring for my keys and thought that my Grungepaper would fit the bill perfectly. So I drew around some chipboard flower shapes onto the Grungepaper, cut them out and coloured them with my distress ink pads. I then punched holes in the middle of the flowers and put them all together on a jumbo eyelet (Stampin' Up). Before closing the eyelet I used a piece of Grungepaper to make a loop through which I inserted a ring binder clippy thingy (will change that though as soon as I get my Tim Holtz Idea-ology D-Rings through the post). Thing is - now I have made it, I don't want to put it in my handbag with all the rubbish that accumulates in there. Think I will have to ca

A Great day.

Image
Now I don't always say it, but today has been pretty good (not so good at the mo - thunder storm approaching so may lose power any second). Started the day off at  Rosie's where me and four others made these gorgeous cards using the fab Stampin' Up set - Nature's Nest. Sorry about the chipped paint and socket - I take the distressed look into my decor too you know! So after my lunch I then did a bit of tidying and decided to do something with all the sponge wedges seen yesterday (scroll down to the last post and you will see). I punched out (with my tab punch) tabs in all the S'U coloured card stock that I have and attached them to said sponges - like so I also did  colour charts of all the matching inks too - how's that for being organised eh? Can't remember where I saw the idea for the sponges - it was something I found mooching round You Tube one day. I even found time to race off to my local craft shop to buy a huge amount of card stock for something I

Pink & Girly DT Call.

Image
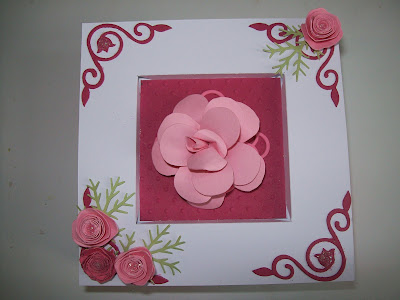
This is a card I have made to apply for a position on the Die Cut Dreams  Challenge blog Design Team. The rules are - make a card that is new and not blogged before, not combined with any other challenge and following the theme of Pink & Girly. O.K. so blowing my own trumpet now (not part of the challenge but hey - no one else will!!!!) I made a Recessed Window, Easel Drawer Card - take a look The Recipe for this card is : Basic white card stock Stampin' Up card stock - Rose Red, Regal Rose, Pretty in Pink & Certain Celery Sentiment - S'U - Simply Said Various dies & embossing folders Cuttlebug Glitter & Brads The flowers are hand made although the greenery is from a paper punch. Thank you for taking the time to look - hope you enjoyed looking, see you soon - Jacqueline xx.

Wednesday Again.

Image
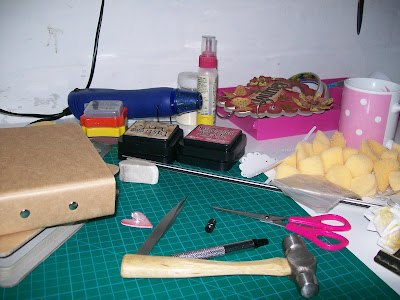
Golly that came around quick - the weeks are just flying by! So Wednesday heralds a new WOYWW over at Julia's  and today my desk is a) recovering from a mamoth grunge session and b) preparing for another!!! Can you see all the sponge wedges - I bought those at The Range Sunday - perfect for distressing. And I have a couple of Maya Road chipboard albums one of which will house the photo's I took at the weekend of my daughter's belated 18th birthday party. (It had to be put back 'cos dad was having his chemo treatment) Dad is a lot better now and here he is (white shirt) at the party -his hair is just about starting to grow back now. Mind you it all fell out again when we told him he was paying the bill!!!!!   Have a good Wednesday folks - Jacqueline xx.

Journey.

Image
How many of you like me have drawers,shelves, boxes where stuff gets shoved  placed carefully 'cos you are going to do something with it later - but then never get round to it and those drawers, shelves and boxes just keep getting fuller and fuller? Well I decided I was going to do something about it 'cos I have all three - drawers, shelves and boxes........... Now just lately I have have been inspired by a couple of blogs whose work is just fabulous and it has really got crafting mojo working. One such crafty Goddess is Hels Sheridan  and she has a kind of challenge that she sets on a Sunday called 'Sunday Stampers' This week is 'Believe &/or Journey' and this week I think that I have actually produced something worthwhile. This is what it looked like before It started life as a pretty boring looking book, one that I think I had given to me ages ago and I didn't know what to do with and so threw   oops no placed carefully in recepticles mentioned a

Christmas in July.

Image
I'm starting to stock pile a small amount of Christmas cards now which is very good as I am usually still making mine on Christmas Eve! And I love making Christmas cards because you can be very over the top and add loads of glitter and bling! The one I made today has a moderate amount of glitter and bling and a gorgeous little digi stamp downloaded from Pink Gem  web site. Used some Christmassy backing papers and my Promarkers. This is for the Pink Gem challenge this month here . The challenge was to follow the sketch and the optional extra was to decorate the inside. Here is the sketch And here is my creation I made an easel card so I guess the decoration in side would be under the flap - like so - I then decided to mount the card on a drawer - a good place to put a christmas pressie or some choccies I think I would like to enter my card/box into the following challenges Pink Gem  - Sketch Die Cut Dreams Christmas Club  - A Very Beary Merry Xmas Bee Crafty - DOWNLOADS  - a

Colour Challenge and a Fond Farewell.

Image
Hi crafters - this is a card for a challenge that only started a little while ago but is sadly finishing this week. I think I have entered 4 out of the 6 challenges and I have come in the Top 3 twice. So I will be sorry to see it go. The last challenge is to use Orange and Turquoise. I used Stampin' Up card stock Apricot Appeal and Taken with Teal. Also used my butterfly punch and Cuttlebug . Please pop over to Hidden Treasures  before it is no more - there are some lovely DT samples for you to see. Thank you ladies of the Design Team and Kelli who started the ball rolling back in May - hope you start enjoying your card making again real soon - lots of love - Jacqueline xx.

Purple Haze.

Image
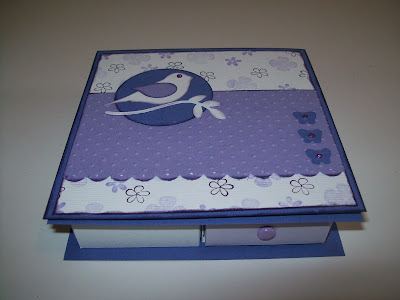
Hello folks - here as promised is a project not using blue! This is an easel card with a difference - it has little drawers underneath it - take a look This is for this week's challenge over on Project Tuesday  and I have used Bazzill card stock and my favourite 2 step bird punch from Stampin' Up. I got the inspiration for this project from  Jennifer Meyer  who is on the PT design team and she provided the link for the tutorial - here . Here it is with drawers open The idea for the image on my card is sort - of CASEd from a blog I love - here . She did a You Tube video for her card so I'm hoping she won't mind that I tried it out. Doing this I found that I had a few bits and pieces of card stock left over - so I made this aswell - This was last week's Project Tuesday challenge that I never got around to. It was just too good an idea not to do! Will have to hide this though - I can see it ending up in my daughter's hand bag!!! See you soon - Jacqueline xx.

Wednesday Again.

Image
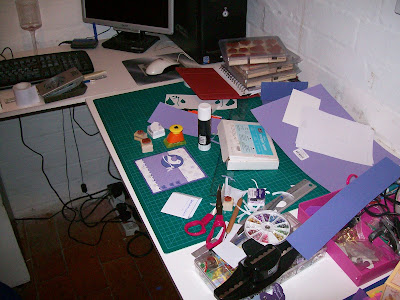
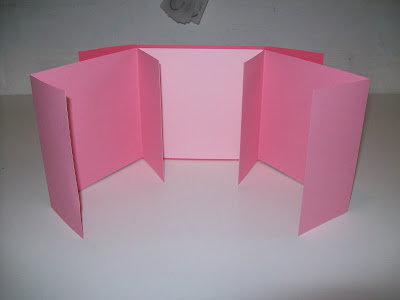
Good morning WOYWWers. Have moved on from my blue phase - hopefully that is behind me now and working with purple.I am having a go at making an easel card with some drawers These are the drawers waiting for the easel part of the card to be attached when it is completed. I will probably post this and all it's details on my other blog as it is for the Project Tuesday  challenge this week. Hope everyone has a good day - I will be popping over to Julia's  later to take a look at some desks - see you soon - Jacqueline xx.

Workshop Projects.

Image
Just a quick short post as promised to show you the Flip Album I demonstrated at last week's workshop. This one is a made up album without all the embellishments This is the bare bones of the album and as far as we got on Thursday night. Hopefully my Ladies went staight home and decorated their albums - just as I did The pink album was the sample album - this is the one I made on the night. Blue seems to be my colour of the moment. Inspirarion for the little tag pockets was taken from a video I saw on You Tube and the papers are Blue Awning by K&Company. Here is the cover Can you see a little Stampin' Up sneaking in there........ yep you guessed it Greenhouse Garden! If you pop back later I will have yesterday's project to show too - bye for now - Jacqueline xx.

Flight of the Butterfly.

Image
Good evening everyone. Just a quick post before I go to bed - it's nearly 10 and I'm feeling pretty tired. I have had a busy day preparing for my workshop tomorrow. We are using the Stampin' Up stamp set Flight of the Butterfly and I made a couple of cards to inspire my ladies - take a look This is called a recessed window card and I got the idea from a Splitcoast Stampers tutorial on You Tube. Apart from the stamp set I used the Butterfly Punch and some Elegant Eggplant card stock and ink. I used my trusty Cuttlebug for the corners and embossing and the sentiment stamp from Bird on a Branch. Not being content to just make one card - oh no - I revisited You Tube and found this idea for a stair step card For this card I used Sage Shadow and Always Atichoke and various paper punches. We are going to be making a 'Card in a Bag' tomorrow morning so please pop back to see the results. I will also have my completed 'Flip Album' from last week's workshop to sho

Got The Blues.

Image
Hi there folks - too hot to be outside again so I am in my craftroom crafting. Had my Thursday night club last night and we made Flip Albums. I will finish mine later and post it on my other blog in the next couple of days if you would like to see it. Meanwhile I have made a card for the Daring Cardmakers  challenge blog. The theme is Silhouettes so what better stamp set to use than Stampin' Up's 'Pocket Silhouettes'. Also used S'U card stock and inks - Night of Navy, Brocade Blue and Bashful Blue. I used  paper punches for the butterflies and decorative borders. But if that isn't blue enough for you - take a look at the card I made for my brother Peter - he's 40 today. This card also uses my S'U stuff and one of my favourite techniques - brayering. So there you have it - two blue cards, and if you do pop over to see the Flip Album when it's finished - that's blue too! I promise to use some brighter colours for my next card - really!!! Bye fo

WOYWW.

Image
It's that time of the week again - if you don't know what I'm on about, go see Julia  and all of the other WOYWWers at The Stamping Ground. I'm a bit late posting this morning - had to finish the above card and get it posted ASAP - my baby brother reaches the ripe old age of 40 this week so I have been very good and made him a 'grown up' card for a change! So my desk is a teeny bit messy today. Also I would like to show you a piece of art I have just made. I have been blown away lately by many peoples projects using all the various ditressing techniques. So I dug out my Distress Inks, bought some Grungepaper and had a go. As you can see I have been inspired by the lovely Linda E - I followed her rose tutorial from her blog. I now have Fired Brick coloured fingers! Have to go now - half way through decorating the bedroom but I will be back later to take a look a your desks - bye for now - Jacqueline xx.

There's No Place Like Home.

Image
Hi folks, this is just a short post sneaked inbetween housework and gardening and all those other little things I should be doing instead of playing! This is a piece of work I started last week for the Alter it Monthly  blog. I've lurked around it before and always said to myself " I really must take part" and this month I have. The theme is "Home Sweet Home". I 'altered' a 4"x4" canvas using Distress Inks (Brushed Corduroy, Peeled Paint and Fired Brick) and some scrap pieces of chipboard. The letters are Cosmo Cricket - I was able to reverse them and colour them. I cut the house freehand and (although you can't see it) there is a piece of an old laundry ticket behind the windows and doors which I also filled with glossy accents. The rose is made from Grungepaper and I followed Linda's tutorial here  (left hand column). Hope you like it - Jacqueline xx.