Posts

Showing posts from 2010

Tickled Pink

Image
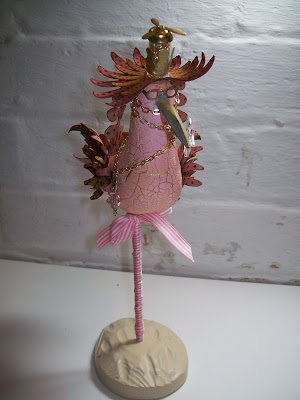
You may remember back in October that I took part in a Breast Cancer Awareness blog hop (see here ). Well I was lucky enough to win Hels' 'Fanny Flamingo' - and here she is And here she is in close up Isn't she gorgeous? Thank you so much Hels - she will now take centre stage on my dressing table to be admired for ever more. So - apologies all for the sparseness of my posts lately. Firstly I was away - couldn't get to see Dad while he was in hospital so 'cos of the snow so saw him last weekend instead. I returned to find that my Mother-in-Law's pipes had burst in her house and that she was staying with us whilst her house dried out. Then I had two workshops this week (which I hadn't prepared for!!!) and I am battling a sore throat and cough. I am in dire need of some TLC! Looking forward to Monday though - my daughter who has left home recently to live with her boyfriend is coming home to have a DVD day with her Mum - yay. Can't wait - popcorn, ch

Christmas Cheer (SC310)

Image
I really enjoyed making this card - at first I was stumped for some inspiration so I popped over to Splitcoast Stampers  to see what today's sketch challenge was. Then I checked out the Color Throwdown  blog for some colour inspiration and the above card is what I came up with. Recipe 5" x 5" cream card blank Card stock - Stampin' Up - Certain Celery, Chocolate Chip & Riding Hood Red. Paper - S'U - Simply Scrappin' 'I Wish' Accessories - S'U Boho Blossoms punch, gold brads & ribbon. Hope you like it - Jacqueline xx.

Brrrrrrrr

Image
The big freeze continues - I even had ice on the inside of my windows this morning. I woke up so cold too - my husband is away at the moment so he wasn't there to keep me warm. It wasn't too bad once I was up - the sun is actually shining in a bright blue sky making the landscape look very picturesque. I have made a card to show you - just a quickie before my fingers freeze up with frostbite This is made using the branch stamp from S'U Bird on a Branch set and the baubles from Hung up on the Holidays. The baubles have been inked with versamark and then embossed with silver embossing powder Take care everyone and keep warm - see you soon - Jacqueline xx.

Monday Mojo Challenge Time.

Image
Time for a challenge and today is the turn of 'Mojo Monday'. Here is today's sketch You can find the Mojo Monday blog here . And here is my card I used my Here Arts stamps again with some red card stock and some S'U Old Olive, a little gold ribbon and some red adhesive stones - simples! It's too cold to remain in my craft room any longer - I may even have to do some ironing in order to thaw my fingers out. Now there's a scary thought!!!! See you soon - Jacqueline xx.

Christmas Craft Fair.

Image
This was my stall all set up this morning at 10.30. The lane up to the hall was extremely slippy this morning but I managed to get there OK with the help of my husband - I'm a real wimp when it comes to snow and ice. Last time I fell I broke my wrist and did all sorts of other damage too. Anyway I think that everyone else must be feeling the same as unfortunately the fair didn't get very busy and my stall looked pretty much the same at 2.30 in the afternoon. Had some lovely ladies on stalls next to me - one selling cupcakes (mmmmmm cakes) and the other some gorgeous silver jewellery of coarse both of which I had to buy from - thus spending all my profits!!!! It was great fun though. Hope you are all keeping safe and warm in this nasty weather - see you soon - Jacqueline xx.

Snow flake Tree.

Image
I had a bit of a play today - just looking through my stamp sets and trying to get some inspiration. I remembered a card I made back at the beginning of October where I made a tree card with the branch stamp from Bird on a Branch ( here ). So I decided to make a Christmassy one too. I got my favourite piece of kit out again - my brayer and created the background using Baja Breeze ink. Then I stamped the branch in Chocolate Chip and the snowflakes - from the Snow Flurries set in Versamark ink. Then I embossed the snowflakes with some silver tinsel embossing powder. I stamped a sentiment inside the card with a few more snowflakes as I didn't think the front of the card needed anything else. It's my Christmas Fair tomorrow - weather permitting - so hopefully will be able to share some pics of my stall with you - see you soon - Jacqueline xx.

Finally....

Image
..... after going around in a grump all day - we had more snow (yuk) and I am soooooooooo fed up with all the hype about the football (I mean really - bothered?) - I finally got around to making a card I have made this for my Mum and Dad. Mum is seriously hard to please - Christmas cards have to be in traditional green and red - no blue and definitely no black. She doesn't do silver and she hated the ones I made in green and neutrals. This hopefully will tick all her boxes! I used the fir tree from Lovely as a Tree to make a kind of garland and then I embossed with one of the stamps from the Autumn Days set with gold embossing powder. I picked out a few of the round bits with some tiny red stones. I then made some poinsettia flowers with the 5 Petal Punch and the Boho Blossoms Punch - they are held together with gold brads. You can just see some snowflakes in the background, these were embossed with a holographic powder and I edged the card with versamark and sprinkled on some mo

One Layer Card.

Image
This is not normally something I would do - I like to layer up my card and add embellishments and so on. However, my Mother -in- Law needed a 'thin' card to send to America. So I made this I went straight on to a C6 sized card with my brayer. I blocked out the moon with a post it note and used some scrap copy paper torn into a hill shape. The ink I used was Baja Breeze. I then used Lovely as a Tree (one of my all time favourite sets) to create a forest and then stamped my reindeer jumping over the moon. So, hopefully this will be 'thin' enough for MIL to post. We have more snow falling at the moment so I don't think I will be venturing out today - I think I'm going to hibernate! See you soon - Jacqueline xx.

It's so frustrating.......

Image
.......... I hope I'm not being a killjoy but - I hate the snow. I was supposed to be going to see my Dad - he is in hospital this week but with the present conditions and the forecast - I don't think that's going to happen. Also this Saturday is the Christmas Fair - I have worked quite hard to make loads of stuff for this so I'll be very disappointed if it doesn't come off. Plus - and this is the worst - the snow has knocked out our Freeveiw box and I can't watch Neighbours. Somebody please tell me if Donna gets to Ringo's funeral on time!! OK - sad, ranting lady has now finished and I will now calmly show some mini calendars I have made. Really quick and simple to make - These have been made using Stampin' Up 'Elegant Soiree' DSP and the Boho Blossoms punch and they are just offcuts of chipboard, covered and decorated with a bit of Very Vanilla ribbon for hanging. Will leave you now with a pic of the view from our house across the valley Se

Post it Note Holders.

Image
A very long time ago I came across a blog with these delightful little post it note holders, click here  to go and see them. I downloaded the instructions - and must have forgotten them because when taking a tour around some files I found them again! I didn't make mine exactly the same - I didn't add the holder for the paperclips. I thought that they would make cute little stocking fillers. As you can see I have used the very versatile 2 Step Bird Punch and also the Scallop Edge Punch and they are so easy to make, Jo has made her instructions very easy to understand. So - only 27 more days left to the big day - is anyone excited yet? I bought some tree lights today only to get them home and find that they don't work... doh! Bye for now - Jacqueline xx.

Raffle Prize.

Image
Hello again folks. Today's effort is not a card and I hope I am giving some inspiration to the Ladies of my craft group by posting this. At the last workshop I set the last challenge of the year which was to make something but not a card. This is a calendar with a notebook and it even has a place to keep your pen. This is made from an off cut of chipboard covered with some of the new Stampin' Up DSP - Elegant Soiree. The note book is one I had bought intending to cover but it all went a bit wrong and the cover came off completely (nearly threw it through the window actually!!) anyway it looks much better now. I stuck a little more of the paper over it so that the pages didn't fall off and I stamped the first page with a stamp from Just Believe. The pen holder is again a piece of the DSP wrapped around the pen and glued securely under the note book. I printed off the calender page, cut it up and fixed that on with brads and then used some jumbo eyelets to attach the ribbon

Looking for some inspiration.

Image
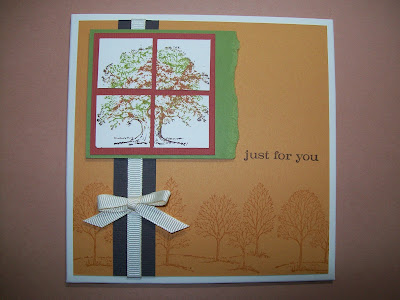
And I found some! I had a trawl last night through some past Stampin' Up catalogues - well they do call them idea books too - and saw a lovely card using Lovely as a Tree. It's a very close copy but I added a couple of extras - more stamping, ribbon and a different sentiment (from Just Believe). The colours that I used are More Mustard, Old Olive, Really Rust and Chocolate Chip. So that's this morning taken care of. I need to go and get a coffee now - it's so cold in my craft room this morning and my fingers are going numb! See you soon - Jacqueline xx.  

Christmas Tree Challenge.

Image
It really is getting close to Christmas now and as I have a stand at the Village Christmas Fair I am working hard to fill my table with lots of Christmas goodies. So with that in mind today I have made a card to add to the pile. I followed a sketch for this card but rotated it counter clockwise . Recipe 5" x 5" cream card blank Card stock - Stampin' Up - Handsome Hunter, Crumb Cake, Chocolate Chip & Very Vanilla. Ink - Stampin' Up - Handsome Hunter. Stamps - Hero Arts - Happy Holidays Trees & Stampin' Up - Lovely as a Tree. Stampin' Up - Scallop Edge Punch Glitter & adhesive stones. This card will be entered into the following challenges: Sketch Saturday  - Sketch (see above). Die Cut Dreams Christmas Club  - Christmas Anything Goes. Craft Your Days Away  - Christmas Trees. Thanks for looking - Jacqueline xx.

Simply Sayin'

Image
Brrrrrrrrrrr - it's cold out there. Just been to do the weekly shop and can't see a thing it's so foggy. I live next to a cider orchard and the boys have been picking the apples with their huge tractors. Those massive wheels have really churned up the field and everywhere is a sea of mud - not a good start to the day. However here is a card to hopefully cheer you up This is using one of my favourite Stampin' Up colours - sadly now retired - Brocade Blue. I used the Simply Said stamp set along with the tiny flower from Flight of the Butterfly. It is all the same ink although I stamped the image two or three times before re-inking to get differing tones. The main card is Very Vanilla and I have also used a small piece of Crumb Cake (mmmmmm cake). For a finishing touch I added some tiny blue sparklies to the centres of the flowers. I am off now to scrape 3" of mud from my shoes and the kitchen floor! See you soon - Jacqueline xx.

Another Pop-Up Card.

Image
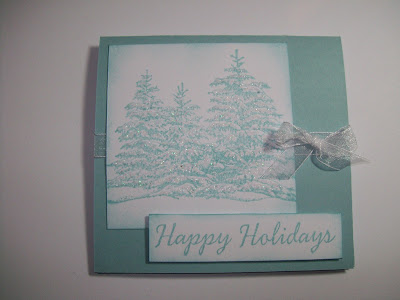
Well, we all had a good night last night making our Pop-Up Christmas cards. Most made tree scenes as I had done except one lady who made a lovely card with pop-up snowflakes - very effective. The Christmas Card and matching Gift Tag competition prize went to Louise - she made a lovely card and tag in traditional red and green and had added robins made with the 2 Step Bird Punch. The card I made was using another Hero Arts stamp - Happy Holiday Trees. I used Baja Breeze card stock and ink (Stampin' Up), and some sparkly glitter. Here's what it looks like inside - The sentiment is from the Wondrous Gift stamp set and the little twiggy thingy is from Lovely as a Tree. Now, some say ................... it's only FIVE weeks to Christmas!! Yikes how did that happen? I've only got two weeks left to prepare for the big Christmas Fair in the village. I think I'm going to very busy in the next few days! - See you soon - Jacqueline xx.

Christmas Tutorial.

Image
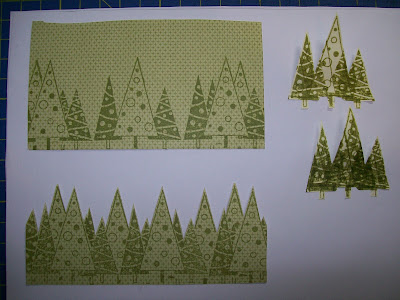
Hi there - it's been a while again. Been working hard with village hall committees, art workshops and the local Mother and Toddler group. However I have a craft workshop tomorrow night so I 've been doing some preparation. We are doing 'Pop-Up' Christmas cards and as I was working out what we would do I decided to make it into a tutorial so everyone could have a go. Here is what to do: Firstly - find a stamp that you like and that can be made to 'pop-up' inside a card. I used the Sparkle Clear Merry Christmas stamps from Hero Arts. Then stamp the image in a long line. I also used some post-it notes to make a 'mask' so I could also stamp in between the image. Cut the image out. Then take a rectangular piece of card and fold it in half. Take a smaller piece of thin card or paper and make a mat for one half. The edges of this can be sponged and don't forget to leave a small margin. Then take your strip of trees and stick them over the mat.         

Challenge Time.

Image
Do you know it's ages since I did a challenge card - how shameful! So in order to rectify this I found a challenge over on The Shabby Tea Room . The theme is 'Lavendar and Lace' and here is my card I used a square card blank as my base and added some 'Lavendar Lace' card stock. This was stamped with the florish stamp from the Vintage Vogue set (Stampin' Up) in Lavendar Lace ink. I then used Pocket Silhouettes for the main image - I was hoping that it looked like lavendar flowers, these were stamped in Lavendar Lace and Elegant Eggplant. The flowers down the side are also stamped in Elegant Eggplant and are also from the Vintage Vogue set. The gorgeous lace is some I was sent by a lovely lady who lives in Cypress (thank you Cath!) and I added a few flat backed pearls. Thanks for looking - Jacqueline xx.

Ornate Flower.

Image
I just love this new stamp set Ornate Flower and this is another card I have made using it I used some Basic Black and Ruby Red cardstock along with some white. The flowers down the right hand side have been stamped in Ruby Red ink and the main flower is stamped in black. Looking at it now I rather think that next time I shall use black embossing powder for a bit more depth of colour. The script in the background is an old dictionary page which has been torn and the edges inked. I'm very pleased though with this colour combination and I think I shall be using it some more. Hope you all enjoyed your weekends - any one started their Christmas shopping yet? - Jacqueline xx.

More Christmas Ornaments.

Image
This is a card I have seen a lot of recently - I could'nt tell you who did it first but it's rather a nice design. Mostly I have seen it done with the Stampin' Up ornament stamp and punch, I however had a stamp I bought last year and tried to make it work with that. As you can see I used the fir tree from Lovely as a Tree and made it into branches. This was stamped in Handsome Hunter ink and then I stamped the baubles in Ruby Red. I then cut them out and stuck them on using 3D foam tape and I added a couple of gold bows. I managed to stamp the sentiment a bit wonky so I restamped it and punched it out with a scallop oval. This one is more or less the same - I just stamped the baubles in versamark ink onto red card stock and then heat embossed using gold embossing powder. Well I didn't get to see any fireworks last night - after a day running around town with my daughter (which by the way was very nice) I was too shattered to do anything else but veg out in front of th

Christmas Cheer.

Image
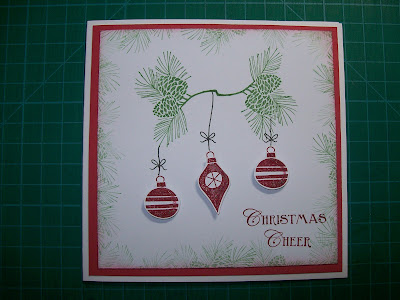
Christmas is drawing ever closer - only 7 weeks. So I thought I'd show you a card I made using a little ornament set I have I stamped the branches in Garden Green and used that also to go around the edge of the card. I used a home made stamp positioner to join the branches together. (The branch is from the Autumn Days set). I then stamped and cut out the tree ornaments from Hung Up on the Holidays - I used the new Cherry Cobbler ink for this. The sentiment is one I have had for years - also stamped in Cherry Cobbler and I drew the hangers by hand. Hope you are all having fun firework watching - I'm off to a do tonight - weather permitting! Bye for now - Jacqueline xx.

A Little Sympathy.

Image
Sadly a friend of ours passed away last week - one of our neighbours'. This is the card I made It uses the new set from Stampin' Up - Ornate Flowers. I've also used some of the new colour - Baja Breeze. I teamed it up with some Bazzill Basics card stock and some Versamark ink. The ribbon is quite a good match with the brown card, I actually cut it out of a jumper I bought recently - you know the bits that get all tangled up on the hangers - looks much better on my card I think! See you soon - Jacqueline xx.

More New Stamps.

Image
Golly - it has been over a week since my last post - did you miss me? I have been away for a few days visiting family but now I'm back and getting back into the swing of things again. Lucky me - only been home a little while when my new stash arrived (thanks Sue) and look what I have made This uses the new Butterfly Prints stamp set and I love it. It fits nicely into the butterfly punch too. I used some of the card from the Neutrals range - Crumb Cake and Basic Black along with Ruby Red and I also used one of my old favourites - Pocket Silhouettes. Please pop back soon as I also have Ornate Flowers to try out next - bye for now - Jacqueline xx. 

A Little Pickup.

Image
Good morning - my goodness it's cold this morning and wet and windy and did I mention cold? I can't believe it's November next week can you? Ok so today's card is one I have made for my husband to give to a friend of his. He has some health issues at the moment and has to have a big opperation soon - so what better stamp set to use than the Loads of Love? I have stamped the truck onto blue card and cut it out. Then I stamped the driver and the dogs on to the background so that it looked like they were in the truck. The background has been sponged to give some perspective and then stamped with the trees. Hope this makes him smile. Bye for now - Jacqueline xx.

Where has the week gone?

Image
I really do not know where all my time has gone this week - I've had meetings (boring), I went to a Stampin' Up party (fab) and I helped out at the local Mother and Toddler group (exhausting) and last night I had my monthly craft workshop. I set my ladies a challenge to make Christmas cards and matching gift tags and the results are astounding. The time and effort that they have put into their projects is amazing - I'm so proud of them. Trouble is I now have to choose a winner - that is going to be sooooooo difficult! Anyway this is what we made last night These little 4" x 4" boxes boxes open up easel - card style to reveal little calendars on top of a small drawer suitable for storing post - it notes, stamps paper clips etc. These projects use my new favourite stamp set - Just Believe, Greenhouse Garden and my new favourite colour Baja Breeze - doesn't it look absolutely gorgeous with the dusky brown? Well my time is going to even busier this weekend as

New stamps

Image
Yay - I got new stamps. I have just received the new 'Just Believe' set from Stampin' Up along with some card and ink in the new Baja Breeze colour. Only had time to make one card so far but this colour is sooo lovely - just had to have a play. I really will have to find some time this week to play with this properly - where does all the time go? I have also taken on some voluntary work at the local village 'Teeny Tots' - I will be making tea for all the mums and pouring out gallons of juice - I wonder if they will let me play with the plasticine?! See you soon folks - happy crafting - Jacqueline xx.

Sparkly Trees.

Image
I have done a lot of tree cards lately - mainly in autumnal colours - but when my friend Jane came to play yesterday she showed me these stamps and I just had to have a go with them. They are from Kanban and are just gorgeous - especially in my favourite colours Old Olive and Not Quite Navy (Stampin' Up). This is just very simply stamped onto vanilla card stock, mounted onto the coloured card and then finished off with a few green sparkles. I also covered two notebooks with the same cardstock and used the smaller tree stamp to decorate them. Thanks for stopping by to take a look - see you soon - Jacqueline xx.

WOYWW.

Image
Morning everyone - my desk is very tidy and organised today as I have a friend comming round to play. She has recently invested in some distress ink pads and wants to know how to use them. As you can see I've also dug out some chipboard shapes and a couple of beer mats and the remains of my grungepaper. So after getting all inky and grungey I will hopefully popping round to see what all you other WOYWWers have been up to. Any one confused? Hop over to Julia's Stamping Ground  and take a look. See you soon - Jacqueline xx.

Turning Pink for October.

Hi Ladies - a quick post to draw your attention to the blog colour change. I'm sure you all know that October is Breast Cancer Awareness month and that pink is their campaign colour. I would also like to direct you over to Hels's blog  - she has a big thing going on there to raise awareness and I think it would be great if you could take a look and maybe even join in - I certainly will. This is a subject very close to my heart and anything that we can do to stamp out this terrible disease can only be good. So - for one month and one month only I'm pink - how about you? - Jacqueline xx

Just a Quickie....

Image
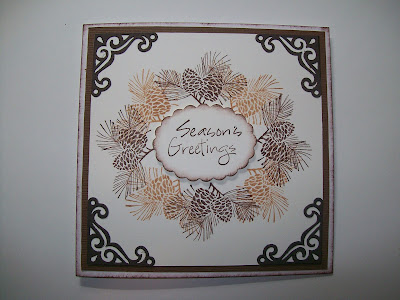
.... to share with you a card I hve made using one of my favourite sets at the moment. It's a Christmas card using the fir cones from the Autumn Days set from Stampin' Up. I also die cut some decorative corners wih my Cuttlebug. Told you this was a quickie - still not feeling 100% yet. hopefully I will be back to normal soon. Bye for now - Jacqueline xx.

Is it me......

Image
......or is it getting colder? 'Cos I'm freezing! Anyways - was nice and cosy Saturday afternoon at my local village hall where we had our Harvest Sale & Exhibition. Here's a couple of pics of my stall Unfortunatly we weren't rushed off our feet but I managed to sell a few cards and two of my paintings. I haven't sold any artwork for ages so that was a nice surprise. Also this weekend I went to a Stampin' Up catalogue launch party so what I made on my stall I spent there! Some gorgeous new stuff is now heading my way - see you soon - Jacqueline xx.