Posts

Showing posts from 2017

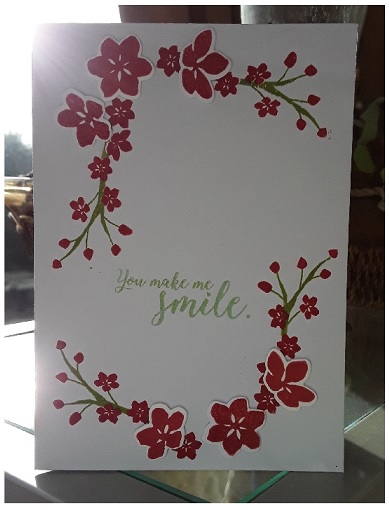
Quicky Christmas Cards

Image
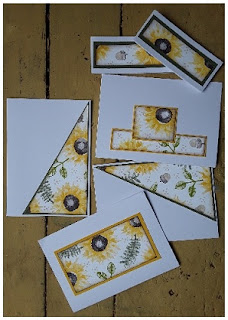
I've a card to show you today that is very quick and easy to do. In fact it's so quick I made six in under an hour  - take a look  This lovely wreath is made using Painted Harvest but instead of using floral colours I used green - Lemon Lime Twist and Always Artichoke.  There is a dotty image which is perfect for the berries and in one of my other sets - Christmas Happiness - there is a lovely bow that looks very festive embossed in gold.  As I said I made six of these so my pile of cards is starting to mount up at last! Thanks for stopping by today,  see you soon  - J xxx 

More Lovely as a Tree for Christmas

Image
In my last post I made cards with the fir tree image from Lovely as a Tree,  today I'm using the same set but I'm using the line of trees. I've taken lots of pictures so you can make the cards too. Just as before this is production line crafting and the end result is six Christmas Cards - enjoy!  First take an A4 sheet of Whisper White card stock, cut into three lenghs and add two post it note moons to each strip. Make sure they are evenly spaced as in the picture and sponge on some pale blue ink.  Make sure the ink - in this case Soft Sky  - goes below the moons.  Add some darker ink - Dapper Denim  - to the tops of the sky and remove the moons. DO NOT THROW  THE MOONS AWAY.  Next take some Versamark ink and stamp the line of trees across the strips of card stock. Heat set with silver embossing powder.  Cut the strips into two and replace the moons. Sponge a very dark blue ink - Night of Navy - around the edges.  The panels are now ready to be attached to 

Production Line Christmas Cards

Image
When I make cards I like to make them unique  - one of a kind and naturally I make only one! This changes at Christmas and because this year I've not made any Christmas Cards throughout the year I have to make up for lost time! Today I will show you how I made eight cards in next to no time.  First take an A4 sheet of Whisper White card stock and sponge on some blue ink - Dapper Denim.  Take the fir tree image from Lovely as a Tree and stamp it multiple times top and bottom of the card stock - Emerald Envy.  Make sure you clean the stamp thoroughly and then using Versamark ink stamp the tree again over the green trees. Vary the height of the images, add white embossing powder and heat set. Fill in any gaps. Do this top and bottom. Cut the card in half giving you two strips of trees. Now cut the strips into panels - I managed to get eight pieces.  Intensify the blue inking for the sky and also the edges. Add glitter - lots of it. It is Christmas afte

It's Advent!!!

Image
Happy December 1st - not long to go now and what better way to celebrate the start of Advent than with a little tutorial. This a little card with a wintry scene just perfect for Christmas and uses Stampin' Up inks Soft Sky, Night of Navy and Basic Black - here's how to make it I started with a C6 card base and a piece of white card stock 3 1/2"   x 4 1/2". I cut out a circle and added some dabs of 2 way glue to the back that have been left to dry - this means that the circle can be removed easily after sponging. My circle had been used previously so it looks blue! A pale blue ink was then sponged all around the moon. It doesn't have to go all the way to the bottom but it should go all around the moon. Do not remove the moon. Some copy paper was torn next and used to sponge hills for the background. This was done with a dark blue ink. Add as much scenery as you wish  going a little lighter the further you go back into the distance.

Simply Holly

Image
I have another new set to share with you today  - Glad Tidings.  It's got a beautiful holly image that is perfectly true to life.  It's a two step stamping technique which builds up a gorgeous holly sprg complete with red berries  - take a look  The leaves have been stamped in Old Olive ink and then over stamped with the second image in Always Artichoke.  Instead of using two reds for the berries I stamped off the paper first and then added the detail full strength Real Red. The stem is Early Espresso.  This was then simply matted on to a blank card base that had been scored diagonally  - this is difficult to see in the photo. Very clean and very simple.  Please do not hesitate to contact me if you would like to order any of the above products or go to my online shop  - link is above. My email address is  jacquelinenm68@gmail.com  See you soon  - J xxx 

A Trio of Cuppas

Image
Following on from yesterday's post I have another card made using Hug in a Mug  - take a look  I have another hot chocolate image like yesterday but I also have a mug topped with pink and white marshmallows and a steaming cup of tea.  I've also used another of the cute sentiments this set has to offer - ' You Warm my Heart ' is such a lovely phrase don't you think? I am entering this card into the challenge over at  Sunday Stamps Where I have followed their sketch. Hope you like my card today,  see you soon  - J xxx 

Hug in a Mug

Image
Hands up  who loves hot chocolate  - hands up who loves it with all the frills? If you answered yes to all the above then Stampin Up has the set for  you! Hug in a Mug is full of mugs and cups ready for you to customise. Here is a card with just one variation  So - the outline mug was stamped in Early Espresso ink and the middle was stamped separately in Soft Sky. The yummy whipped cream was then added along with the spoon and the stick of flake. Last to be added were the sprinkles on top. The card stock mat is Soft Sky and it has been layered on top of a mini paper Dooley- don't you just love that yummy sentiment too?  If you would like to order any of the above products or indeed any Stampin Up product please go to my online shop or drop me an email  jacquelinenm68@gmail.com  There are links to the current catalogues in my side bar. Thanks for stopping by today  - it's lovely to see you here and please do leave a comment to say you've visited. 

Festive Silver Tree

Image
Time for another Christmas card - well it is that time of year! Today's card is a little festive scene in cool blues and silver - take a look The gorgeous ginormous snowflakes are from the Seasonal Layers Thinlets set. My silver tree is heat embossed to give it a frosty feel - did you see that I stamped it upside down to make the shadow? Hope you like it - see you soon - J xx

Seasonal Sprigs

Image
Colorful Seasons is a lovely set and I made a card today with some of the floral twig stamps. I did them in red as I thought that they looked a little festive - what do you think? It was a very quick and simple card to make - the green sprig was stamped four times in the corners of the card. The tiny flowers were stamped over the sprigs - they fit perfectly onto them - and then the larger flowers were stamped and die cut using the Seasonal Layers Thinlits. They were attached using dimensionals. Thanks for joining me today - hope to see you again soon - J xx

Introducing - The Stamparatus!

Image
It’s big news when something breaks the mold and changes everything. The Stamparatus will change the way you stamp, and before long, you’ll wonder how you ever crafted without it! Why do YOU need one? You’ll fall in love with stamping all over again when you learn everything you can do with it! Make multiples with ease Consistently stamp crisp, clean images If you want a darker impression, apply more ink and restamp—no need to start over Make fewer mistakes, saving time and money Easily create 2-step, 3-step, and 4-step stamped images using reversible plates Develop new and specialised stamping techniques with adjustable stamping plates and precision placement I need product details! Compatible with Stampin’ Up!’s red rubber and photopolymer stamp Foam mat to use with photopolymer stamps Rulers and gridlines for quick measuring 2 open sides so you can stamp on larger paper 2 reversible plates: a total of 4 surfaces to work with 2 magnets to hold the pape

Stampin' Blends

Image
I am very excited to bring you news of a brand new Stampin' Up product - Stampin' Blends. Twelve gorgeous colours -high quality duel tipped markers that fit in and co-ordinated with all the other fabulous Stampin' Up products. Take a look at this special info packed PDF -  HERE or watch the video below These fab new markers can be ordered from me or my shop -  HERE For more details on ordering please email me on jacquelinenm68@gmail.com Thank you - J xx

Christmas Pines

Image
Today I have another card made using the Christmas Happiness set - it's fast becoming a favourite I love the tree lights and although you can't see in the picture they have been glittered to make them all twinkly. The background is all one layer stamping although the lights and pine cones are 2-step stamping images. My middle panel has been layered on to Cherry Cobbler card stock and I found a scrap of matching ribbon in my stash box (not Stampin' Up). The main pine cone has been attached using dimensionals and it too has been glittered with Dazzling Diamond Glitter. The inspiration for this card came from this post by Mary Deatheridge  HERE  - she has some fantastic projects on her blog - it's well worth a visit. My internet has been behaving very badly lately and it's taken me three days just to get this post up! Even my 4G phone has struggled - what do you think - atmospherics perhaps? Anyway we're up and running today - long may it last!

Autumnal Scene

Image
Although we are fast approaching Christmas I decided to make an autumnal card. Colourful Seasons is a beautiful set and has some lovely sentiments and this time I teamed it up with the Hometown Greetings Edgelits Dies - take a look I started with a Kraft card base and also die cut my houses from Kraft - they were attached with Dimensionals. My branch was die cut from Early Espresso card stock and my lovely leaves were cut from Pumpkin Pie and they are part of the Seasonal Layers Thinlits - love all these die cuts they are going to make some beautiful cards. I am entering this card into the challenge over on Lets Craft and Create #130 Anything Goes + option  Witchy/Autumn Colours   (Obviously I went for the Autumn Colors!) Thank you for joining me today - please come back soon - J xx

Christmas Crafting

Image
It's been another busy day at work  - everyone is Christmas shopping and the shop is starting to look really festive. I haven't begun to think about presents yet but I have managed to fit in a little Christmas card making  - take a look  My stamp set of choice is Christmas Happiness and the  pine branches have been stamped in Emerald Envy. The branches were stamped twice before re-inking as this I think gives the image a bit of depth. The cones were inked with Tranquil Tide and the detail added with silver embossing powder.  I am entering this card into the challenge over at  Addicted to Stamps and More The theme is Holiday.  Thanks for looking today  - hope you like my card  - see you soon  - J xxx 

More than just stamping

Image
I mentioned yesterday that I did more than just stamping  - I bead as well.  I mostly do bead weaving with seed beads but I do like to mix it up and use other beads too. I've just finished a project  - it's called a 'Dune Necklace ' and I followed the tutorial on YouTube.  I love how it turned out  - take a look  The large beads in the centre of the triangles are Czech Firepolished crystals,  they have a gorgeous iridescent  sheen to them which you can't really see on the photo.  This will be up for sale when I get a website organised but if you'd like to get in there first please message me at jacquelinenm68@gmail.com  Thanks for stopping by today  - see you soon xxx 

Winter Migration

Image
So, the clocks have changed and the days are getting shorter. They are also getting a lot colder too and my little crafting space in the garage is getting decidedly chilly!  I used to only craft down there in the summer and craft very minimally in the winter  - just make the odd Christmas card. My main winter hobby was usually beading as that could be done in front of the telly in the warm and cosy living room.  The thing is  - I don't want to stop card making  - I  want to carry on all through the winter especially as I'm a Stampin' Up demonstrator again.  So over the weekend I migrated from the cold dark garage up into my bedroom. It's been a mammoth task  - I've had to completely change everything around,  extend shelves and install cupboards but it's been worth it as now I can craft in comfort. I'm also closer to the kitchen so more cups of tea!!! Ok  - so no new cards yet so here's one I made earlier This is a card I made for a rece

One Sheet Wonder - Part 4

Image
This is the final post with the one sheet wonder - the last of the cards made Just a simple sentiment Large sentiment paired up with a fussy cut flower and punched leaves. Individually cut leaves highlighted with a sequin. Just adding some punched leaves. The one on the left has been just left as it is while the one on the right has just had a flower added. Hope you have enjoyed this mini series of cards and how to make them - hope you come back soon - J xx

One Sheet Wonder - Part 3

Image
Here are some of the finished cards from my Painted Harvest one sheet wonder. Two magnetic bookmarks were made using the long strip that remained down the side after the shapes were cut out. This was also made with left over scraps. Flowers were stamped and cut out and attached using Dimensionals. Leaves were stamped and punched out using the co-ordinating leaf punch. Or cards are simply stamped with a sentiment. The sentiments can also be mounted onto co-ordinating mats. More tomorrow - see you soon - J xx