Posts

Showing posts from February, 2011

Two Posts in One Day!

Image
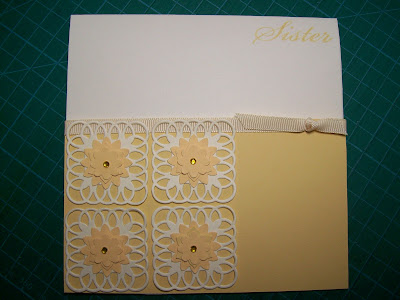
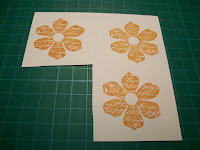
I couldn't resist the sketch on the *SPLITCOAST STAMPERS*   site today - it was so clean and simple. And because of this I decided to go with a simple colour palette too - Very Vanilla and So Saffron . I also used minimal stamping too - just the sister sentiment in the top right hand corner. The fancy squares were created on my Cuttlebug and the flowers were made using the Stampin' Up punch Boho Blossoms. I added a tiny bit of  bling to the center of each flower. My head is a lot better now and I have been doing a bit of blog hopping - may I draw your attention to my side bar please - a new monthly challenge of the scrap booking kind. I'm really looking forward to taking part in this. I am relatively new to scrap booking but with regular layout ideas and colour combinations I think even I will be able to manage something every month! I might be back tomorrow - I might not. I'm off to see my Mum and Dad this weekend - Dad is having some more treatment in hospital on F

Poppies

Image
Yes it's true I have actually made a card without using anything Stampin' Up!  This is a set I bought ages ago - it's from Papermania and it's the 'Build A Poppy' set. I stamped the largest flower in the corner of the card stock and then I made a mask using a post it note. I then stamped the flower again - twice. This gives the picture an element of perspective. I then dug out my Promarkers and proceeded to spend the next 15 minutes or so colouring in. the red and black card stock is some I had in my stash pile. I am going to creep off now - I've woken up with a bad head - no I haven't got a hang over - but I do feel awful. See you soon - Jacqueline xx.

Brayered Background.

Image
I was being very good last night and tidying my craft room - I have a friend coming round to play later - when I spyed a piece of card that I had brayered to show my craft Ladies last Thursday. So all tidying then had to cease 'cos I really wanted to do something with this piece of card. I then remembered seeing on the Slpitcoast Stampers site that the weekly CAS challenge was to make your own background - this is what I made It is very similar to some I have done in the past but in blue. This one used a whole host of yellows and oranges from my Whispers Archival range and then a final layer of Cherry Cobbler. The sun of course is a post it note punched with a circle punch (tip - fold the p-i-n in half or double them up sticky to sticky - it goes through the punch much more easily). The stamp set is my current favourite - Just Believe, stamped in Chocolate Chip. I did finish my tidying in the end - just a bit later than anticipated! Oh - and I managed to find some quite tiny coff

Simply Said - Again!

Image
I haven't had much time for crafting over the weekend as I was working so this is a card I made a little while ago. This is another card inspired by the Ideas Book and Catalogue (2008 -09) - I changed the size and added some bling to make mine a bit different. It uses the Simply Said set - very versatile with it's interchangeable hearts, and Bashful Blue, Certain Celery, So Saffron and Night of Navy card stock and inks. Now I have been making alot of cards lately and I think it's time for a change. I have an idea for my next workshop but I need some coffee filter bags - I hope you are intrigued enough to return to see what I make - bye for now - Jacqueline xx.

Graceful Flowers.

Image
This is going to be a short post as when I have done this I shall be rushing off to get ready for work :-(. I thought I would do a card with a stamp set that I haven't used for a long time - Organic Grace. It was a hostess gift that I received from my first ever Stampin' Up party. I have teamed it up with a bit of sponging and some Bashful Blue and Certain Celery. I sponged around a circle punched post it note to get the sun and also embossed the tops of the flowers with white embossing powder. No time to play today - so I will see you tomorrow - Jacqueline xx.

Brayering Workshop.

Image
Last night was my brayering workshop and this was one of the cards I demo'ed This is brayering in it's simplest form - a moon punched out of a post it note and blue ink (Baja Breeze) brayered over the card. The image (Just Believe) was stamped in a darker blue (Not Quite Navy) and then the edges were stamped again with the same image to continue the picture. The background papers are from the Elegant Soiree DSP range and I inked the edges before sticking them down. The card is a 'Z' shaped card - here it is from the side   Now I also demonstrated a brayered reflection - but that didn't turn out how I wanted it - so I will have another go later and show you the results. The saga of the Blackberry continues - ETA Monday morning - synchronising watches now! Bye for now - Jacqueline xx.

A Card for a Man.

Image
Yesterday I promised you a 'man' card - and never one to renege on a promise - here it is I have used the ever faithful Lovely as a Tree set and Cherry Cobbler, Chocolate Chip and Very Vanilla card stock. The image was stamped on to the Very Vanilla and then using a circle punch a circle was punched to the right hand side. The panel was then cut into three and mounted on to the Chocolate Chip which had the bottom edge scallop punched. The circle that was removed from the image was matted on to a circle of Cherry Cobbler and then placed back in the image but raised on 3D foam pads. It did look a little bare till I decided to add some ribbon - not very manly I know! A stamped sentiment finished off the card. Now those of you who read yesterday's post will remember a dispute about a Blackberry phone. My husband and I are now reconciled ..........however there is an evil grin on my face - I have a cunning plan. I shall lie in wait for the postman, ambush him to get the phone

Sour Grapes of the Blackberry kind!

Image
Gosh - I am posting late today. My friend Bev came round to play this morning and refused to leave 'till she had finished her card. It was rather stunning but she wouldn't let me photograph it to put on my blog! Today's card is made using my Simply Said set and is CASEd from one of the past Ideas Book and Catalogue It's not a complete copy 'cos I changed the colours but it manages to use nearly every stamp in that set! The colours I used were Cherry Cobbler, Mellow Moss and Always Artichoke. I also used the sentiment from Vintage Vogue. I have a 'man' card to share with you tomorrow - why are they so difficult to cater for? It's my Anniversary card to my husband - we will have been married for 20 years! We did have a little disagreement this morning though - his firm are providing him with a brand new Blackberry phone. I am sooooo jealous - I have been lusting after one of those for ages! I'm off now to cry in a corner - see you soon - Jacqueline

Happy Valentine's Day.

Image
What a lovely way to start the week don't you think? I have had a great weekend watching all the rugby - wasn't the England match fantastic? Here is a picture of the card I gave my husband this morning I love making these 3D flowers - this time I have stamped the flowers in black on to red card and used one of them to prop open my easel card. I also did some faux stitching around the edge. Hope you all have a fab Valentine's Day - we don't do much today as it is our wedding anniversary on Wednesday and we shall celebrate then. Bye for now folks - Jacqueline xx.

Two Step Stamping Workshop.

Image
Last week saw my February Tuesday workshop and the theme was 'Two Step Stamping'. To help my ladies understand what I meant by this I prepared some examples There is a bit of glare on the photo 'cos I laminated them and they will now be stored in my stamp index for future reference. After we had done a bit of practicing with and without a stamp positioner, I then demonstrated the Twisted Easel Card. Garden Greenhouse seemed to be the favourite - one lady loved it so much she has borrowed my set! I chose Bird on a Branch, this is a set form last year's Mini Catalogue which is now retired - but I love it. I also used a bit of Vintage Vogue too. It is essential to use a stamp positioner with this set as it is very difficult to stamp the three images by eye. The colours I used are Cameo Coral, Not Quite Navy and Very Vanilla. Here is a view from the side. This next week is another of my workshops and I will demo-ing some Brayering techniques - one of my favourite things

A Twist on a Twist.

Image
Do you remember my Twisted Easel card of a couple of weeks ago (take a look *HERE*)  - well I've been having a play with the concept. Have a look This has two panels that angle into each other and it really isn't that much more difficult than making a card with a single panel. I used the Just Believe stamp set and the colours Very Vanilla, Baja Breeze and Chocolate Chip. Now not one to stop there - I went a step further ..... This one still has the two panels facing each other but it has a front facing panel in the middle too. This one was a bit more tricky as you need to shave a sliver off the sides of the middle panel to prevent the side panels snagging it. Again I have used Just Believe but this time used Cherry Cobbler and Always Artichoke along with the Very Vanilla. Now I have another idea to take this even further - but that is going to take a lot of time and card stock - so stay tuned. Bye for now - Jacqueline xx.

3D Flower Tutorial.

Image
Today I thought I would share with you the way I make my 3D flowers. (Other tutorials are available). The flower I have used is the large flower from the Vintage Vogue set - but this works with any 6 petal flower stamp. In fact the free stamp on the cover of the March Craft Stamper mag would work really well. O.K lets get started.   1. Stamp your chosen flower 3 times onto thin card stock.                      2. Cut each flower out.                                                                          3. On the first flower cut between two petals to the center and cut off half of the petal to the left of the cut. On the second flower cut to the center as before but remove and keep one petal. Cut off half of the petal on the left of the cut. For the third flower repeat this time removing two petals. Cut off half a petal as before.                                                      4. Take each flower in turn and place glue on the half petal on the top. Curl the flower round until

Slpitcoast Colour Challenge.

Image
River Rock, Basic Gray and Whisper White were the colours for this week's colour challenge on Splitcoast Stampers. Not a combination that I would normally pick but I stand corrected - they look really good together - here is my card I have used the 2 Step Bird punch on this - just 'cos I love him so much. I stamped his wing with the foliage stamp from Vintage Vogue and also used it for the background to the bird. Behind the white is an old dictionary page which I distressed a little and the finishing touch was one of the little flowers from the Boho Blossoms punch. Hope you can pop back tomorrow - I'm hopefully(!) putting together a picture tutorial on how to make the 3D Vintage Vogue flowers find them (*HERE*)   - I say hopefully - my Son has been ill for a while now with joint problems. He had some tests yesterday in hospital and he's having more tomorrow. Add that to the fact that because he lost so much school due to his illness - he was asked to leave and now ha

February Flowers.

Image
Yikes - the first of February already!. Still the sun is shining here and I have some flowers in my garden. I have tiny Snowdrop spikes and bright yellow Aconites - it's looking very pretty. My card today is inspired by flowers and blue skies I have used Baja Breeze card stock for the background and scalloped the bottom edge. I then inked around all the edges with Baja Breeze ink. The stems of the flowers are punched with the 2 Step Bird punch from Old Olive card and the flowers themselves are punched using the Boho Blossoms punch from Regal Rose card stock secured with yellow brads.  Short and sweet today - loads to do (more on that story later!) - see you soon - Jacqueline xx.