Posts

Showing posts from 2014

Last Challenge Post of the Year

Image
My last DT card of the year is for  CAS - Colours & Sketches . The theme is a past Double challenge - that's a sketch and a colour combo and I chose Here is my card See you in January xx

Four Seasons

Image
Here is a card to show you the versatility of a couple of  Christmas stamp sets. White Christmas and Holiday Home are not just for Christmas - take a look at a Four Seasons card I made a while ago These sets won't be hanging around for much longer - they go with end of the Holiday Mini catalogue so if I were you I would snap them up quick and you could be creating outdoor scenes for the rest of the year! Thanks for looking xx

Snow flake Card

Image
So - the stamp Endless Wishes set fell into my basket last time I was placing an order and I haven't really used it enough yet. I did get to use it on a card I made for a Facebook swap a while ago though - take a look I do love a bit of word stamping around the edge - have you noticed that?! And of course I used my favourite colour Lost Lagoon - this time teamed up with a bit of Blushing Bride. The vellum panel is a piece I was given a while ago by  a friend, it's been embossed with the Northern Flurry embossing folder and I topped it with a snowflake which is made by quilling - a technique recently experienced at a local craft club. It's a Joy Fold card and I hope it bought a little joy to the person I sent it to! Thanks for looking xx

Make My Monday Nativity

Image
It's the last challenge of the year over at  Make My Monday  and the theme is Nativity - here is my card This was a very quick and easy card to make - after all time is short at this time of the year! A little stamping and gold embossing looks great on navy card stock and the gold bow adds a touch of luxury.  Thanks for looking xx

Last Minute Quick and Easy

Image
So time is racing on and time is precious but you have a few short moments to create a few last minute cards - like this one perhaps? I've used White Christmas - the tree stamp is inked with a marker so I can only ink up the parts I need to - like this one lone tree. A few birds are added along with a Rudolf deer and a sentiment - honestly this took minutes to create and a whole batch could be made in no time at all. The set has lots of little extras as well so instead of a deer why not add a snowman, a polar bear or a a car? Thanks for looking xx

Digi Christmas

Image
Over at the  52 {Christmas} Card Throwdown  blog. We have an extended challenge that started last week and continues for anther week. We have a sponsor who is also offering a prize so do pop over and take a look. Here is another card using the sponsor's image Loads of sparkle on this, a panel of Cherry Cobbler card stock and the sponsor image printed on to Whisper White card stock and coloured with Old Olive Blendies - job done!

A Bright and Beautiful Star Card

Image
Who doesn't like stars at Christmas? The Bright and Beautiful stamp set has gorgeous star images and co-ordinates with the star dies too - take a look I am also loving the Lost Lagoon blue ink from the In - Colours - it looks great with silver and is perfect for Christmas. I also used the Good Greetings set to make a word border for my card. The centre star is folded and raised up on 3D dimensionals - not good for posting I know but fine for hand delivering. Thanks for looking xx

Christmas CAS

Image
We are doing Christmas over on the  CAS - Colours & Sketches  blog. You are invited to choose a past sketch BUT - Make It Christmas. I chose the sketch from August 22nd 2013 Here is my card I have used an image from the Festival of Trees set simply stamped and embossed with silver embossing powder on to Mossy Meadow card stock. I then attached it to some silver glimmer paper. I embossed the base of the card using a score board. Hope you like it and pop over to take part. Bye for now - xx

A Manly Christmas Card.

Image
It's time for a new challenge in  The Male Room  and this week the theme is CHRISTMAS. So this is the card I will be giving my other half this year - he never reads my blog so he won't be getting a sneak peek! Here it is take a look This card is inspired by some artwork I spyed recently at a local craft fair. The artwork in question was enamel on metal by an artist called Kevin France and both myself and Clive fell in love with it - it's very expensive however so this will have to do till we win the lottery! I've used soooo many stamps to create this: stamps I've made myself, some Barbara Gray stamps and of course some Stampin' Up stamps. The foliage stamp at the bottom actually has a moose attached to it - I just coloured the bits I needed with a marker! To make it a bit more Christmassy I was going to add some glitter - I didn't think my hubby would like it so I left it off - shame, I LOVE glitter! Thanks for looking - do pop over to the blog

Markers vs Blendabilities

Image
I did a party recently and as I was going through the Stampin' Up catalogue with the ladies one asked "what's the difference in the markers?" Well - one is alcohol ink (Blendabilites) and the other is a water based dye ink (Stampin' Write Markers) I replied. "Yes - but what's the difference?" she insisted. Hmmmmm - time to find out! Here is a sheet of Whisper White card stock. It's very smooth and I find that it is excellent for colouring onto - not water colouring though. I have stamped said card stock with the Blended Bloom stamp and coloured them with both sets of markers - take a look Two of the blooms have been coloured with Stampin' Write markers - reds and greens and two have been coloured with the Cherry Cobbler set of Blendies and the Old Olive set of Blendies (you get three in each set, dark, medium and light). Can you tell which is coloured with which? Well the top two are the Blendibilities. The colours are a lot rich

Christmas Angel

Image
Today at  Make My Monday  the theme is ANGELS. I had this all sussed out when I set this challenge, I had seen the perfect tutorial on YouTube and I was looking forward to making them. However when I came to do all the die cutting the die wouldn't cut the shape completely. I tried several times and then gave up. Sigh. Plan B - take a look (made at 11pm last night as a last resort!) The star card is die cut and the angel is made from a bow template. I added a golden halo and sparkly flower - punched from glimmer paper. These would look nice just with a little twine added to the angel's halo and hung from the Christmas tree - or as place names on the dining table. They can made bigger too! Please do pop over to the blog and take a look at all the other angelic creations from the dt - bye for now xx

Cardinal Christmas

Image
The brand new challenge over at  52 {Christmas} Card Throwdown  is ............. We also have a sponsor this month to finish the year off  "AND....we have a fabulous sponsor who is offering a terrific prize for the TOP HONOR winner of the December challenge. Prize is $15 in digital images!!" Here is my card using one of the sponsors designs Printed on to Whisper White card stock the image was coloured using the colour combo from March I made the easel shaped card using Stampin' Up Window framelits and another from Apothecary Art. Card stock used was Cherry Cobbler and Whisper White. Thanks for looking xx

MMM - Sprays and Mists

Image
The lovely Laura has chosen our theme this week at  Make My Monday  - Sprays and Mists. Here is my card The only spray or mist I own is a Perfect Pearls one in Gumball Pink but I think I managed to make it look Christmassy! The spray is on the background which is the Hardwood stamp, stamped on to Blushing Bride card stock with Blushing Bride ink. The pearlescent spray was then sprayed on to the background. Thanks for looking - no doubt I shall be back later with my now becoming usual Monday 'catch-up' post! xx

Sketch Time at CC&S

Image
We have a sketch for you this week at  CAS - Colours & Sketches  - it's Lizy's last for this monthand it's a god one - take a look And here is my card Pink and black look so good together and are a very romantic colour combo - add a bit of bling and you can't go wrong! I've used my air drying clay to create the flowers, they are really light but very robust and perfect for adding to cards. Hope you can pop over and check out the other DT cards - see you soon xx

Join Stampin' Up for Less

Image
Ever though about starting your own crafting business? It might not be as difficult or as expensive as you might think. How about joining Stampin' Up? Did you know that joining Stampin' Up usually costs £99 and for that you get to choose whatever you want to get started? Not only that but you choose products up to the value of £130. You get a business pack included and it's delivered to you free of charge - that's a great deal. But Stampin' Up don't want to give you that - no - Stampin' Up want to give you a further 25% off. That means you can join for just £75 and still choose products up to the value of £130. If you join now, you will only need to place orders worth £275 catalogue price between now and the end of March 2015 to remain a part of Stampin' Up. You can be your own customer, or take orders from friends and family, or a mixture of both. You get discounts on orders and during December demonstrators will get an extra 5% off - can'

Making Ribbon Masculine

Image
Well that's a tall order - all the men I know would not appreciate having ribbon on their cards. However a bit of burlap perhaps?? What do you think? The card was one I made a while ago when I was asked to demonstrate masks at a local craft club. It's one I borrowed so I don't know the make - sorry. The mask was placed on to Kraft card stock and I sponged over it with Stampin' Up's Craft White ink. Early Espresso was used to stamp the leaves and the tiny wooden acorn was attached with a strand of the burlap ribbon. This is the theme of the challenge over in  The Male Room  and I really do look forward to seeing what everyone else does to 'Make Ribbon Masculine'! Bye for now xx

Black and White and a Splash of Red

Image
I have been very naughty lately and have lots of new goodies including these fabulous star stamps and dies which I used for this card for  Make My Monday The Christmas sentiment is from the Endless Wishes set and I really do love the font style they have used - looks great stamped around the edge to frame the star. The centre star is folded so that it stands up from the front of the card. I did this by folding the star so that every point was creased - in between the points also have a fold. All you do then is make sure that every crease on a point is a mountain fold and every crease in between is a valley fold. Pile up a few dimensionals in the middle so the star can't be squished. Not good for posting I know but great if it's being hand delivered. The star stamp set is called Bright and Beautiful and is in the Holiday Mini - co-ordinating star dies can be found in the main catalogue. Email me on deezinesart@icloud.com for more information. Thanks for looking xx

Paper Pierced Screen Card

Image
Well Monday has come around again and of course I am as organised as ever with my posting - NOT! I went to post my Make My Monday DT card only for my camera batteries to fail 2 seconds after turning it on. I then made the discovery that the card I had so lovingly made was not destined for today's challenge but for next week - it's not the first I've done that recently either. So - this me the perfect opportunity to post Saturday's  52 {Christmas} Card Throwdown  card. The theme is PAPER PIERCING  - take a look I have been wanting to make a Screen card for ages now and I must say I was rather pleased with the outcome. The picture was sponged and stamped whole and then cut to fit the panels. The piercing is at the top of the card and around the legs at the bottom. Here are some close ups This was a very simple scene to create - torn copy paper and sponges were the main tools and stamp sets Wetlands and Lovely as a Tree were used. The opposite f

Endless Wishes

Image
I have been hankering after a stamp set ever since the new Holiday Mini came out. There's loads to love in little catalogue and so I prioritised but ............. there was still this one set that I really really loved. So one dark night night when no one was looking (especially my hubby) I ordered it! And I couldn't just order one thing - that would be silly as I had to justify the p+p so a few more more items just jumped on to the order too - more on those items later. The set of the moment is as the title suggests is Endless Wishes - three snowflakes and a whole flurry of gorgeous sentiments. I just had to use it straight away - take a look And as luck had it I needed a card for today's challenge over at  CAS - Colours & Sketches  where the beautiful Lizy has chosen these colours for us This card is only 4" x 4" and I had a purpose in mind as I created it. I made three more and then this made this little pocket to house them all And

Blended Poppies

Image
From time to time I have a sort out on my computer, I delete random pictures that I have uploaded and I create nice neat new files for the ones I like to keep. I also file all my card pics in files according to stamp sets. Well one such tidying up session occurred a couple of days ago and I found a picture of a card I had made a loooooong time ago when I had first bought some of the new Blendabilities markers. I bought a set of the Cherry Cobbler and a set of the Old Olive. I stamped out the Pleasant Poppies on to Very Vanilla card stock and set to work colouring Now there are lots of ways to colour - check out all the tutorials on YouTube but as a painter I have always gone in first with the lightest shade and then added details with the darker shades. Not bad for a first attempt! Well after all that playing I just had to make a card and this is the result I do believe that this was a sketch from a Mojo Monday challenge many weeks ago and in the end I think

Catching Up

Image
So I have been very lazy lately and not updated my blog. In my defence I have had a cold - the first in about 2 years and this has made me feel very miserable and wretched. So after emerging from a mountain of paper tissues, paracetamol and Lockets I am now going to post a selection of the cards I should have posted last week. First up is last week's Make My Monday card for Berries and Foliage - it's closed now but I was really pleased with this card Next is my card for  The Male Room  - this one is still ongoing and the theme is 'TIME' Now comes  Colours and Sketches  - again ongoing and we are using a sketch designed by Lizy And finally  52CCT  where the theme is a WINDOW - this one only started Saturday so plenty of time to get in on that Thanks for staying with me during this whirlwind tour of cards- I still have loads to catch up on so see you soon xx

Get Your Sparkle On at Make My Monday

Image
The theme of this week's challenge at  Make My Monday  is GLITTER. So I haven't a card to show you for this but instead these little 'thank you' favour boxes Made using the Envelope Punch Board this tiny boxes measure approximately 2" x 2" and contain sweeties! They have been decorated with the Beautiful Bunch stamp set and adorned with Tangelo Twist ribbon and Silver Glimmer paper for  a glittery finishing touch. These were made as table favours for my last monthly workshop but I do pop something similar into my customers' orders from time to time. If you'd like to order anything Stampin'Up from me please do email me on deezinesart@icloud.com and I can have it delivered direct to your door (p+p charges apply). Must go and hide these now - before I get tempted to eat what's inside!

Vintage

Image
We have a VINTAGE challenge going on this week at  Make My Monday  - not a theme I'm most comfortable with but here goes Again I'm attempting this with my ipad so the photo is not very special! However it's really easy to list the materials for this card - Blushing Bride is the colour and Lovely Romance is the stamp set, plus a bit of seam binding ribbon. Thanks for looking and a big HI to my new followers - it's great to have you here. Back home soon so normal blogging will resume! Bye for now - xx

Sketch Time at 52CCT

Image
OK here goes - I'm going to attempt doing a post via my iPad - Internet is not good at the moment as I'm at my parents home having a bit of a break and this is the first time I've managed to get on it properly! The theme is a sketch - let's see if I can work put how to add the picture! Ahhhh what a head ache - it's not easy! The link is  52(Christmas) Card Throwdown And I'm going to quit while I'm ahead ! See you soon xx

Wood

Image
It's time for another fortnightly challenge in  The Male Room  and this time the theme is WOOD. It's not a problem making 'male' cards any more not when you have the fabulous Hardwood stamp -it's huge but creates gorgeous backgrounds - here is my card I have teamed it up with the equally manly Walk in the Wild - I really do love that moose! - and the Lovely as a Tree - always a great standby for male cards. Embellishments are the Modern Label Punch with a few gems - coloured black with a marker. This card is as we speak flying across the Channel to my Facebook swap buddy for this month - hoe she likes it! Bye for now xx

MMM - Shabby Chic

Image
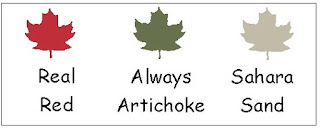
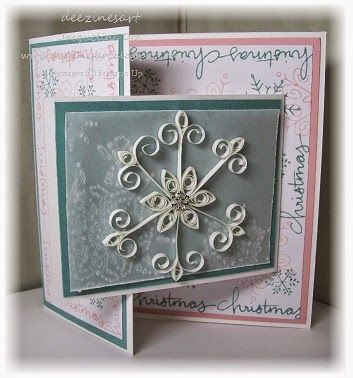
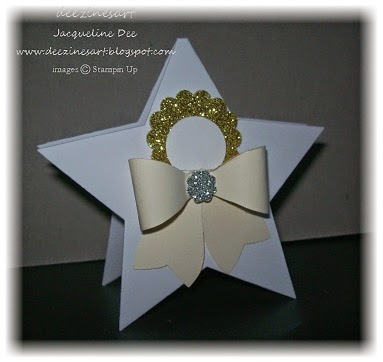
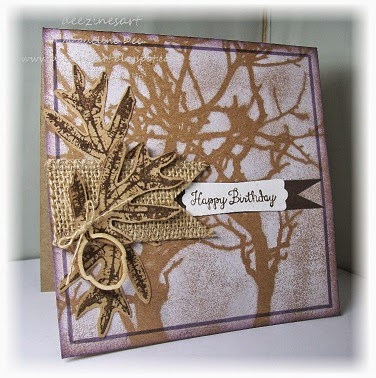
I think I'm actually going to be on time for a challenge for a change! Today at  Make My Monday  the lovely Suzi B would like to see SHABBY CHIC cards and projects. I'm not a huge fan of this but I must say I did have fun making this card - take a look I've used a couple of retired items - the dress form die cut and the ribbon flowers, and the pink ribbon was some I've had in my stash for ages but the rest is Stampin' Up. Daydream Medallions, Kraft, Crumb Cake and Pear Pizzazz card stock, leaves from Kinda Eclectic and the scallops were made by stamping and punching loads of little hearts from the Kind and Cosy stamp set - they were attached using Tombow glue to the underside of the card stock. Don't forget to pop over to the blog to take a look at all the other DT cards - there's loads more shabby-ness over there! Bye for now x

Late Again!

Image
I should have posted this last Thursday to coincide with the new challenge at  CAS - Colours & Sketches  but it's been a very hectic end to the week - beading class, monthly workshop, art exhibition and charity auction to name but a few of the things I have been up to - phew! Crafting has taken a back seat but I did manage to rustle this up using a few scraps I had lying around on my craft table The main panel had been made for another card but didn't quite work a the time, the borders were offcuts from card prepared for my monthly workshop - luckily I hadn't cleared up after doing this else they would have ended up in the bin! All that was added was the label and rhinestones and the bird which was stamped, coloured with pencils and cut out and attached with dimensionals. Here's the sketch I was following I've jiggled it around a bit and rotated it but it's mostly all there. OK - off now to catch up on a bit of card making - see you soo

Workshop News

Image
It's nearly time for my monthly craft workshop - here's what we will be making I found the inspiration for these cards on Monica's  BLOG  - she had used a different stamp set but I CASEd the colours and layout. So - if you are in or around the Malvern area and fancy a fun evening of craft, conversation and cake please get in touch on deezinesart@icloud.com.