Posts

Showing posts from March, 2011

Wishbone or Backbone.

Two posts in one day - sorry folks but I have something I wanted to share with you. I'm getting frustrated - it's been hard going lately trying to get my stamp business up and running.It's very slow going and things have not been running smoothly but then again as my husband said 'if it was easy everybody would be doing it'. And then someone said to me today 'people are like the bones of a chicken - wishbones are the ones with the  big ideas but when the going gets tough they snap and give up. The backbones stay true and firm, carry the load and will stop at nothing to achieve their goals' I'd like to think that I am a backbone - I'm not giving up on my dream and if you visit my blog and think 'blimey she's been on about this stamp shop for ages when is it going to be ready' it will be ready when it's ready. I will get it right.

WINNERS

The lucky crafters who have won the paper bag to make their own mini albums are........ Cath in Cyprus and Pine Bird Knitter. Ladies if you would like to e-mail me your addresses I will get them posted to you ASAP - thanks for taking part. Jacqueline xx.

Poppy Card.

Image
Hello every one - the launch of my on-line stamp shop is getting ever nearer - I'm working very hard designing as we speak. However I had ordered some new kit and it's just arrived damaged so I hope that this won't hold me up to much. Today I have another of my designs to share with you - hope you like it. I stamped the image a few times to test it out - this is just my prototype - and then I coloured it in. I used a memento ink pad (Tuxedo Black) as this meant I could colour it with my Promarkers. Next I cut out the part of the design I wanted to use and made my card. As you can see I am still borrowing the Martha Stewart paper punch and I also used the sentiment from the Bird on a Branch set. I am going to press the 'Publish Post' button now and hope that blogger behaves it'self - yesterday it wouldn't post my pics - how rude was that! - See you soon - Jacqueline xx.

A Very Traumatic Time.

I was enjoying my Sunday morning - the loss of the hour didn't bother me much and as my work on a Sunday has now ceased I decided to sort some of my washing. I have a room just off my kitchen where I keep my tumble drier and hang my washing to dry. As I went into said room I heard a rustling, I looked behind me and there was the biggest spider I have seen in a long time - it was HUGE! Now my usual reaction is to scream hysterically and run for my life but I am in the house on my own no one will rush gallantly to my aid - what should I do? I run into the kitchen and slam the door but the thing is only inches away from my clean washing - what if it runs and hides in it and then jumps out at me later. I realise that I have the advantage here - it's out in the open and I can deal with it - oh yes I grab a glass and attempt to cover it. But did I mention that it's the biggest spider - IN THE WORLD - a simple glass is not big enough. I have to rush off and find a plastic tub. Now

Whimsical Wings in Saffron.

Image
I think I have mentioned before - me and my pal Bev get together once a week to craft - well I say craft we drink coffee, gossip and laugh for most of the time but we do get a little crafting done! This week it was my turn to choose the stamp set and I chose Whimsical Wings. I love this set but didn't manage to get hold of it as it was a Hostess Gift in the last catalogue. We both used yellow and blue as our main colours and I added a little Crumb Cake to mine.......mmmmm cake! Short and sweet I'm afraid today - I have an exploding cupboard which has now exploded all over my craft room and I should really get it tidied away - then again the boat race is about to start ...... mmm men in shorts...... I may just take a little more time off!!! Bye for now - Jacqueline xx.

My First Stamp.

Image
Yay - I am so excited - I have made my first stamp (soon to be available to buy on my website). Now you all know how much I love my brayer so my first design just had to be a silhouette - here is my card The image is taken from one of my own drawings - as will all my designs and is stamped onto a brayered background using Baja Breeze and Not Quite Navy inks. This is just a prototype at the moment - I still have some kit on order to enable me to make my saleable stamps but hopefully you won't have to wait too long to see those. I have also uploaded this card onto the Splitcoast Stampers  website for today's challenge - no stamping in Black, White or Brown ink. I have to go now 'cos I have a meeting tonight so no vegging out in front of the t.v watching Eggheads for me! - See you soon - Jacqueline xx.

Joy Fold Card.

Image
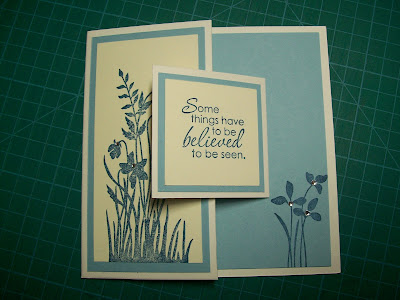
I am taking a break from making more tissue box holders to show you a card I made last week when my friend Bev came over to play. Each week we pick a stamp set, check out the cards on Splitcoast Stampers for some inspiration and then try and make our own version of it . This time Bev chose the stamp set - Just Believe and she chose the Joy Fold technique (except she then chickened out and made an easel card instead!). So - here is my effort Now typically joy fold cards have a little addition to the front of the card to hold the smaller part closed - I did put a small circle of card on but it seemed to hide most of the main image  - so I took it off. The smaller part opens up like this You see I thought that when the card is in it's envelope it won't need to be held shut and then when it is stood up and displayed it definitely won't need to be held shut therefore no need for any unsightly additions!!! The colours I used are Not Quite Navy and Baja Breeze. Don't forg

Tissue Box Holder.

Image
I am doing a huge craft fair this summer (see side bar for details) and as it is a two day affair I thought I had better start to get a few things ready. In addition to my hand made cards I will also have note books, post it note holders and bookmarks etc - and these Well this to be more precise! I will make more. This is a tissue box holder - made with some large sheets of card that I have in my stash drawer and using some Martha Stewart paper punches. unfortunately these are not mine but merely borrowed I will have to give them back :( ! I have also used the Vintage Vogue stamp set and Regal Rose, Rose Red and Old Olive inks. I used a couple of cute little Paperartsy flower dies to do the hole in the top That's all for today - see you soon - Jacqueline xx.

Paper Bag Min Album - Part 2.

Image
Monday again and today I have some more to add to my Paper Bag Mini Album Tutorial that I started yesterday. When you have covered your album pages with paper or card of your choice you can then make a few file cards to slip into the pockets - these are great for adding extra photos or journaling. As you can see in the picture above I have also made some little tags to fit into the smaller pockets. There are alot of pockets in this style of album so you can really go wild with loads of little extras like storing memento tickets, postcards or invitations. Now you can make a cover for your album - take a look at the pictures first and then I will explain how I made it You need to make a spine cover first - just enough to fit round the spine of your album but just stick it to the cover flaps. Before I stuck this down I punched two holes and added two jumbo eyelets to which I also inserted a D-ring. (Beware - this is very difficult to achieve once the spine cover has been stuck down. B

Paper Bag Mini Album Tutorial - Part 1.

Image
Good afternoon folks - hope everyone is enjoying their weekend. I'm sorry - I promised this tutorial for Friday but some personal issues have cropped up and things are going to be a little worrying over the next couple of weeks. This is a step by step guide showing you how to construct you album - adding the decoration will come later. Step 1 - find your self some bags. These are gift bags I bought a while ago made from brown paper. I have used brown paper lunch bags before - these had been bought over the net from America. The bag pictured above is one that when opened will have a flat bottom. In this case I removed the handles and carefully opened the bottom of the bag . Step 2 -  The bag was then flattened, the edges creased with a bone folder and the folded in half. When you are satisfied that your folds are in the right place open the bag, apply adhesive to one half and then fold again. Step 3 - at the one end of the now folded bag there will be a natural crease where

And the good news is ........

Image
yay - I have a working scanner again! I stole my husband's as mine really had bit the dust - still it's done him a favour as he now has more room on his desk!! Today's card is inspired by the sketch challenge over on Splitcoast stampers  - it was a very clean and simple design so I kept my card quite simple too It starts off as a 5" x 5" cream card blank and I matted and layered some Baja Breeze and cream card stock - the sentiment banner uses the same. The stamp set is Vintage Vogue and uses Baja Breeze and Sage Shadow inks. I am feeling a little shell-shocked today - I went to an AGM meeting last night (I'm the bookings manager for our local village hall) and I managed to come away from the meeting as the new secretary. How did that happen?! I'm sure that I wil be fine at the job - I just hope I can find the time speaking of which - I have a workshop that I need to finish preparing for. Really looking forward to that as we are making Paper Bag Mini Al

Teething Troubles.

Image
I don't know if anyone has noticed but a the top of my sidebar there is a link to my new website where I am going to sell my own clear polymer stamps. They will be my own designs - that is drawn by me and I will also make them. Well - I have all the stamp making equipment, I have the designs and I was just scanning them into my computer when the scanner just gave up and stopped working! So frustrating! So it will be a little while longer before I have any thing to sell. Today's card is one I made a while ago using a stamp I designed and had made up This is simply stamped with a Memento ink pad in Tuxedo Black and coloured using Promarkers. Memento ink pads are the only ones I know of that you can use to stop the Promarkers bleeding when you colour. The orchid has been cut out and raised up on some 3D foam pads. I'm sorry this is very short and sweet today - I have to finish preparing for my workshop, prepare for a meeting tonight and try and fix my stupid scanner - I fea

Black & White.

Image
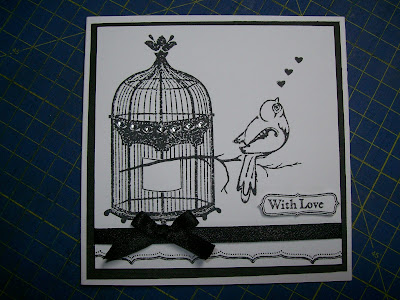
What a lucky girl I am - yesterday my husband went out to do a bit of shopping and he came home bearing gifts. He had bought me a set of stamps from the Papermania range called 'Tweet'. Now I love birds and birdcages so I had to stamp a card straight away and this is the result The whole thing is stamped with a Memento ink pad - Tuxedo Black - and I used the branch from my Bird on a Branch set. To finish it off I raised the sentiment on some 3D foam pads and added some black satin ribbon. Although you can't see them on the photo there are some crystal hearts on the birdcage. I was really pleased with this card and it really didn't take that long to make and I also think it will be perfect for the challenge over on Craft Your Days Away Challenges  - the theme being 'Black and White' Thanks for looking - see you soon - Jacqueline xx.

Birthday Card for my Girl.

Image
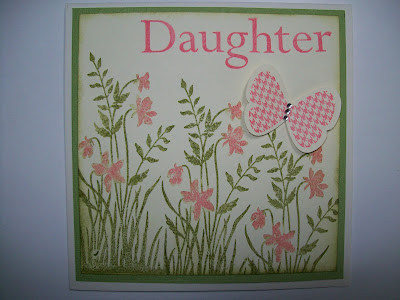
Good morning - hope everyone is enjoying their weekend. Today I have a birthday card to share with you - one I made for my Daughter Briony . This is a combination of Old Olive and Cameo Coral. I used a technique I invented for myself by inking up my stamp (from the Just Believe set) with Old Olive ink, and then removing with a damp cotton bud the parts I want a different colour (ie the flower heads). With a clean cotton bud I pick up ink from the Cameo Coral pad and add it to parts I want - the flower heads. The butterfly is from Butterfly Prints and it is punched out using the butterfly punch - I also added a bit of bling - well it was her 19th birthday after all! Well that's me done for today - I'm off now to do more playing. I am in the middle of creating another mini album this time made out of paper bags. It's in preparation for my workshop on Thursday night. OK so have a good weekend - especially if you are in the area visiting the Stitch and Creative Crafts Show -

Coffee Filter Mini Album - Part 3.

Image
This is the third and final part and shows the cover to my album. It's covered with more embellishments from Cosmo cricket and some green rik-rak ribbon. I bound the album with some rings and then added some ribbons and fibres - there is also a silver heart charm hiding there too inside the pockets are some file cards for journaling - I used the tab punch from Stampin' Up and added ribbons and fibres to these too. So - I have a card to show you tomorrow to finish off the week and then...............well that's a bit of a secret. I shall be working hard over the weekend to show you something rather special - see you soon - Jacqueline xx.

Coffee Filter Mini Album - Part 2.

Image
If you read yesterday's post you will remember I showed you some pictures from my Coffee Filter Mini Album. Well those pages are well and truly dry now so I have finished the reverse sides - take a look For a materials list please refer to yesterday's post or click here . o.k - from the top left we have the inside cover - this album mainly holds pictures of the female part of my family - mostly on my mum's side but there is a small picture of my dad'a mum. Next is a photo of mum with her parents. my mum as a little girl and then my Grandma and Grandpa. The little girl in the green dress is me on my first day of school and then a photo of our wedding day. Tomorrow I will show you the cover page and the journaling pages - have to make my daughter's birthday card too - she is 19 tomorrow - yikes that makes me feel sooooo old! - Bye for now Jacqueline xx.

Workshop Coffee Filter Mini Album - Part 1.

Image
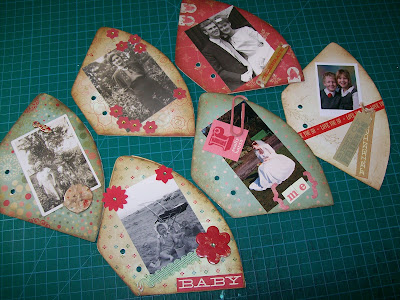
As promised - here are some pics of what we did today at my workshop . We made today a 'Coffee Filter Mini Album'. That is - we took some coffee filter bags and covered them top and bottom. This made a pocket into which we inserted some tabbed file pages ready to be journaled. These are the first six finished pages of my album - I will show you the reverse side tomorrow. I used some Cosmo Cricket scrap book pages and inked the edges with some Distress Inks. The embellishments are all Cosmo Cricket as are the words and ribbon. So the pictures are (from top left) - my Great Gran Rose, my Grandma Hilda - both of these ladies are no-longer with us, and my Mum and Dad on their wedding day. Bottom left - me as a baby (eek!) me on my wedding day and my two children This is such a fun project to do and next week at my Thursday night workshop we will be making Paper Bag Albums - can't wait. See you soon - Jacqueline xx.

Blue Jelly Scrapbook Challenge.

Image
Hello folks - hope you all had a lovely weekend. I have had a lovely day today, my husband (who normally works from home) has been away on business and I have been locked in my craft room scrapbooking. As you can see in my side bar I am drawing attention to a new monthly scrapbook challenge. It's set by Victoria over on Blue Jelly Stampin'  and the first challenge is a sketch There were two optional extras - use Black and White and one other colour and have a family theme. Here are my pages - I used mainly stuff from my scraps box but I did use my Stampin' Up Butterfly Punch.   So, my optional colour was Pink and the pages are family themed as they are of my daughter Briony. She was all pink and squidgy when she was born so my husband nick-named her Polly Pinkle and that has stuck although it does get shortened to Pinkie now and then. (Do you think I have embarrassed her enough yet?!) Well anyway that little bundle of pink loveliness turns 19 this Thursday - I can'

One Year Old!

Image
Today is my one year blogaversary - it's been one year and a couple of days since I set it up and exactly a year since my first picture post. Don't go back there though - my efforts back then weren't up to much. Instead feast your eyes on this It's a sort of copy from one I saw whilst browsing the Splitcoast Stampers gallery - I changed it quite a bit but the idea is the same. It uses mainly Greenhouse Garden and a bit of Vintage Vogue, Mellow Moss and Summer Sun and a bit of bling. Now you may be aware that the appearance of my blog changes quite regularly and it's about to change again - I know what can I say - I love to play. Seriously though I hope that these new changes are going to be big. Stay tuned - you have to be in it to win it as they say. See you soon - Jacqueline xx.

Driving By........with a tutorial!

Image
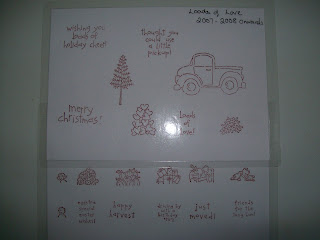
As promised here are some instructions on how to make the slider card. This card has again been made using Stampin' Up - Loads of Love and Accessories . 1) choose your image, colour it and then carefully cut it out. I used Promarkers to colour this image . 2) Cut a piece of plain card stock and create a background for your image. I used a brayer, post it notes and the trees from Lovely as a Tree. 3) Cut a small slot in your background carefully removing the piece of card whole. Now cut a piece of card stock a little larger than your background. Line up the background on the larger card (but do not stick) Replace the card back into the slot and stick this to the larger card. This means that the background remains the same when the truck moves.  4) Now take the truck, turn it upside down on your mat. Take the background and turn this upside down also - place over the truck and add some 3D foam pads . 5) Remove the backing paper and stick on two pennies . 6) Now cover this with 3D

Driving By.

Image
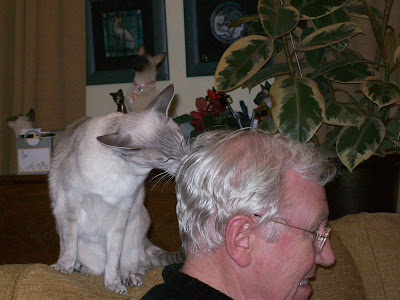
Hello everyone - happy March to you all. Well it's been a week since I last posted - as you know I've been away visiting my Dad as he was having some top-up chemo treatment. Whilst I was there I managed to take this picture of Mum and Dad's cat eating Dad's head! Hee hee - I thought this was very funny. So - I came home and went straight round to my friend Bev's house for some emergency crafting. I did do a bit while I was away but not much. We decided that this week we would use the Loads of Love stamp set and also the accessories set that go with it. Bev made a fab little pull card with a tab and I made a 'Penny Slider' card. Here it is The truck starts and the right, and drives along I will try and put some instructions up together for this - it's not that hard a card to make and - it's for a Man! I have to go now as I also came home to meetings and paper work which is all very boring but needs to be done :(  See you soon - Jacqueline xx.