
3D Flower Tutorial.
Today I thought I would share with you the way I make my 3D flowers. (Other tutorials are available). The flower I have used is the large flower from the Vintage Vogue set - but this works with any 6 petal flower stamp. In fact the free stamp on the cover of the March Craft Stamper mag would work really well. O.K lets get started.
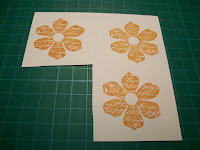 1. Stamp your chosen flower 3 times onto thin card stock.
  2. Cut each flower out.
  3. On the first flower cut between two petals to the center and cut off half of the petal to the left of the cut. On the second flower cut to the center as before but remove and keep one petal. Cut off half of the petal on the left of the cut. For the third flower repeat this time removing two petals. Cut off half a petal as before.
  4. Take each flower in turn and place glue on the half petal on the top. Curl the flower round until the petals meet, press together and clamp with a crocodile clip or bulldog clip. Do this with all three flowers and set aside to dry.
  5. Now comes the tricky bit. Take the two petal piece and curl one petal round inside the other. Glue in place and clamp as before. Then take the remaining one petal and curl tightly. Cut the bottom down and add some glue. Gently insert this into the two petal piece. It should stay in place. Leave to dry completely.
  6. When your flowers are completely dry remove the clamps.With a bone folder gently curl each petal back on each of the flowers. You may find it helpful to snip the pointed bottom of the flowers.
  7. Finally take the top of a drink bottle and place the largest flower on it. This will ensure that the flower doesn't roll around while you are gluing it. Place a small amount of glue into the center of the first flower and place the four petal flower inside. Repeat this process with the three petal flower and the center petals. Leave in the bottle top until completely dry.
This is the card I made with my completed flowers - it's my Mum's birthday on Sunday. Don't worry - she won't see this before the day - she never goes near computers!
Hope you found this useful (- and understandable!) see you soon with some more ideas - Jacqueline xx.


Aren't these stunning. It's a little while since I made some and I can feel the Vintage Vogue set coming out soon ;-)
ReplyDeleteYour Mum will love this card. Hope she has a great day.
Sara xx
Wow what a lovely card.
ReplyDeleteA really clear, easy-to-understand tutorial Jacqueline - thank you for sharing it. The card you made with your flowers is gorgeous!
ReplyDeleteThis is a great tutorial ...thank you. so clear and concise. I am a follower but I am going to pop your blog into my side bar so I dont miss any new posts.
ReplyDelete