High Tide - Basic Tutorial
High Tide is a fabulous new set from Stampin' Up. It has loads of potential but here is a basic step by step tutorial to create a lovely seaside scene.
Firstly take a piece of white card stock - mine is 6" x 6" square but any largish square is fine.
Next take the sandy stamp and ink it up. I used Crumb Cake but any pale beige colour will work. Stamp the image at the bottom of the card stock to create a sandy bank.
Make sure that the notch is uppermost at the left hand side of the card stock - this is where the lighthouse will sit. The image can be stamped multiple times to create the land turning it upside down to fill the gaps.
Next take the more solid lighthouse image and stamp in a pale colour. Again I have used Crumb Cake. It's quite easy to line up the images although you may find a stamp positioner helps with this.
Now take the second lighthouse image and over stamp the first with a darker colour - I used Brocade Blue (a very old SU colour!!!).
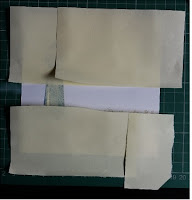
I used a post it note to stamp the lighthouse and cut it out. It was then placed over the lighthouse on the card stock.
More post it notes were then used to separate the sky and the land - this is where the sea will be stamped.
Stamp the sea in the gap - your card should now look like this.
Take a pale blue ink pad and sponge the sky taking care not to remove the post it note from the image. Add darker blue to the sky around the edges with a sponge.
Now your details can be added - birds in the sky. grasses and birds on the ground. All post it note masks can be removed now.
A small banner can now be cut on to which one of the sentiments can be stamped.
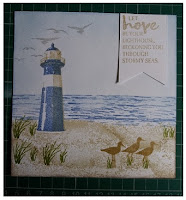
Your scene is now complete and can be mounted on to a card base or made into a picture for home decor like the picture below.
I hope you like my tutorial - I love this set and can't wait to bring you more projects created with it. See you soon xx


Comments
Post a Comment